Monster Hunter Rise Monster List (And How To Kill Each One)
Here's how to defeat every major monster in Monster Hunter Rise on Nintendo Switch.
Monster Hunter Rise is out now, which means it's time to hunt and carve up some monsters! Like previous games in the series, there's a plethora of challenging monsters to fight, each with their own unique attacks and patterns to understand if you hope to successfully best any of them. Below we provide a full monster list detailing how to defeat each one you can hunt in the base game.
- Main Game Monsters (Low-Rank)
- How to kill Great Izuchi
- How to kill Great Baggi
- How to kill Kulu-Ya-Ku
- How to kill Great Wroggi
- How to kill Arzuros
- How to kill Lagombi
- How to kill Volvidon
- How to kill Aknosom
- How to kill Royal Ludroth
- How to kill Barroth
- How to kill Khezu
- How to kill Tetranodon
- How to kill Bishaten
- How to kill Pukei-Pukei
- How to kill Basarios
- How to kill Somnacanth
- How to kill Rathian
- How to kill Barioth
- How to kill Tobi-Kadachi
- How to kill Magnamalo
- Endgame Monsters (Low-Rank)
- Endgame Monsters (High-Rank)
- Apex Monsters
Main Game Monsters (Low-Rank)
The main section of the game has you fighting a total of 20 monsters, which are categorized as low-rank on the scale of monster difficulty. Below we detail the strategies to consider when taking down these low-rank versions, which appear in Village and Hub quests ranked 1 to 3 Stars.
How to kill Great Izuchi

- Most vulnerable spots: Head, tail tip
- Elemental weaknesses: Lighting (primary), Water (secondary)
- Status vulnerabilities: Poison, Stun, Paralysis, Sleep, Blast, Exhaust, Thunderblight
Great Izuchi is likely to be the first big monster you take on in your hunting endeavors. It's one of the easier fights, but that doesn't mean you shouldn't be careful! Great Izuchi is a pack hunter and tends to fight with a posse of two smaller Izuchi to annoy you. It can also summon more buddies to join its side, though they go down pretty fast--so taking out Great Izuchi's minions first is generally a good idea. Izuchi's weak point is its head, but facing it head-on can be dangerous, especially when it's enraged If it does get enraged, it uses a damaging ranged spit attack, and its swift triple-tail swipe, which can easily knock you flat on your back. Fortunately, many of its most damaging attacks use its tail and have a lengthy wind-up, making them easy to dodge or block. If you're a rookie at Monster Hunter, hunting Great Izuchi's a great way to learn many of the basic skills you'll need to take on the game's larger beasts, so use this opportunity to get some practice in.
How to kill Great Baggi
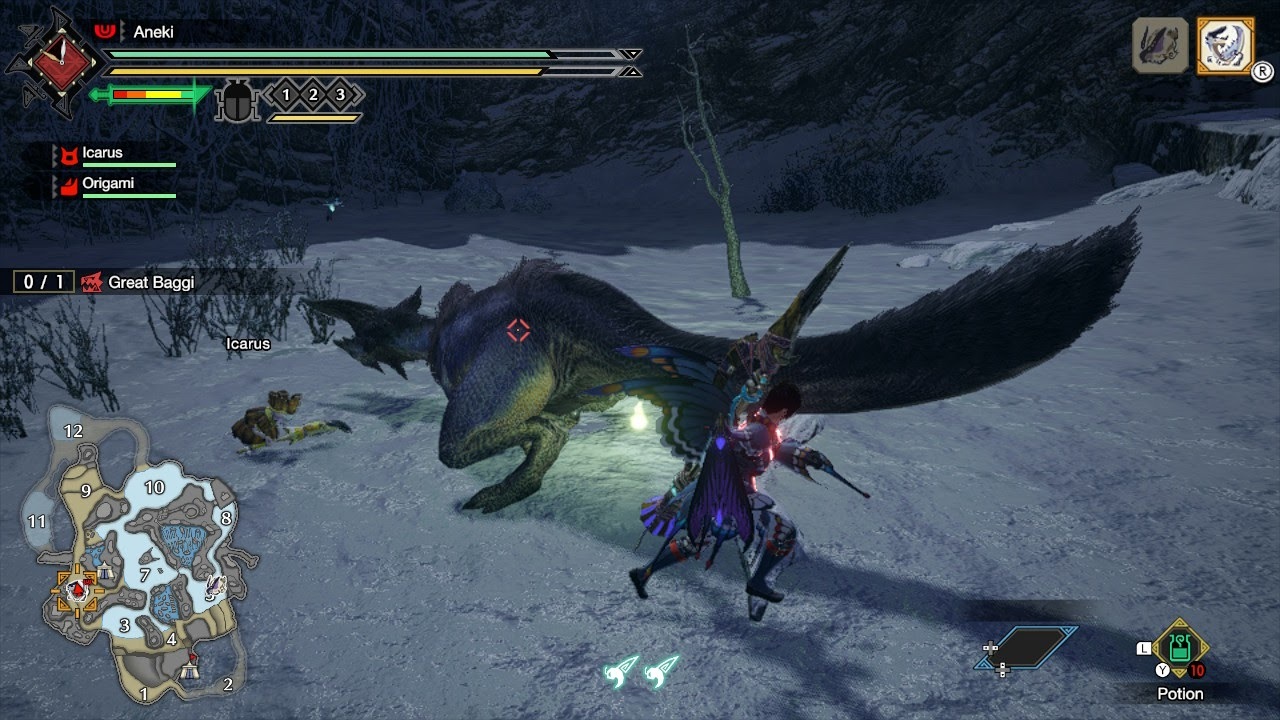
- Most vulnerable spots: Head
- Elemental weaknesses: Fire (primary), Water/Lightning (secondary)
- Status vulnerabilities: Paralysis, Blast, Exhaust, Fireblight
Did you manage to take down Great Izuchi? Swell! The other "Great" raptor-like large monsters fight in a similar fashion, so many of the skills you've picked up from Izuchi will come in handy. Much like Great Izuchi, Great Baggi is a pack hunter and will bring along a posse to its battles. Take out the small fry first (or let your buddies handle them) before focusing your attention on the boss. Great Baggi can also spit out projectile venom that will cause you to get drowsy, making your movements slow and rendering you incapable of doing much of anything. Chugging an Energy Drink item will help you recover from that sluggish state. Use the same combat strategies as Great Izuchi to dodge its physical attacks, and it shouldn't be long before you've felled another "Great" one.
How to kill Kulu-Ya-Ku
- Most vulnerable spots: Head, foreleg, tail
- Elemental weaknesses: Water (primary), all others (secondary)
- Status vulnerabilities: Stun, Blast, Waterblight
Kulu-Ya-Ku is smarter than the average birdbrain, despite its goofy appearance. In fact, it's smart enough to dig in the ground for objects it can use for both defense and offense. Try not to hit the hard objects Kulu-Ya-Ku is holding, as doing so only results in your attacks getting deflected. Also, Kulu-Ya-Ku will eagerly try to smash your head in with jump attacks while holding these implements. If you can stagger or stun Kulu-Ya-Ku, it will drop whatever it's holding. The objects tend to wear down after a while; attacking a held object that's already showing signs of wear will cause it to break after a few strikes, stunning the big bird in the process. Beyond its crude tools, Kulu-Ya-Ku's attacks are pretty simple, using mostly pecks and charges to hurt you. It's weak to almost all elements, especially water, so bring your element-laced weaponry if you've got it to add some extra damage and show Kulu-Ya-Ku, who's higher in the pecking order.
How to kill Great Wroggi
- Most vulnerable spots: Head
- Elemental weaknesses: Ice (primary), Water (secondary)
- Status vulnerabilities: Paralysis, Sleep, Blast, Iceblight
It's another "Great" bird wyvern that fights quite similarly to Great Izuchi and Great Baggi: fights in a pack, likes to attack up close. You know the deal by now, right? Where Great Wroggi differs most is in its status affliction of choice: when the purple sac expands, it's about to spit up some noxious poison mist. Antidotes and Herbal Medicines will cure this, with the latter being slightly faster to take effect. Don't wait too long to take your meds, though, because Poison's life drain can really sting! Otherwise, stick to the same strategies as the other "Greats": take out the small monsters first, watch its movements, dodge when you know it's going to come at you, and strike while it's vulnerable.
How to kill Arzuros
- Most vulnerable spots: Head, abdomen, rear
- Elemental weaknesses: Fire (primary), Ice/Lightning (secondary)
- Status vulnerabilities: Poison, Stun, Paralysis, Sleep, Blast, Exhaust, Fireblight
This big ursine might not look too bright, but if you're not careful, it can cause some serious hurt, especially in areas with less space to maneuver. Arzuros's most common attack sees it using three claw swipes to slash in front and around its sides. It's not too hard to dodge, thankfully. While Arzuros's charging attacks are more choreographed, avoiding them can be a bit tricky at times--especially because an angered Arzuros can turn around very quickly and charge right back at you just as you're getting up on your feet again. It can also grab you in a literal bear hug, mauling you up close before tossing you aside. If this happens, use a wirebug to get right back on your feet. Even standing behind Arzuros isn't completely safe: if it knows you're attacking it from behind, it can fall back on its butt to knock you down and deal damage. Fortunately, because Azuros likes to charge at you, it's easy to lure into traps--so set up your nets and hit it while it's immobile.
How to kill Lagombi

- Most vulnerable spots: Rear, head
- Elemental weaknesses: Fire (primary), Lightning (secondary)
- Status vulnerabilities: Poison, Stun, Paralysis, Blast, Fireblight
What has long ears, a big belly, and an appetite for destruction? It's Lagombi, the winter hare from hell! Lagombi has the ability to cover long distances by sliding on its belly, which allows it to very quickly close the distance--and hurt you in the process. It can also do big bouncing butt-bombs, send a massive snowball hurtling your way, and throw chunks of snow up in the air to catch you leaping or climbing. When attacking, take care not to aim for its thick stomach, which can repel strikes easily and hasten the dulling of your blade. Instead, try to aim for its ears--you can break them for an additional item drop. Said ears are also very sensitive to sound, so Lagombi can be stunned easily with loud noises (such as from Sonic Bombs). Be aware, however, that an angered Lagombi won't have that vulnerability. Also, its habit of sliding towards you makes it fairly easy to lure into ground-based traps. Good footwork and attacking the right spots should let you skin this hare without too many problems.
How to kill Volvidon
- Most vulnerable spots: Head, upper body, parts of back
- Elemental weaknesses: Water (primary), Ice (secondary)
- Status vulnerabilities: Stun, Blast, Waterblight
Given Volvidon's name, taste for warm habitats, and flame orange skin, you'd think that it's a fire monster--but actually, Volvidon much prefers fighting dirty. Its mouth is filled with electrified spit that will jolt and paralyze you on contact, and it can let rip some noxious gas in a close radius that will render you unable to use any recovery items. Should you be unceremoniously farted on, use some deodorant to rid you of the stank with speed. Between its spit attacks, blazing-fast rolling spin-dashes, and long anteater tongue, Volvidon excels at attacking from a distance. The armored shell along most of its back can also deflect strikes from behind and above if your weapon isn't at peak sharpness. As such, you'll usually want to go for its head, limbs, and squishy belly, but getting in close can be tricky. Blinding it and luring it into traps can help you immobilize it for a short while to get some good damage in. Also, bring your water weaponry--Volvidon is very sensitive to moisture.
How to kill Aknosom
- Most vulnerable spots: Head, Crest, Wing
- Elemental weaknesses: Water (Primary), Lightning (Secondary)
- Status vulnerabilities: Blast, Waterblight
A giant, fire-breathing kung fu crane? Yes! Aknosom is certainly one of the more unique encounters of Monster Hunter Rise., as this big bird has a lot of personality. Unfortunately, that personality is "an annoying jerk." Aknosom is very swift, and can hop around the area easily. Generally, the worst place to be in relation to Aknosom is in front of it, as it can hit you with pecks from its sharp beak, headbutt using its big neck frill, perform a long-distance running dash and full-body tackle, or--worst of all-- spit a series of fireballs that cover a wide range and distance in front of it. If you get hit by these fireballs, you'll start taking fire damage that rapidly drains your life. The best way to get rid of these flames is what you learned in school: stop, drop, and roll! After several dodge-rolls, you should be back to normal--though your stamina bar will definitely be feeling it. (You can also use a Nulberry to recover from all of the elemental -blights.) When Aknosom hops up on one leg, be careful: it's getting ready to do a close-range attack by slashing with its wing. This attack can hit in a semi-circular radius, so get away quickly! If you can manage to get Aknosom to fight you in a lake, it'll help you out by squelching the flames. Smack it with some water- or lightning-infused strikes to do extra damage and put the bird to bed.
How to kill Royal Ludroth

- Most vulnerable spots: Sponge mane, head, abdomen
- Elemental weaknesses: Fire (primary), Lightning (secondary)
- Status vulnerabilities: Blast, Fireblight
What's underneath that big,moist ring of golden sponge around Royal Ludroth's neck? Sadly, it's not delicious cream filling, but rather a vicious lizard eager to get straight to your juicy center. Royal Ludroth is mostly a physical attacker, using its long body--particularly its tail--to strike. It thrives in wet environments, and can splash you with attacks that inflict Waterblight. Waterblight hampers your natural stamina recovery, so it's good to get rid of it ASAP by using Nulberries. If you can get Royal Ludroth away from water, it'll start to dry out, causing its attacks to lose some of their bite. If it gets too dry, it'll start running away to look for a source of hydration, so keep pursuing it! Royal Ludroth's back scales and tail have a good chance of deflecting strikes, so for maximum efficiency, aim for that smooshy golden sponge area--or the tail, which doesn't take optimal damage but can be severed with cutting weapons to further limit the creature's attack power. (Also: you can get an additional chance to carve for items on the severed tail piece!) Keep up a steady assault on Royal Ludroth's vulnerable spots to hang it out to dry.
How to kill Barroth

- Most vulnerable spots: Front legs, tail
- Elemental weaknesses: Fire (primary), Ice (secondary)
- Status vulnerabilities: Poison, Paralysis, Blast, Fireblight
Here comes the pain train! Barroth likes to attack with its massive noggin, using it to lunge and swipe at you. When you see steam coming off of that muffin top, watch out! Barroth's going to start using some painful attacks, one of which is a very damaging tackle from a distance. Barroth loves to cover itself in mud when water's nearby, and it can shake the globby piles off, throwing goop projectiles all around its body that severely slow you down if you're caught in them. They disappear after a short time, but if you get stuck, try to roll out before they vanish--even a few seconds of limited mobility is enough time for Barroth to smack you with a devastating headbutt. Since Barroth's head is its main weapon, it's very resistant to your attacks and will deflect strikes regularly. Aim for its sides, limbs, and the base of its tail instead to do the most damage. The mud it rolls around in also doubles as an extra layer of armor, so knock that grime off with a few weapon strikes before really going in and mopping up.
How to kill Khezu

- Most vulnerable spots: Head, Neck
- Elemental weaknesses: Fire
- Status vulnerabilities: Poison, Blast, Fireblight
The moment you set eyes on this sightless, pallid freak of nature, you will want it extremely dead--but Khezu will do its best to make that as difficult as possible. Khezu relies heavily on electricity-based attacks, such as releasing an electric charge into the area around it and spitting out orbs of electricity. Bring your best electricity-resistant gear to the fight to help dull the damage--though taking too many shocks can still inflict Thunderblight, so keep Nullberries on hand. If you're in a cave, Khezu becomes more dangerous, as it can cling to the walls and ceilings to launch lightning and pounce upon you. It's possible to knock Khezu from its perch with projectile attacks and flying Wirebug-fueled strikes, which will leave it vulnerable for a few precious seconds. Try hitting it with fire- and poison-laced weaponry to make the fight go by faster, though do note that Khezu is fairly resistant to most other status ailments. When you see its pale white skin turn veiny and cracked, you've got it on the ropes.
How to kill Tetranodon
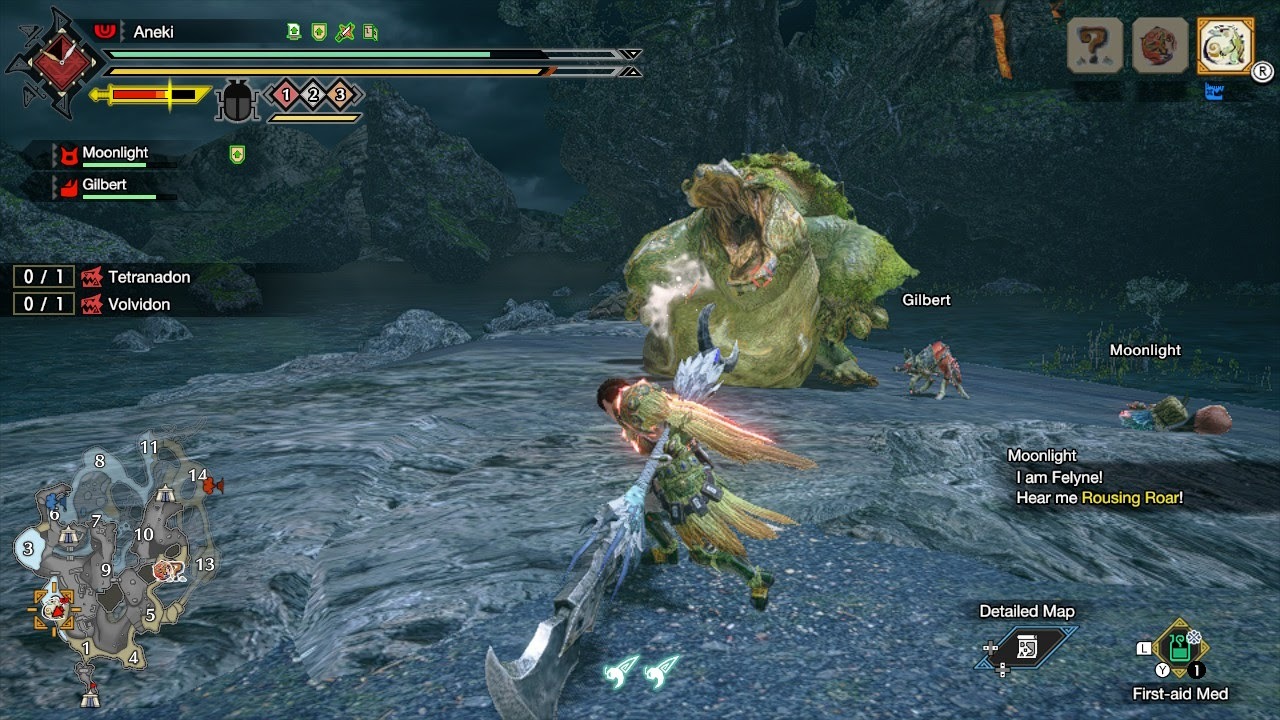
- Most vulnerable spots: Head, neck, forelegs
- Elemental weaknesses: Lightning (primary), Fire (secondary)
- Status vulnerabilities: Paralysis, Blast, Thunderblight
A portly, seaweed-covered platypus might not seem too threatening at first glance, but Tetranodon is one of the tougher encounters from the early-game period. He seems rather simple at first, cannonball diving, charging at you, and striking out his webbed limbs. Eventually, Tetranodon will start vacuuming things into his gaping bill -- and hopefully you're not among them!
After he ingests his Big Gulp, he will stand on his hind legs. This is when you'll really need to pay attention! Tetranodon's sumo stomps send a shockwave of craggy rocks away from his feet, which have a surprisingly long and wide reach -- instead of rolling, use Wirebug evading to safely escape. (You can attempt to knock him off-balance when he's lifting a leg with repeated weapon strikes, which will leave him prone for a brief time, but this can be very risky.) He can also do a close-range hand clap, a long-range water spit, and even chuck a huge boulder in your direction. If Tetranodon gets super steamed, he'll come barrelling at you with paws flying. Should you evade him successfully, you're not out of the woods -- he'll make a quick turn and come roaring back at you, so watch out!. The scales on his back are tough and can deflect your weapon if it's not at peak sharpness, so to inflict maximum damage, aim for his bill, his belly, and his front legs.
How to kill Bishaten
- Most vulnerable spots: Head, Tail
- Elemental weaknesses: Ice (primary), Fire (secondary)
- Status vulnerabilities: Blast, Iceblight
There's no need to monkey around with this trickster! Bishaten can be extremely annoying to fight, but there are some things you can do to put a speedy end to its shenanigans. Most of Bishaten's attacks involve it either whipping its long, prehensile tail around or tossing fruit from you from a distance while balancing on said tail. The fruit it throws can cause status ailments like poison and stun, depending on what you get smacked by, so keep healing items (or a buddy with status-nullifying skills) with you to recover. Sometimes Bishaten will forgo the tossing altogether, opting instead to lunge at you from afar with a fruit held in its tail and releasing a noxious cloud of poison gas in a wide area. However, if you're able to knock Bishaten off-balance while it's sitting on its tail, it will drop its stash of fruit snacks, which you can pick up and use to turn the tables! Chow down on some healing fruit, or lob some poison or stun blasts to give Bishaten a taste of its own citrine medicine. You won't get to keep these fruits after the quest, so you might as well use them now--or even save them for another monster you want to take down in the same area.
How to kill Pukei-Pukei
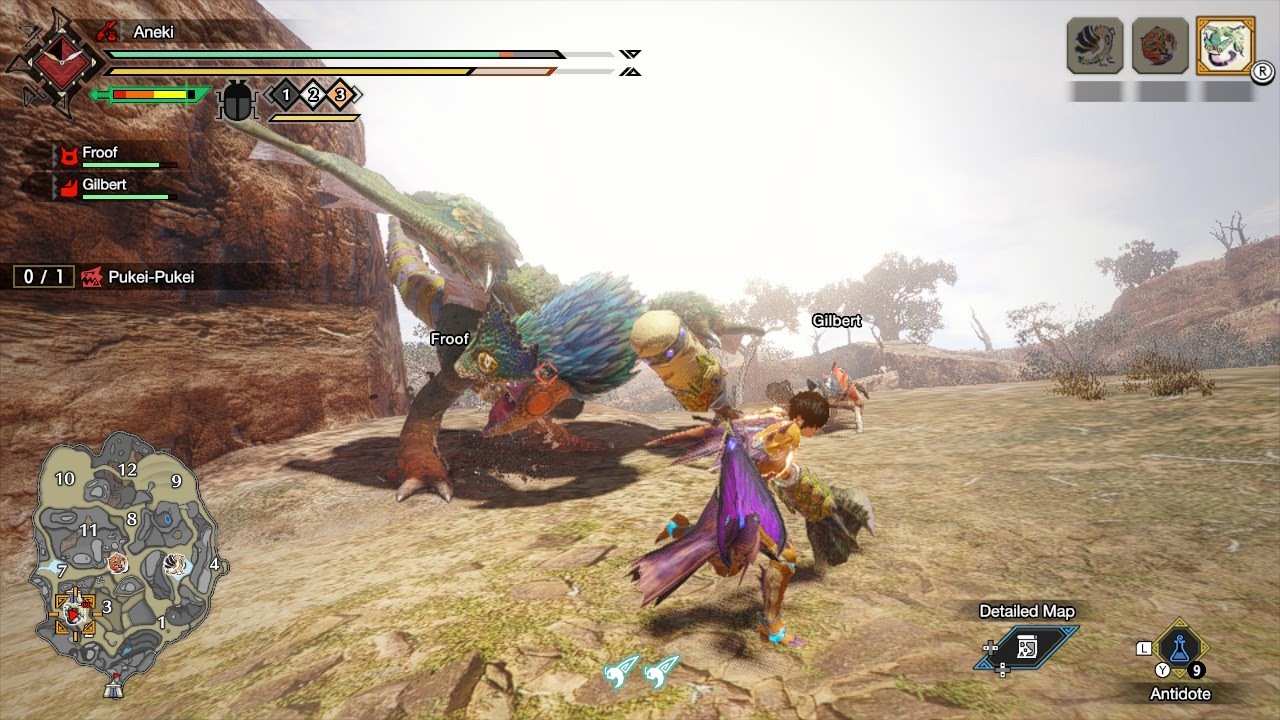
- Most vulnerable spots: Head, Tongue, Tail
- Elemental weaknesses: Lightning (primary), Ice (secondary)
- Status vulnerabilities: Paralysis, Sleep, Thunderblight
Slimy, slobbery, and poisonous to the touch, Pukei-Pukei is a very gross gecko who will make your life miserable. Pukei-Pukei is somewhat less dangerous when you're fighting in close, but a big threat at a distance: its hovering dive-bomb attacks and long tongue-whip strikes can catch you even when you think you're safe. The biggest danger when fighting Pukei-Pukei, however, is its poison. It can spew an intoxicating purple haze from its mouth…and also poop out poison globs from its tail. Ewww. Antidotes and herbal remedies--as well as poison-cleansing buddy skills--are a must if you plan on besting Pukei-Pukei.
Keep your eye on the color of the frill-feathers around its head as well as its face: when they start to turn orange and stand up, Pukei-Pukei is in an enraged state. Sometimes, Pukei-Pukei will dash off to snack on a nearby plant. This odd behavior is far from harmless: depending on what it eats, its poison secretions will gain additional effects, like lingering around for longer or causing stun. If the sac below its mouth is swollen, you'll know that it's just eaten something potentially very bad. Fortunately, Pukei-Pukei is weak to both paralysis and sleep, so use tools, weapons, and gathered endemic life to afflict and subdue it. It's also possible to sever Pukei-Pukei's tail with repeated slashing strikes--it will not, however, stop the tail poison attacks entirely, so be warned. Keep smacking its face while drinking antidotes, and Pukei-Pukei should give up the ghost.
How to kill Basarios
- Most vulnerable spots: Head, Abdomen, Legs
- Elemental weaknesses: Dragon (primary), Water (secondary)
- Status vulnerabilities: Sleep, Waterblight
Craggy and cranky: a dangerous combination. This cantankerous molten monster's got a lot of armor on its back and head area, but its limbs and underbelly are significantly squishier. If you see Basarios rearing back or its belly glowing extra-bright, that's your cue to get the hell out of Dodge. Stick around too long, and it'll try to crush you with a rolling attack, spout several spurts of searing-hot gas around its body, spit out a few flaming fireballs from a distance, or blast you with an ultra-painful, blisteringly hot laser of fire aimed straight from its throat.
With so many fire attacks, bringing fire-resistant gear to the bout with Basarios is a no-brainer. Still, you should also consider hauling along a Palico with status-healing support skills (along with plenty of antidotes), as Basarios is also known to exhume very dangerous poisonous purple gas. Should you see purple mist forming around it, it's time to move. It can also puff out some wisps of sleeping gas, as well, though this attack is less common. If you're fighting this blockhead above ground, it can burrow under the dirt and give you chase--fortunately, it's slow and easy to spot, so keep running, and you'll stay out of danger. If a weakened Basarios limps off and tries to take a nap somewhere, it can camouflage itself as an unassuming pile of rocks. Fortunately, the R-stick target lock doesn't lie, so use that to help find it--and maybe try to mine its back while it's asleep for giggles.
How to kill Somnacanth
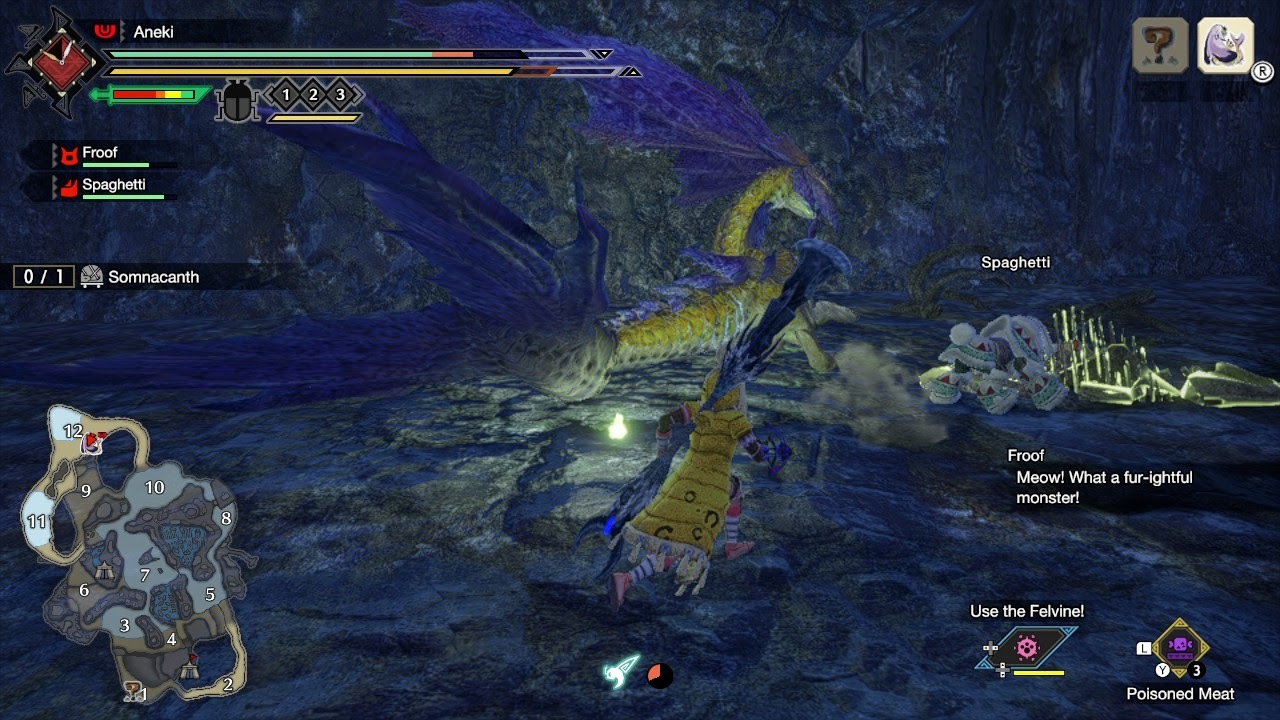
- Most vulnerable spots: Head, neck
- Elemental weaknesses: Lighting (primary), Fire (secondary)
- Status vulnerabilities: Blast, Thunderblight
Somnacanth is a fishy fiend that's curiously enchanting, but trust us, this is a siren song you don't want to get snared by! As you may have guessed by the name, Somnacanth's gimmick is making you drowsy before going in for the kill. She can fire out sleeping gas from her maw like a rotating pulse cannon, but if she's in the water, she can also exhume the gas in patterns as she swims around. Bring Energy Drinks to keep yourself juiced up and stave off the need to sleep. (Who says games aren't realistic?)
When Somnacanth's swimming, she can also dive for shells--and when Somnacanth cracks a shell open, bad things will happen! Keep an eye out for the glowing yellow shells in particular: when broken, a stunning flash will erupt in a wide radius in front of the beast, leaving you stunned and wide open. Fortunately, there's an easy way to get an advantage. Since
Somnacanth is amphibious, she prefers to fight in watery areas. Finding a way to get Somnacanth on land--whether by trapping her, luring her, or just encountering her in a good location--will help immensely, as her movements and attacks are limited when away from the lakes. Bring your best lightning-element gear to the fight, and soon she'll be the one taking a snooze.
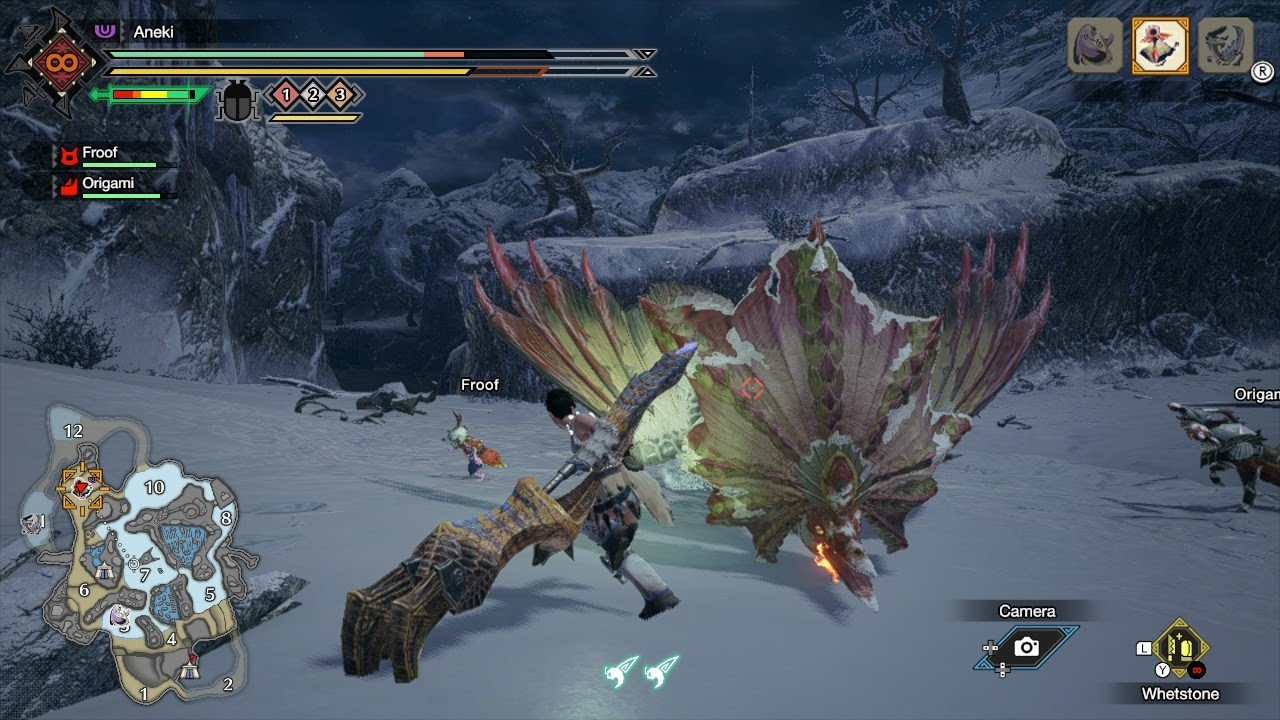
How to kill Rathian

- Most vulnerable spots: Head, Wing, Tail
- Elemental weaknesses: Dragon (primary), Lightning (secondary)
- Status vulnerabilities: Thunderblight
The majestic queen of the land returns! Rathian has long been a Monster Hunter staple and a daunting challenge to overcome. With a massive wingspan, fiery breath, and a poison-laced tail, you're in for quite the fight with this big girl! Rathian might not be the most agile of monsters, but her huge wings afford her a great deal of mobility, allowing her to hover out of reach of many grounded attacks and attack you from an advantageous position. Using wirebugs and projectiles can help you attack her in the air. She's still very much a threat while grounded, though, as her long, venomous tail can sweep you aside and afflict you with a damaging poison effect. And let's not forget the fire breath, either! Preparing for fire and poison attacks with gear and supplies helps out, but the most important thing is making sure you have ample space--both on the ground and in the air--to deal with whatever she wants to do. Attacking her tail is also a good idea: you can sever it and reduce her ability to hit you with her sweeping venom strikes… though you still have to deal with everything else. Dragon-element weapons will be a big help here, but that may be hard to come by at this point in the game, so use Lightning-element arms as a backup to drain her health faster.
How to kill Barioth

- Most vulnerable spots: Head, front limbs
- Elemental weaknesses: Fire (primary), Lightning (secondary)
- Status vulnerabilities: Blast, Fireblight
So we're clear here: Barroth and Barioth are two different monsters. I know, it confuses me too. Just remember: Barioth's the weird sabretooth bird-cat that can make you faint quickly with amazing agility and lots of spiky bits that hurt a lot.
Barioth is very fast, very large, and very very vicious, using extremely fast attacks from the air and the ground to inflict damage so quickly you might find yourself going from full health to KO'ed within seconds. Making the hunt even more difficult is Barioth's resistance to many status effects. However, there is a way you can help turn the tide in your favor. Notice the spikes on its front limbs? It uses those to help it move faster. Aiming your attacks for Barioth's limbs will cause these spikes to break, hampering its movement. Its tail can also be severed to further decrease its mobility and attack power. Try setting traps to hold Barioth in place for a while, then aiming for the parts you want to damage with fire-laced weaponry while it struggles. Once you've broken the beast, aim your blows towards its head to seal your victory.
How to kill Tobi-Kadachi

- Most vulnerable spots: Head, neck, tail
- Elemental weaknesses: Water (primary), Fire/Ice (secondary)
- Status vulnerabilities: Poison, Blast, Waterblight
Part reptile, part flying squirrel, part livewire, and 100% trouble, Tobi-Kadachi can overwhelm you with its slippery speed and tricky moves. Tobi-Kadachi is a high-pressure fight, as it will rarely let you out of its sight once it knows you're around. This makes it hard to slip away for healing or weapon-sharpening. Decoys can help a lot if you need a quick breather while using traps to immobilize it can delay it entering a charged-up state. When it's angry and amped up, you'll see the spines on its back and tail raise, and it will begin to take to the skies in an attempt to dive-bomb you to death.
A PO'ed Tobi-Kadachi can also launch electricity-laced spikes at you, which can afflict you with Thunderblight. These projectiles aren't just dangerous when airborne, either: they remain in the ground for a while, electrifying any poor sap who might accidentally bump into them. In areas with high cliff walls, Tobi-Kadachi can climb them to survey you and launch attacks, so use wirebug-powered flying strikes and projectiles to try and knock the brute off. Despite being powered by electricity--which is usually the bane of water-elemental foes--Tobi-Kadachi's primary weakness is water, so bring an appropriate weapon if you have one. If you can find a way to afflict it with Waterblight, you'll short out its conductive capabilities, making the bout much easier.
How to kill Magnamalo
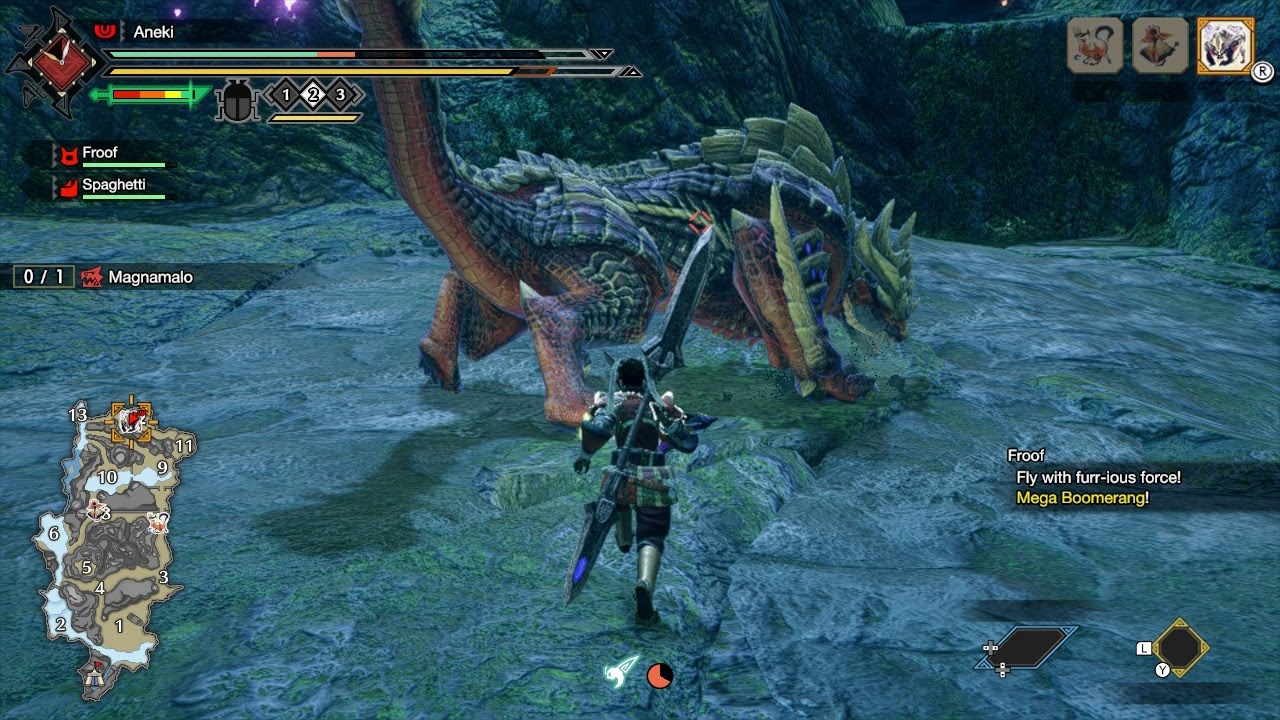
- Most vulnerable spots: Head, armblade, tail
- Elemental weaknesses: Water (primary), Lightning (secondary)
- Status vulnerabilities: Waterblight
It's him--the cover beast in the flesh! And boy, oh boy, are you in for hell of a battle with this behemoth. Magnamalo's agility is incredible, allowing this hulking monster to perform several attacks in a row with its claws and tail. He's so brimming with draconic energy that he's always got a purple glow around his back and tail, and he can fire off said energy around him in mega-damaging explosive bursts that will also afflict you with Hellfireblight, which turns you into a ticking time bomb! Your best bet when you see its purple orbs go flying is to wire yourself out of the area before they explode--and if you're hit with Hellfireblight, wiring away from the area will make the curse drop--and deal damage to something else that stumbles onto it. (You can also freshen up from the blight with some deodorant.) Magnamalo's sharp claws, horns, and long tail will also be used against you with blinding speed, so always be ready to block or dodge if necessary. When it leaps high into the air, it's going to give you a brutal dive-bombing, so move your butt FAST if you don't want to learn a new definition of pain.
When Magnamalo's purple energy turns pink, he becomes enraged and extremely dangerous! We're talking massive bursts of hellfire and giant lasers of pure hate energy from the tip of its tail. If he rears back and howls while gathering glowing energy, get your wirebugs ready, because you're about to get potentially smashed with a rapid combination of lunges and aerial dives that will drain a healthy life bar in the blink of an eye. He'll return to his normal state afterward, but it's a little consolation when his normal mode is almost as brutal as his angered state. Oh, and be careful if other big monsters stumble in--Magnalamo is the king here, and he will promptly grab, and aerial piledrive any other monsters into oblivion. (Also: make sure you avoid a piledriving Magnamalo, because he'll hurt you even more than the poor creature caught in his grip!)
It's a struggle to find a good opening, but bringing a good Water-element weapon to the battle can help you tack on some extra damage when you are able to get some hits in. If you have some explosives on hand, you can also aim for the parts of Magnamalo's body that are glowing: successfully igniting its own hellfire will result in some big-damage booms! You might not be able to best this legendary brute on your first attempt, but that's okay: you'll still learn a lot during the fight. Keep honing your armor, weapons, and skills, and eventually, you'll be able to put to rest the terror of Kamura.
Endgame Monsters (Low-Rank)
Once you roll the credits in Monster Hunter Rise, don't stop playing! There are many more new monsters to fight during the endgame portion, which should keep you busy for a little while. Look below for our strategies on how to defeat all the low-rank endgame monsters, which are found in Level 3-Star Village and Hub missions during the post-credits section of the game.
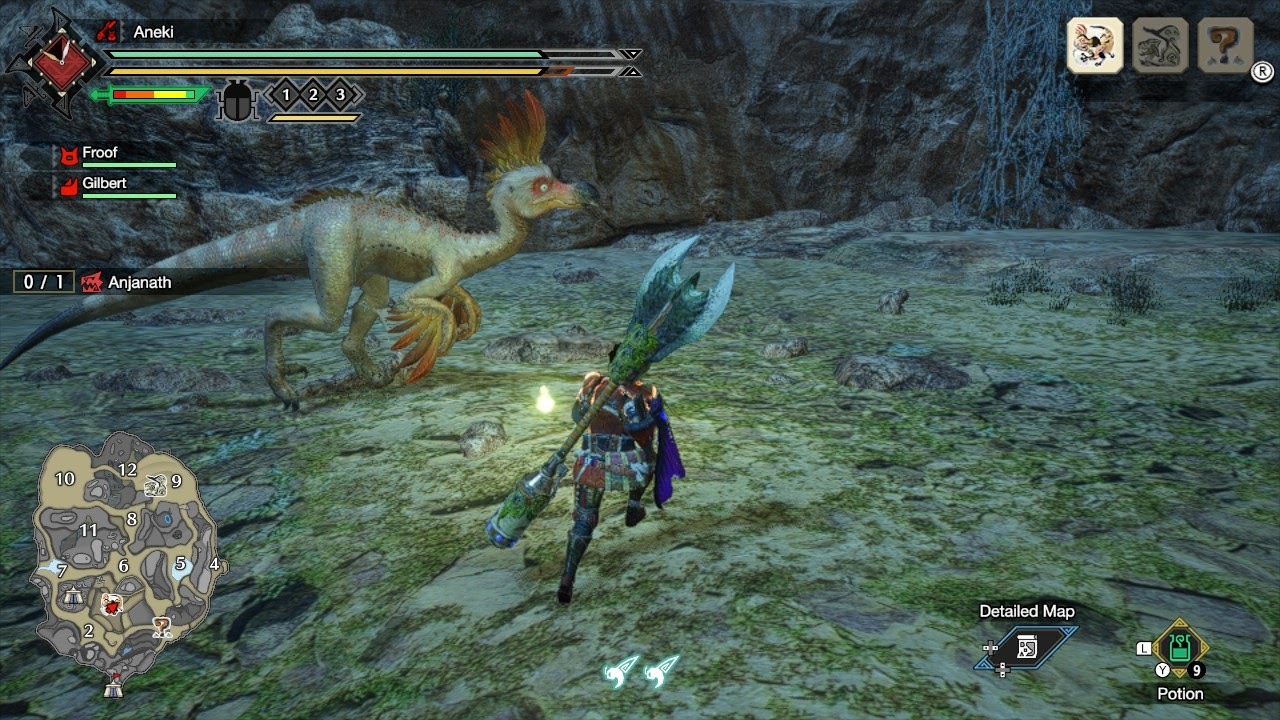
How to kill Anjanath
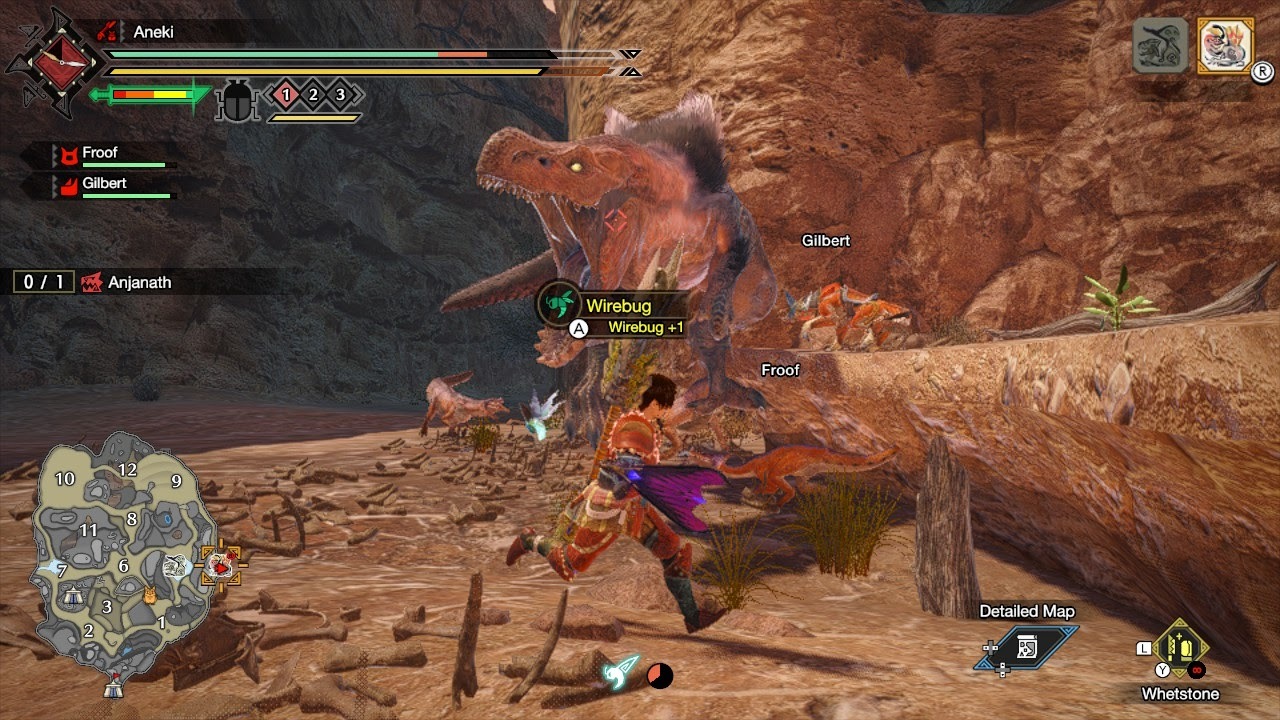
- Most vulnerable spots: Head, snout, tail
- Elemental weaknesses: Water (primary), Ice (secondary)
- Status vulnerabilities: Waterblight
The good news is that Ajananth's stubby arms will prevent it from attacking you with painful claw swipes like many of the monsters you've been fighting lately. The bad news is that it's got a hefty tail, fire breath, and lots of flesh-tearing teeth to compensate! In its normal state, Ajananth will primarily attack with bites and tail swipes. It's not a particularly speedy monster, but trust us: you don't want to be caught in those jaws! Keep guarding and dodging to avoid the wrath of those pearly whites. When it's angry, Ajananth's head and back frills will rise, and the real fire will come out! In this state, Ajananth can exhume a searing-hot laser of pure flame straight in front of it. It can also do a furious, long-distance-run charging attack that will cause you plenty of pain if you're caught in its path. And if you're foolish enough to stand in front of an angered Ajananth's mouth, you'll very likely find yourself being used as dental floss! Fortunately, it's pretty easy to tell when Ajananth's about to strike, so keep your eyes and ears peeled for signals. When it's enraged, aim for the throat for some nice extra damage, but be sure to get away before the fire comes out!
As an additional note, many of the monsters post-Magnalamo have tails that you can sever. This will severely hamper the offense of some monsters, while for others it won't change much of anything. Severing Ajananth's tail does reduce the range of its tail swipes somewhat, so try to do so if you can! Also, severed tail materials of many of these large monsters are needed to craft weapon and armor items, so going for a cut tail is generally a good idea. If it makes the fight easier, consider it a nice bonus.
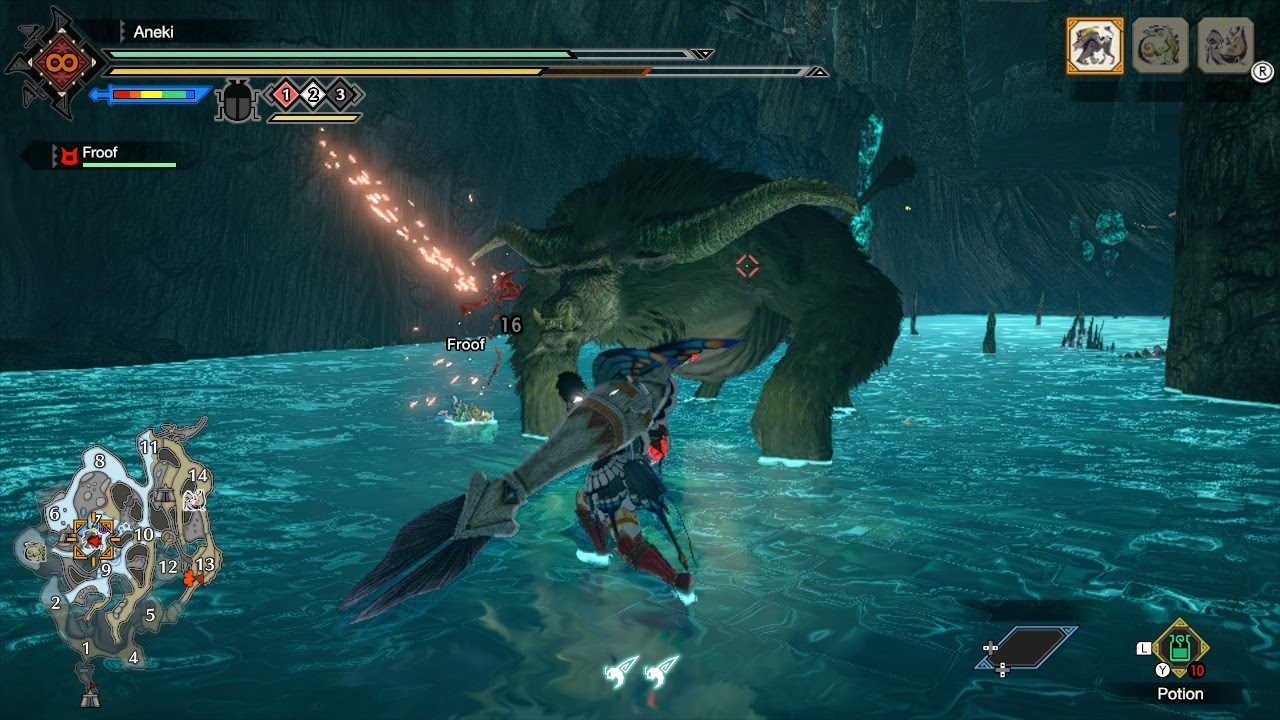
How to kill Mizutsune
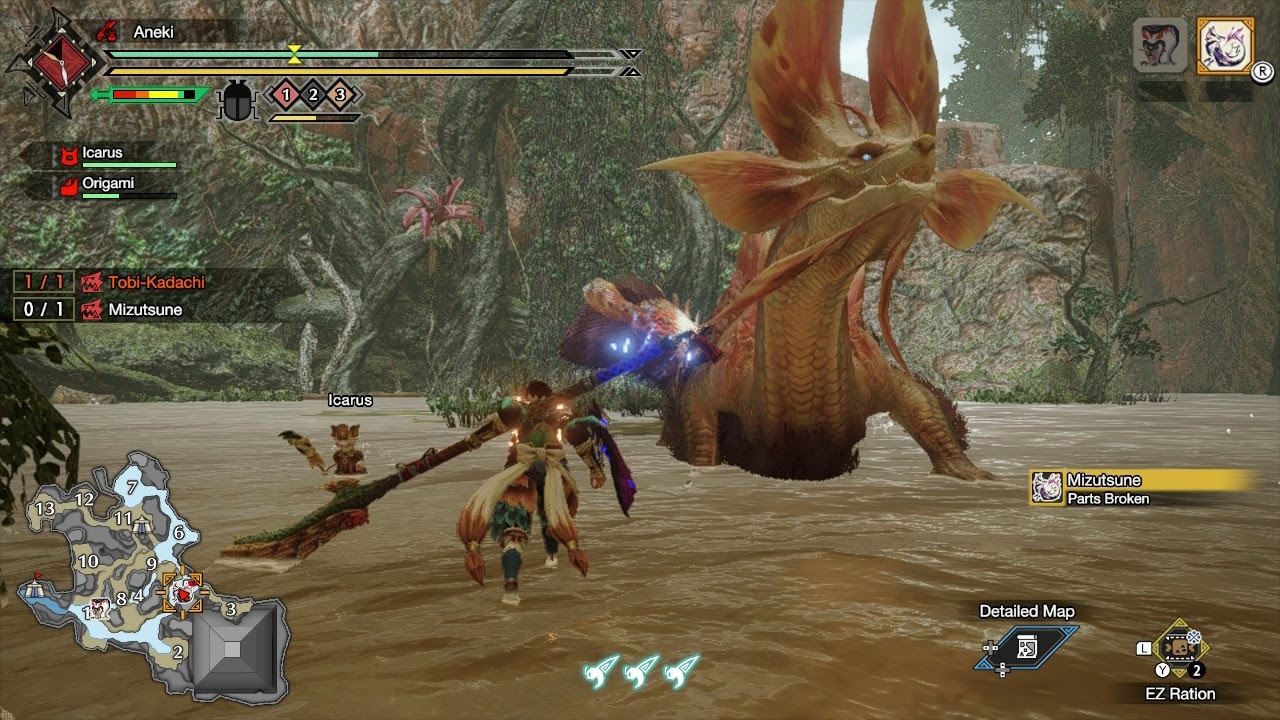
- Most vulnerable spots: Head, neck, dorsal fin
- Elemental weaknesses: Dragon (primary), Lightning (secondary)
- Status vulnerabilities: Blast, Thunderblight
With all the creepy, ugly, and downright vicious monsters you've faced so far, it's easy to look at the beautiful and graceful Mizutsune and find yourself enchanted by its elegance. It's a real shame that this work of natural beauty wants you dead. You'll need to grab your best water gear and get ready to get wet.
Mizutsune's gimmick is blowing lots and lots of bubbles. If these bubbles hit you, they don't do much damage, but they can make you slippery through Bubbleblight. Too many hits of Bubbleblight can cause you to slide around when you try to move on the ground. It's less threatening than it is annoying, but if you use a weapon that relies heavily on positioning, it can be a real pain. You'll need an item called cleanser to get these sliding bubbles off. Pay attention to the colors of Mizutsune's attack bubbles, too--popping the red-colored bubbles grant an attack buff while the green bubbles heal you slightly. If the bubbles are out of reach, you can smack them with your weapon to get the effect.
Besides the bubble barrage, Mizutsune likes to use its slicked-up scales to attack with speedy swipes. If you see it coil up, it's preparing to lunge at you, so get ready to dodge. When Mizutsune is enraged, the light purple scales on its back will spike up and turn a more dark red shade. Besides tossing out more bubbles, an enraged Mizutsune will zip around the area a lot more in an attempt to disorient you and make you bump into more bubbles, worsening the Bubbleblight effect. The most dangerous attack is when angered Mizutsune readies its mouth water gun: it can spit a constant, pulsing stream of water for several seconds in a row both vertically and horizontally. It can even move around while firing this off, allowing it to spray in several directions in a single go or even do a full circular sweep. Wirebugs are once again your best friends in this situation: if you can't get away from the water jet, you can at least hover to try to avoid it. With careful play, Mizutsune will breathe its last bubble without too much trouble.
How to Kill Almudron
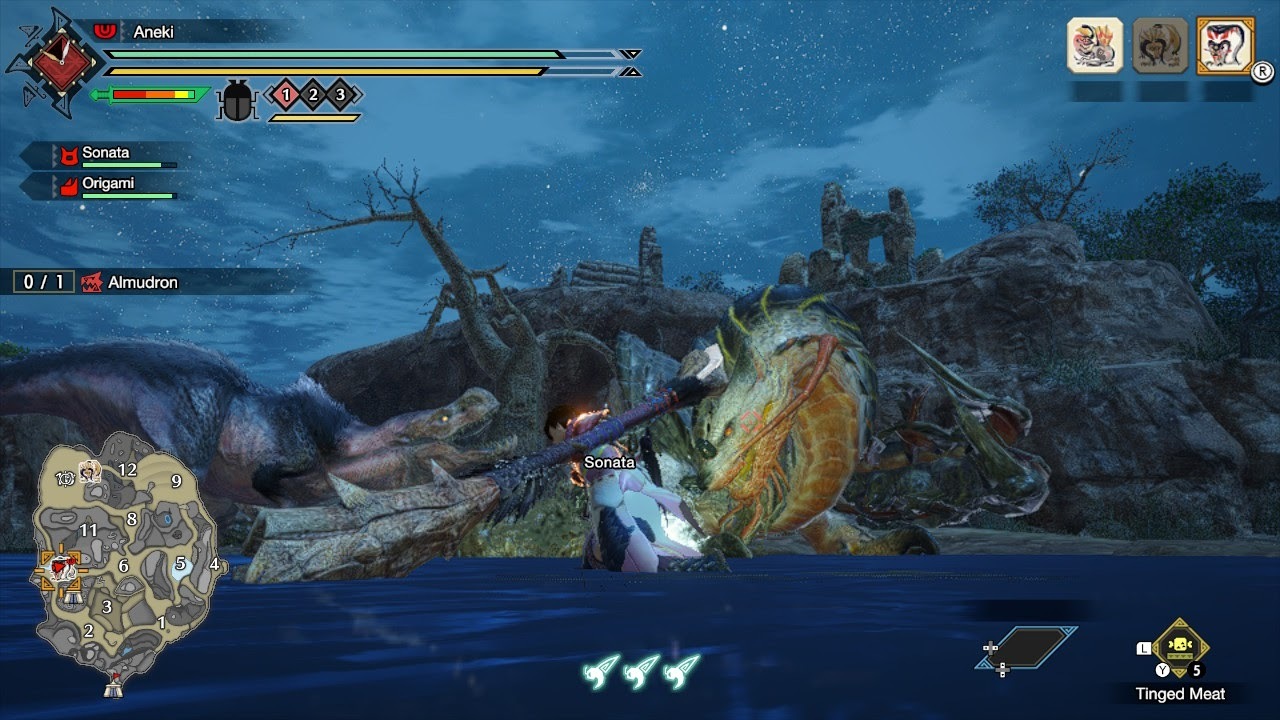
- Most vulnerable spots: Head, Tail
- Elemental weaknesses: Fire (primary), Ice (secondary)
- Status vulnerabilities: Fireblight
The first thing you'll want to do before fighting Almudron is go to the shop and have a Muck Resistance talisman made. Equipping this during the fight will be tremendously beneficial, because... well, remember how much Barroth just loved shaking goop everywhere? Almudron takes mud-slinging to an entirely new level.
The amphibious Almudron can slink around speedily and easily on land and water, burrowing underground, making disorienting movements, and pouncing when you least expect it! It loves to coat the ground in mud and hamper your movement. It can sling mud, make spontaneous mud geysers, and even send a wave of rolling mud at you. It will then use your inability to move as an opportunity to swiftly attack with its claws and tail. The skill Muck Resistance can help increase your mobility in these puddles of mud. Watch your step, though: if you see the mud glowing a gold color, it's toxic, and the longer you're in it, the more your health will drain. (Stepping out of the mud will immediately end this effect.)
Almudron's tail is a weak point, but hitting it isn't easy: besides being extremely slippery, Almudron loves to coat its weaker areas in protective goop, meaning it'll take a few hits to clean it off before you can maximize your damage output. Making matters worse is that, when angry, Almudron can grab a massive ball of toxic goop with its tail, turning it into an extremely painful wrecking ball of solid mud! When this happens, Almudron will take a few smaller swings and flings at you before leaping up high to slam-dunk its goop straight into the hoop (your face). It has a bit of recovery after the smaller swings, meaning you have a few precious seconds to get a couple of hits in on the tail, but once you hear your hunter yell in warning, it's time to prepare the Wirebugs to get far away from a falling Almudron. Try using a flash bomb if you want it to drop the ball before it becomes a threat.
When Almudron feels tired and doesn't want to put up with you, it will erect tall barriers of hardened mud to keep you away. Wirebug-climb these structures and resume your attacks while it's less feisty. You'll need to fight dirty, but keep at it, and Almudron will be eating dust.
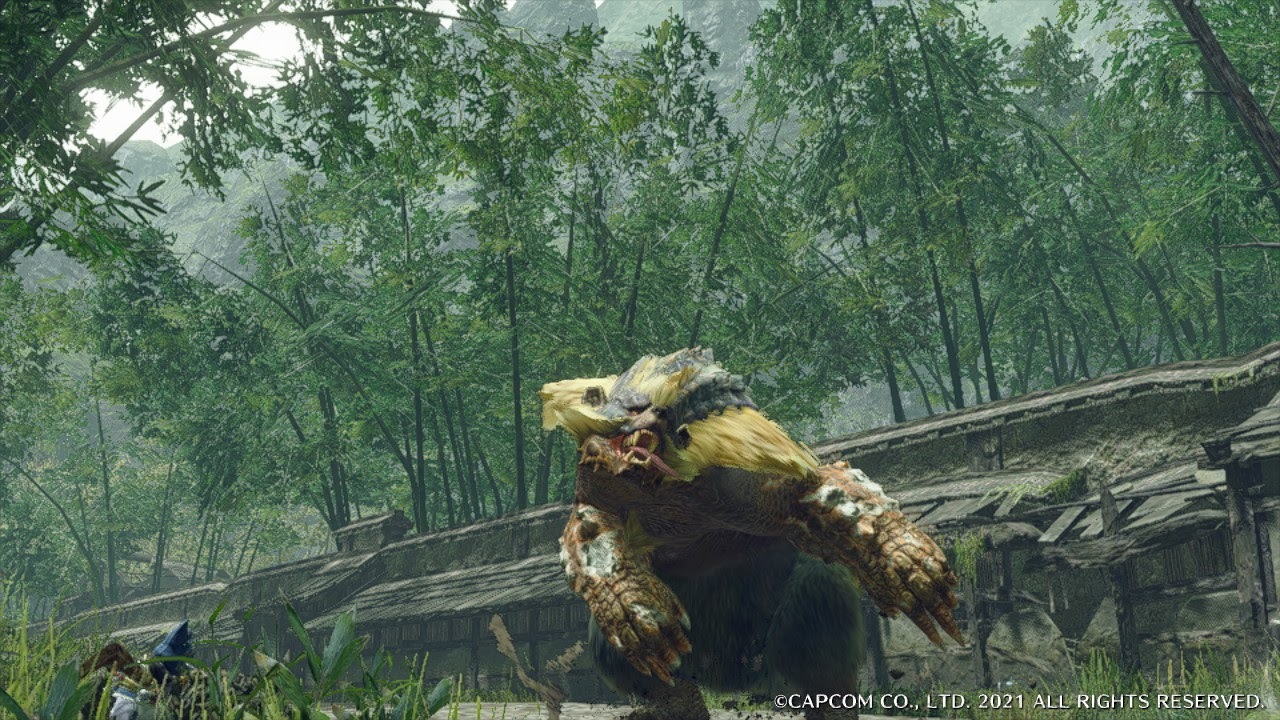
How to kill Goss Harag

- Most vulnerable spots: Head, foreleg, ice clumps on arms
- Elemental weaknesses: Fire (primary), Lightning (secondary)
- Status vulnerabilities: Blast, Fireblight
Just the prospect of battling Goss Harag ought to be enough to give you chills! Its claw swipes and charging strikes are quite vicious, but it can also hit you at a distance by sending a craggy shockwave to knock you off your feet. It's similar to Tetranodon's stomping attack, and you can dodge it in much the same way by using a Wirebug to yank yourself off to the side. Goss Harag's front is generally a pretty dangerous place to be, but its hind legs and hindquarters can deflect dull strikes, so make sure you have a sharp weapon if you're planning to fight it from these angles.
Goss Harag's skin will turn bright red when it's enraged, and that's when the knives come out. By exhaling its icy breath on its claws, it forms a razor-sharp ice sickle on one or both arms, making its already-potent claw swipes extra deadly, so keep your distance! Observe its swipes, and you'll notice that after it attacks with its ice sickles--after two swipes, three swipes, or even just one big circular slash--it has a lengthy recovery time, which you can use to get a few attacks in. It's risky, but you can break the ice sickles with enough attacks and get a potential bonus broken part reward along with a stagger. If you just want to get rid of Goss Harag's weaponry quickly, though, try setting a pitfall trap--it's easy to lure it in, and once it stumbles inside, the ice will break instantly. Eventually, if you don't break these blades, Goss Harag will hurl them at you from a distance. Getting a thrown blade impaled in you is extremely unideal.
Goss Harag can also fire a pulsating, sweeping beam of ice from its mouth. It always follows the same pattern: first, it'll fire sweeping vertically into the air, and then it will attack by sweeping side to side. Its range isn't quite as long as some of the other elemental beams monsters can fire, but you really don't want to underestimate its reach--roll away from the vertical beam, then use a Wirebug dodge on the horizontal sweep. It's a tough fight for sure, but it gets a lot easier once you've learned how Goss Harag's ice beams and swipe patterns work. Bear with it--you'll eventually overcome this frosty brute!
How to kill Tigrex

- Most vulnerable spots: Head, foreleg
- Elemental weaknesses: Lightning (primary), Dragon (secondary)
- Status vulnerabilities: Blast, Thunderblight
Tigrex isn't much for gimmickry--it's just a big, angry lizard that wants to tear you to pieces. You won't have to worry about it firing giant elemental laser blasts or leaving you poisoned, but you will have to dodge a lot. Tigrex's strength is its agility, as it can run, lunge, swipe, and chomp at you at a rapid pace. Its tail swings really pack a punch and can hit you even when you're behind it. When you see the veins in its limbs glow an eerie red, it's angered and will come at you with even more vicious attacks. But having to move so quickly takes a toll, and many of Tigrex's attacks have a long recovery time that you can use to get some hits in. Targeting its legs can help slow it down, and removing its tail will eliminate one of its best weapons. Fighting this beast is more of a test of patience than anything else, as you'll want to wait for it to tire itself out before going in for the big damage. Bring some Lightning-elemental weapons to make the fight a bit faster. If your basic hunting skills are up to snuff, taking Tigrex down shouldn't be too much of an issue.
How to kill Zinogre
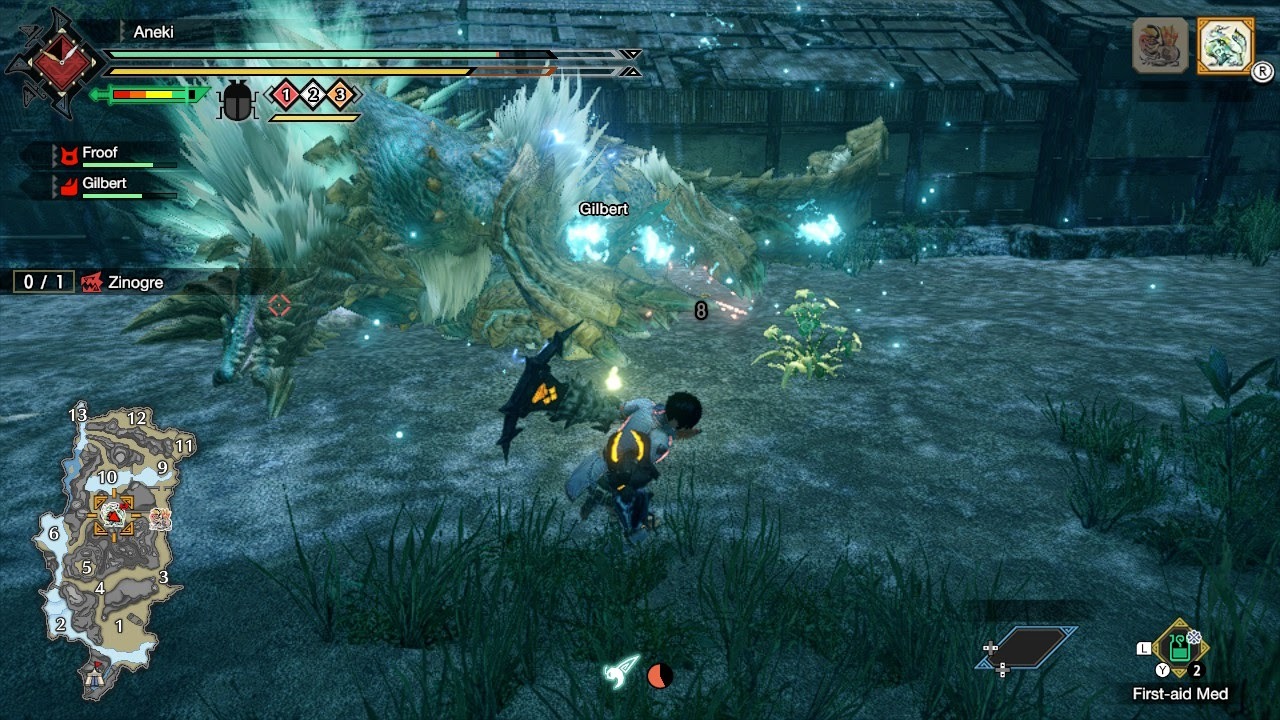
- Most vulnerable spots: Head, back, hind legs
- Elemental weaknesses: Ice (primary), Water (secondary)
- Status vulnerabilities: Blast, Iceblight
It's big, it's fast, it's got lots of spikey parts, and it can put you on the cart in a flash--that's our Zinogre! Zinogre's speed and electric attacks can absolutely overwhelm an unprepared hunter, so before you try to take it on, make sure you've got plenty of gear to resist Thunder and Thunderblight, because almost everything Zinogre does can give you a shock. Claw stomps, rushing attacks, and aerial dive attacks are all things you've seen other monsters do, but not with this kind of speed, so fast reaction is vital. Trying to keep your distance? Zinogre can summon ball lighting projectiles that float at odd angles to try and snipe you, but you can avoid these fairly easily by going airborne with a Wirebug.
The worst thing Zinogre can do, though, is stand still and howl while it gathers up energy. When it's got enough power stored, its fur will burst into sharp spikes--and if you're in the monster's vicinity, you'll be caught up in the electric blast! When amped-up, Zinogre is an even bigger threat, as it gains a huge boost to its agility and the ability to use lots of fast, damaging electric attacks, making lightning bolts strike the ground where you're standing and surrounding the area with an electric charge when it does its diving strikes. You might even find yourself unlucky enough to get launched in the air by its tail! Getting hit by these electric attacks likely means you'll be Thunderblighted--chow down on a Nulberry to fix that fast before you wind up stunned. You can attack its hind legs repeatedly to try to stagger it, which will revert it back into its uncharged state--but getting Zinogre to stay still is easier said than done, and your Shock Trap isn't going to do you any good!
Since Zinogre's going to charge itself no matter what, you can make it less of a threat by trying to break parts that conduct electricity--specifically, it's tail and legs. Cutting off its tail will help immensely, too. Try to get in a few hits while it's charging before moving away--damaging it in these phases will make it easier to stagger when it's fully charged. Move fast, strike when possible, and keep an eye on your status, and you should be able to finally pull the plug on this livewire.
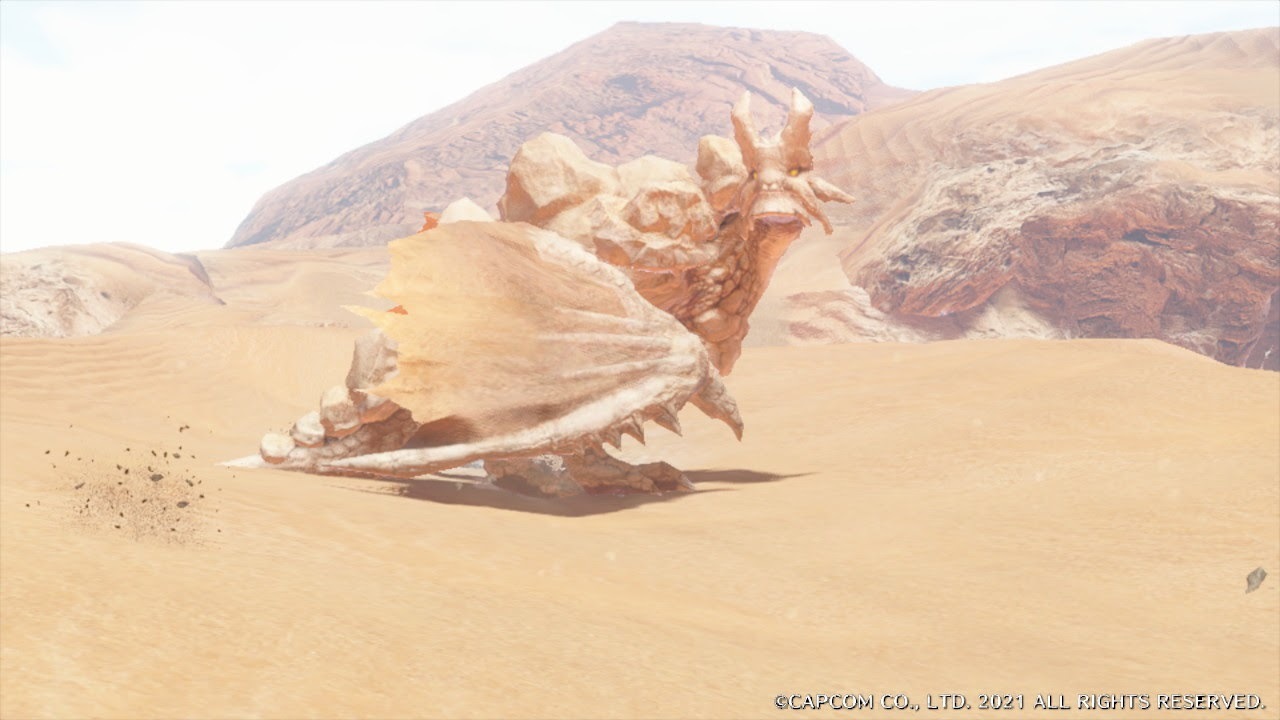
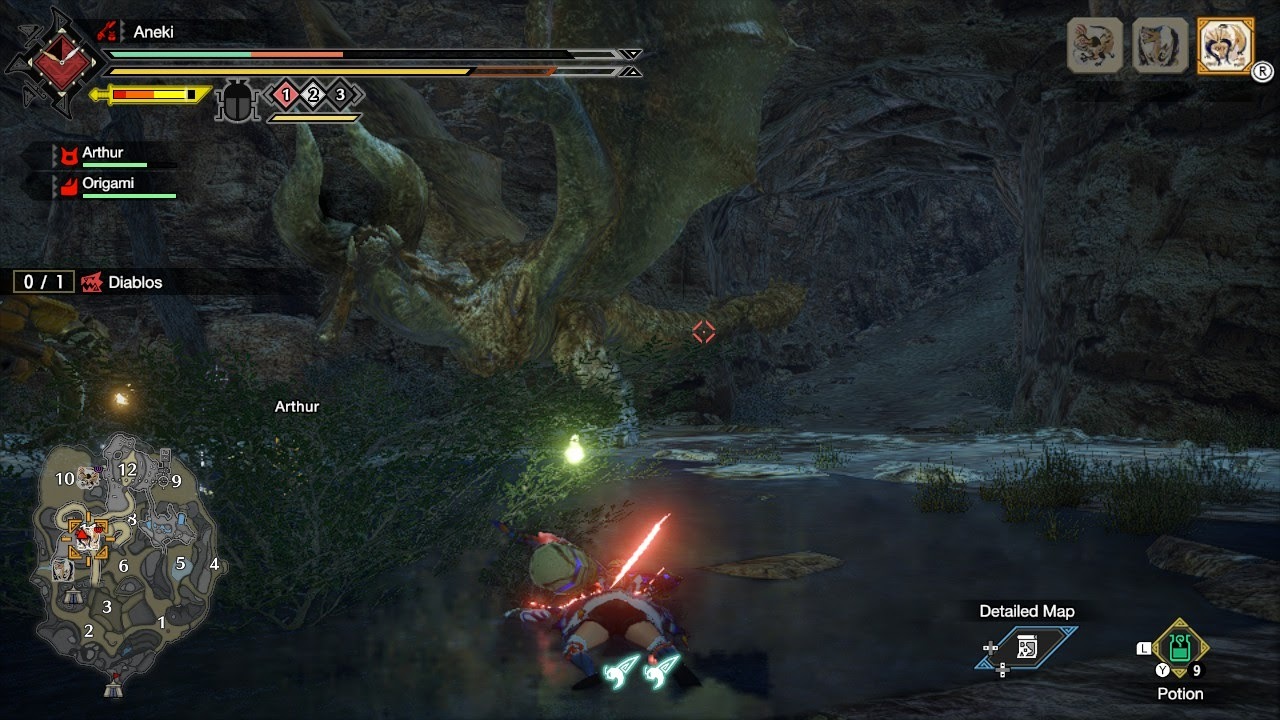
How to kill Diablos
- Most vulnerable spots: Head, neck, abdomen, wings
- Elemental weaknesses: Ice (primary), Water/Dragon (secondary)
- Status vulnerabilities: Paralysis, Blast, Iceblight
Underneath the hot sands of the wastelands lurks something big and very, very mad! Diablos doesn't like you setting foot on its turf and will make it very clear by charging and swiping at you with its horns and tail. Its attacks and movement are slow, but they pack a hell of a wallop! The most dangerous attacks come after Diablos burrows underground. It's easy to tell where it's going, but it moves surprisingly fast and can quickly pop out of the ground high into the air to plant itself firmly on your face.
Immobilizing and stunning Diablos should be a key part of your hunting plan. Act fast by preparing a Sonic Bomb when Diablos is underground--use it when it burrows closer to you, and you'll make it come to the surface immediately in a stunned state. When you encounter Diablos in the Sandy Plains, it likes to hang around map areas 10 and 12, where it feeds on cactus. Sneak up on it while it's feeding, and you may be able to set up some bomb traps. You might notice that there are some structures in the regions that appear to be pillars of rock jutting out of a pit of quicksand. Try standing behind one of these pillars when Diablos goes to charge at you--it'll destroy the pillar and become trapped in the quicksand for a short while, giving you ample opportunity to attack. It's also very susceptible to Paralysis.
Diablos is a big fan of dirt; it doesn't appreciate water without any ice--or ice in general. Dragon-typed weapons can cause extra damage as well, so bringing any of those weapon types will help a bunch. Aim for Diablos's horns and tail. By breaking the horns and severing the tail, you can reduce the hurt from Diablos's attacks (As much as you possibly can reduce the pain caused by a multi-ton monster barrelling at high speed directly into your squishy flesh, anyway). The end of Diablos's tail is hard as a rock, so avoid that and go for the middle part. Keep your weapons sharp, as Diablos's flesh is very tough all over and easily deflect a dull blade. With enough tricks and traps, the Tyrant of the Desert's rule will come to an end.
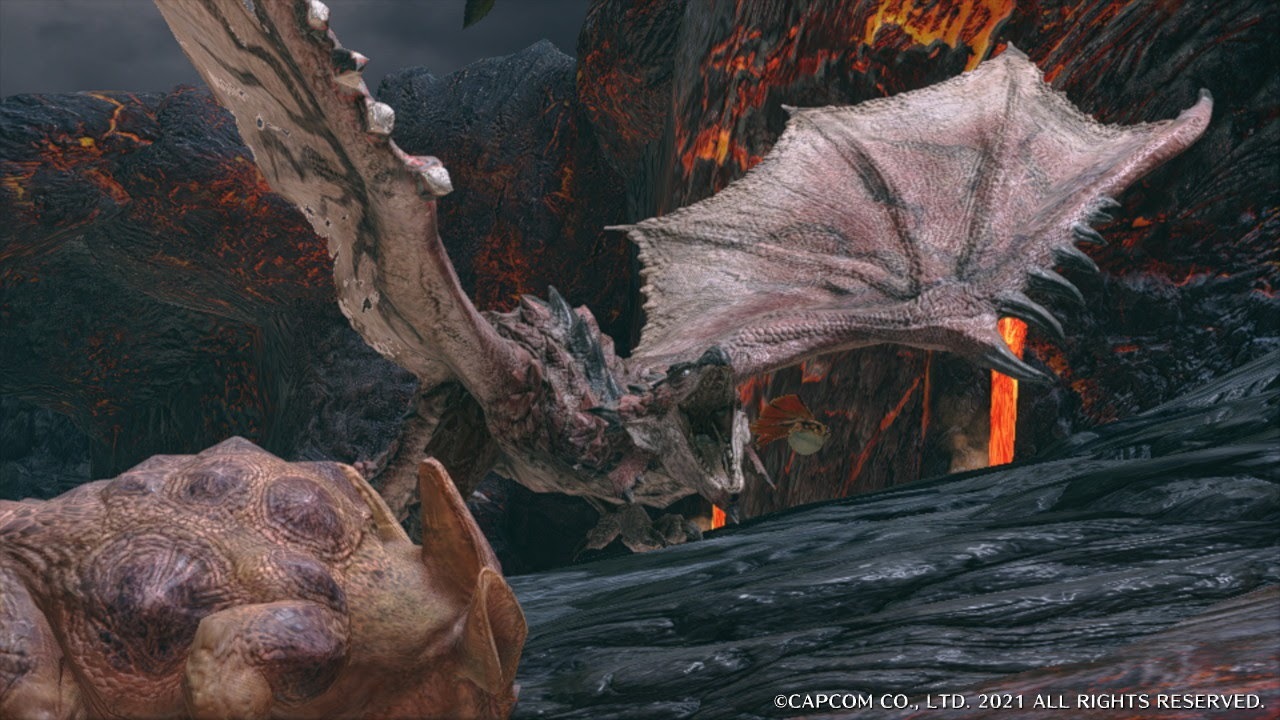
How to kill Rathalos
- Most vulnerable spots: Head, wings, tail
- Elemental weaknesses: Dragon (primary), Ice/Lighting (secondary)
- Status vulnerabilities: Thunderblight
What's a Queen without her King? Rathalos is the other flying, fire-breathing terror and companion monster to Rathian. Like the Queen of the Land, the King of the Skies will assault you with firey breath and poison-laced strikes. Antidotes, Herbal Remedies, Nulberries, healing Buddies, and gear that can help you resist poison and fire-element attacks are a must for this hunt, so have those crafted up before you head in--along with Dragon-element weapons.
Why is Rathalos the King of the Skies? Because he loves to hover in the air out of reach of conventional weapons, much in the same way as Rathian--but much more often. From this position, he can swoop down to attack and grab you with poisonous claws, breathe a shockingly swift sweeping laser of fire, or spit out individual fireballs at targets he finds annoying (likely you). Getting burned by a fire attack can lead to Fireblight. Having poison and Fireblight stacked makes your health drain rapidly, so make sure you rid yourself of these statuses as soon as you notice them! One easy way to ground him is with a Flash Bomb -- the blinding light will stun him and send him straight for the floor. Don't overuse these, though, because eventually, he'll start to develop a natural resistance to their effects. Since he's so heavily reliant on his wings, they're a good spot to focus your attacks to stagger and slow him down. Keep your antidotes at the ready, and soon the skies of Kamura will be safe again... for a little while.
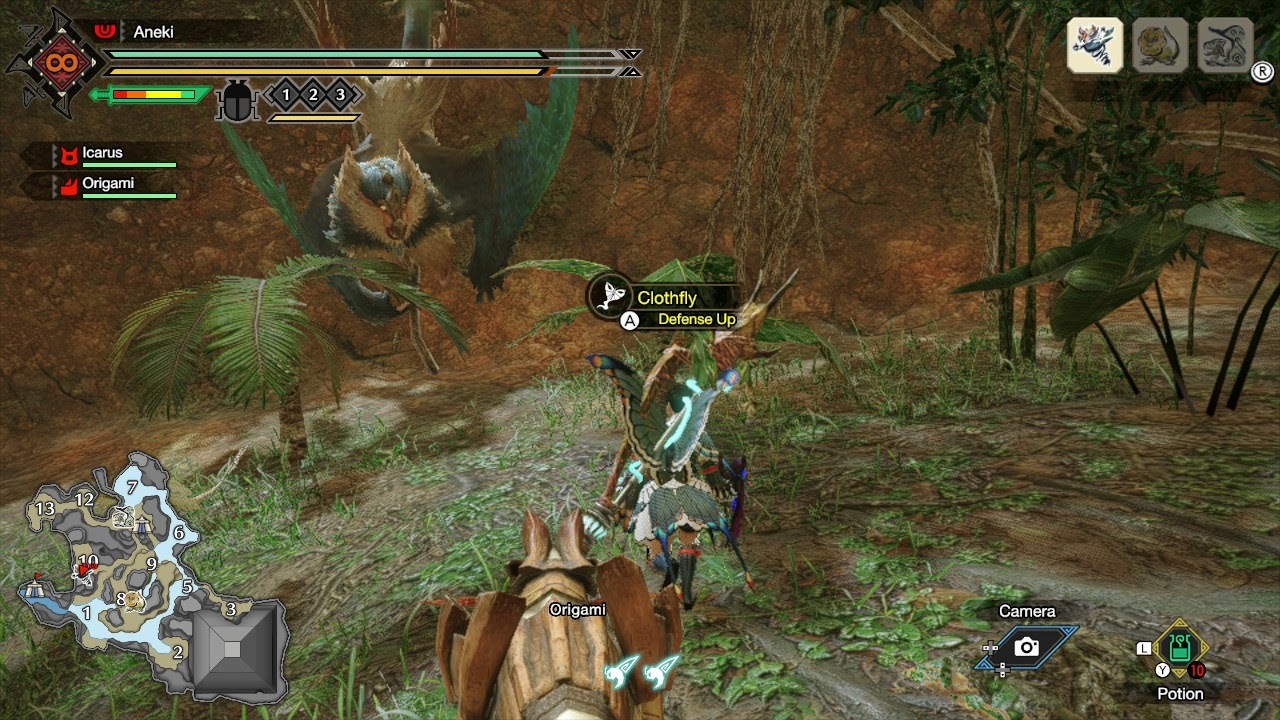
How to kill Nargacuga

- Most vulnerable spots: Head, tail, foreleg
- Elemental weaknesses: Lightning (primary), Fire (secondary)
- Status vulnerabilities: Blast, Thunderblight
Few monsters can match the combination of blinding speed and disorienting movement that Nargacuga brings to the battlefield. When its eyes glow red, an angered Nargacuga only wants your blood! It can be a struggle for even experienced hunters to keep up with the onslaught of physical attacks, and just a few dashing slashes and tail spikes can take you from full health to cart in a matter of seconds.
Finding a good opening to counter is a struggle: when Nargacuga attacks, it tends to go after you with a rapid barrage of swiping claws and spinning tails. When it starts coming at you, don't expect it to let up for a while! Even keeping your distance is risky, as Nargacuga can launch a rain of painful spikes from the tip of its tail. Since Nargacuga's plan is to totally overwhelm you, your counter-strategy should be finding ways to stop and slow it down. Shock Traps are the best way to do this, as Nargacuga's agility can make your Pitfall Traps near useless. Sonic Bombs can also stun it for a brief period if used during a pause in its attacks. Careful, though, as Sonic Bombs used carelessly only make it angry!
After Nargacuga's forceful tail slam attack, you may notice it takes a few seconds to recover. Use this time wisely! Try to cut off its tail if possible -- it won't stop all of its tail-based attacks, but it will help to reduce the attacks' range and potency. Attacking its legs to stagger it can help, too, though its wings will deflect strikes that lack adequate sharpness, so try to be careful where you're aiming. Since Nargacuga's got a Blast vulnerability, try using bombs and gunpowder to damage its wings, or launch some Bombadgys at it with a weapon strike if you're fighting in the Shrine Ruins. Lighting-element weaponry can help the fight go a bit faster, as well. This won't be an easy battle but keep your wits around you, and you'll finally send Nargacuga to the grave.
Endgame Monsters (High-Rank)
As you might've intuited from this guide, there do exist high-rank versions of every monster in Monster Hunter Rise. You get to fight them later on in the game after achieving a 4-Star Hunter Rank, which you can get by completing all of the Urgent Village Quests and finishing the 4-Star Urgent Rampage Quest, which unlocks after finishing enough necessary 3-Star Hub Quests.
Generally, high-rank monsters are more difficult to fight, with more health, bigger damage output, and a habit of using their strongest attacks more regularly. The strategy needed to kill them mostly remains the same as what we've outlined above; we simply recommend that you exhibit a bit more restraint than you would be fighting their low-rank versions.
That said, there are a few monsters that you get to fight in your push through the high-rank category who are entirely exclusive to that part of the game. These monsters are Rakna-Kadaki, Rajang, and Jyuratodus, and they're quite a challenge to take down. It's important to note that you can encounter Rakna-Kadaki and Rajang as invading monsters during 5-Star Hunter Rank quests. Eventually, they each get their own designated hunts once you achieve a 7-Star Hunter Rank. Jyuratodus, on the other hand, is the Urgent Quest monster you must hunt to accomplish a 5-Star Hunter Rank.
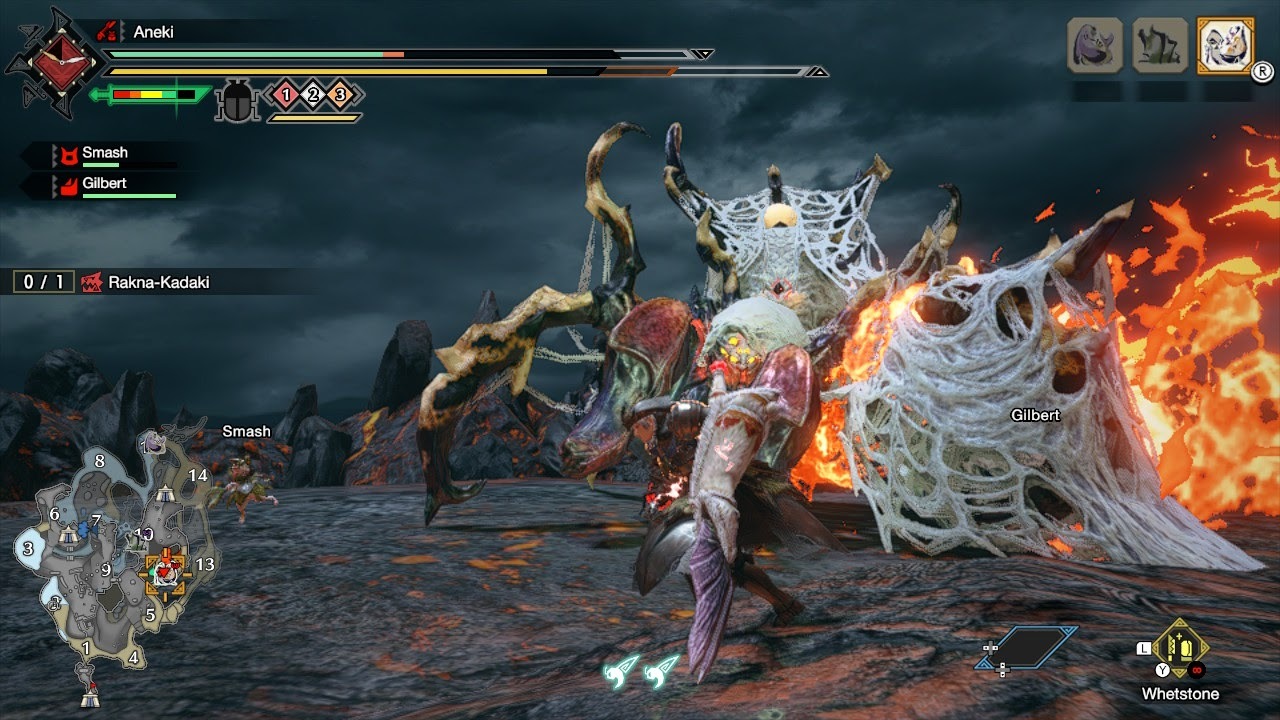
How to kill Rakna-Kadaki
- Most vulnerable spots: Head, legs
- Elemental weaknesses: Ice (primary), Water (secondary)
- Status vulnerabilities: Iceblight
Meet the incarnation of your nightmares. Rakna-Kadaki is a spider straight from the pits of hell itself, and either you or she are going to be a shriveled husk when everything's done. So let's make sure it's not you!
The first step is to gather up your fire-resistant gear and any talismans or decorations you may have made to reduce or prevent the effects of Fireblight. S Rathian armor will help a lot thanks to its fire-resistant and blight-preventing attributes. Pack ice or water element weapons and any tools you might have to inflict Iceblight. Eat some fire resist Dango beforehand, too, because as you'll soon discover, Rakna really likes it hot! Not only can she exhale searing flames from her jaws, but she can also let bursts of flames drop from her sides while you're attacking her legs. When you see orange smoke around Rakna, get away fast because, within a second or two, there's going to be fire! She can also give chase while exhuming flame from her flanks. While the side attack is incredibly dangerous, her frontal attack fire beam is even more deadly due to its range and duration. Don't think you're safe from being flambeed because you dodged the initial blast. After all, she may well just sweep around to catch you, so be prepared to dodge or guard more than once, and keep those Wirebugs at the ready! All of these attacks can inflict Fireblight as well, so you'll want to roll or use Nulberries, assuming you can move at all.
Another of Rakna's gimmicks is her sticky webbing. One-touch, and you'll be unable to move unless you use Cleanser or are helped by a buddy. Rakna will spit out this webbing as strings from her jaws, which you can dodge by Wirebug-hovering or by weaving into the gaps between the threads. She can also toss globs of webbing at you, which has a similar effect if you get hit. Getting caught in her webbing without a means of escape or distraction usually results in getting snapped in her mandibles, crushed by her massive posterior, or quickly roasted alive. Oh, and those egg-colored sacs on Rakna's huge abdomen? Those are are her baby Raknoids that she can pop off and use as mini-flamethrowers or shoot like a Wirebug to drag her quickly around the arena. It's gross as hell, but don't lose your composure: if you can sever one of these tethered webs while she's dragging herself around, you'll stun her for a bit. Use this time to go town with your weapons, especially on her head and legs--they're her weak points but often very dangerous to target. With the proper gear, careful strikes, and a cool head, you'll be able to exterminate Rakna and give everyone peace of mind… until the next hunt.
How to kill Rajang
- Most vulnerable spots: Head
- Elemental weaknesses: Ice (primary), Water (secondary)
- Status vulnerabilities: Iceblight, Blast
Rajang is small, extremely agile, has big pounding fists, and gets very angry very, very quickly. A combination of blistering speed, disorienting movement, and extremely painful strikes give Rajang one of the highest potential battle-start-to-cart times in the whole game. Though Rajang doesn't have a focused quest until you reach the 7-Star Hub Quests, it can show up unexpectedly in certain 6-Star quests, making these already perilous hunts even more dangerous. If you don't want to deal with Rajang during these missions, simply do not engage it--it won't move much from the areas it initially appears in. Eventually, however, you will have to take a swing at this raging ape, so dress up in your finest lightning-resistant gear and get ready for one of the toughest fights in Monster Hunter Rise.
You've fought plenty of speed demons like Nargacuga and Zinogre, but Rajang is in a league of its own when it comes to swift, flashy moves. It can come at you swinging, jump up and smash the ground with its fists, or leap high into the air for a rolling dive bomb. A good rule to remember is that a flying Rajang will always come down quickly and almost always aims itself directly at someone's face. You may find your attempts to slow Rajang rendered futile by its ability to frequently avoid Pitfall Traps, too!
Rajang's elemental attacks are just as fierce. It can leap and spit out ball lighting, but more commonly, it will beat its chest or do a small backward leap before firing out an absurdly large and damaging lighting laser blast straight from its maw. While it can't sweep this laser-like other monsters can, it's dangerous because the tell before it happens is extremely short: you only have a second or two to react before you have a faceful of electricity. One of Rajang's favorite combos is lunging at a hunter in close range, mauling them like a living chew toy, and tossing them on the floor, where they will promptly eat a full laser blast (or a cannonball dive) upon getting up. See you back at the tent!
When Rajang gets enraged--which is quite often--its fur will take on a golden sheen, giving it the nickname "Golden Lion." When it gets really, really mad, you'll see its forearms swell. This makes them rock-hard and able to deflect weapons--as well as destroy Shock Traps! You can attack it from behind repeatedly to remove this effect. Since Rajang moves so quickly and focuses its attacks around its front and sides, moving to and attacking its rear is a good strategy, though one that's not always easy to do when solo hunting. The occasional Flash Bomb can confuse it long enough to get some clear swipes at its back, so make good use of those when you need to take the pressure down a notch. Once it goes down, give yourself a pat on the back--you're one step closer to conquering all of Kamura's greatest threats!
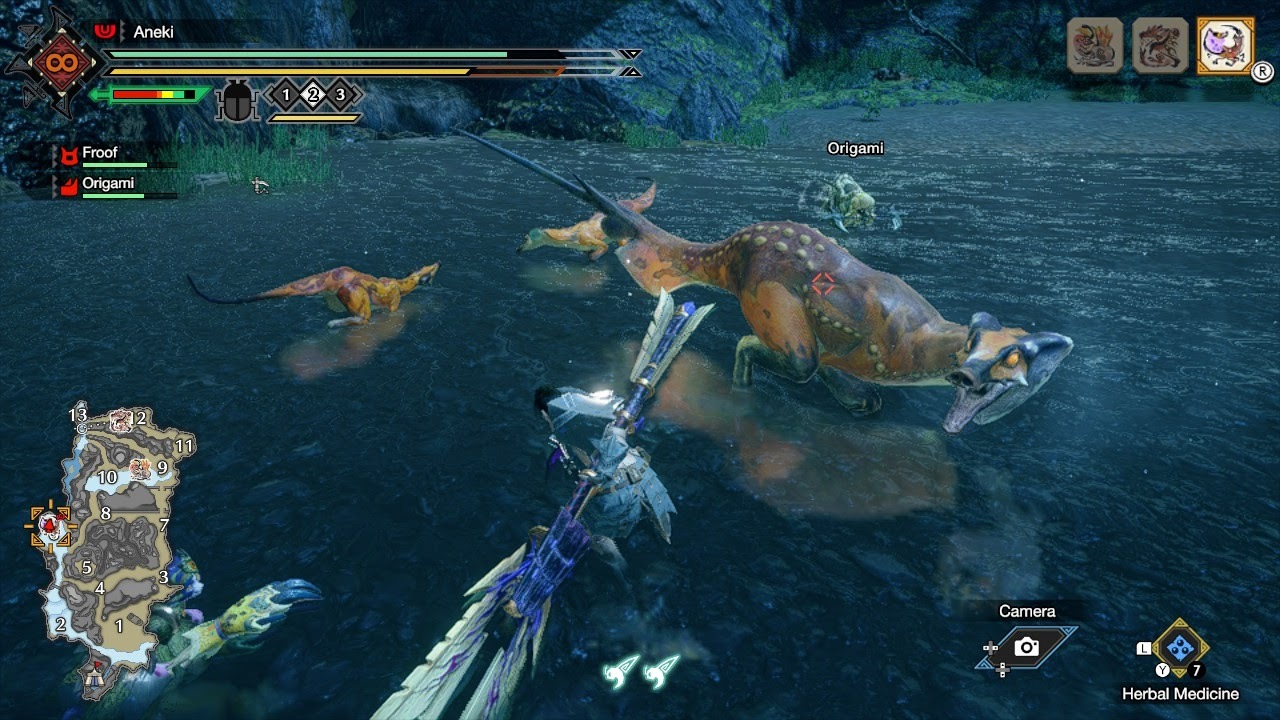
How to kill Jyuratodus
- Most vulnerable spots: Head, legs, tail
- Elemental weaknesses: Lightning (primary), Fire (secondary)
- Status vulnerabilities: Exhaust, Stun, Thunderblight
Time to get your hands dirty again! Much like Barroth and Almudron, Jyuratodus just loves its mud. You know what to do by now with muck monsters--when it gets muddy, whack its body until it’s clean to do more damage. If only that were the only thing you needed to worry about!
Jyuratodus is amphibious and surprisingly agile both in water and on land, though it greatly prefers to fight you in the pool. Like its fellow muddy monster buddies, it can perform attacks that launch balls of mud around the arena. The resulting mud piles aren’t potentially poisonous like Almudron’s, but they can slow you down, so consider bringing Muck Resistance gear and decorations to help reduce the slop slowdown. The mud isn’t terribly damaging if you get some in your face, but it can inflict Waterblight, which will hamper your stamina recovery. Eat Nullberries or equip blight-resistant gear to help deal with this.
Jyuratodus’s primary means of attack--besides launching mud at you--involve slamming into you with its large, slippery body. In water, it will charge at you with swift swimming moves; while on land, it will simply try to toss its body and fling its tail to smack you around. If you’re standing at its sides, Jyuratodus can perform a short sideways lunge to knock you on your butt, so scoot away if you see it shifting for a strike.
When you see Jyuratodus sink beneath the waves, you’ll need to act! It will swim towards you, leaving behind puddles of mud in its wake. Keep an eye on where it’s going because, after a few seconds, it will emerge from the water, leaping high into the air and raining down multiple glops of mud before slamming its entire body directly onto you. Either you can Wirebug and dodge away when you see it going for a dive, or you can attempt to break its stride by using a Sonic Bomb when it’s submerged. If successful, Juratodus will flop out of the water and flail around. Make the best use of this downtime (and the times where Jyuratodus is too busy trying to restore its mud coating) to strike.
Apex Monsters
Monster Hunter Rise also has special monsters in the game known as Apex Monsters. These alternate versions of existing monsters within the game are even harder than their low-rank and high-rank counterparts, sporting much more aggressive behavior and a host of new attacks. Apex Monsters are typically encountered in high-rank endgame-level Rampages, so you'll need to be very skilled to take them on. With Update 2.0, some of these monsters can be fought during standard hunts.
Generally, you'll want to tread cautiously against Apex Monsters. As of writing, the only available Apex Monsters are Arzuros, Rathalos, Diabolos, Mizutsune, and Rathian. We recommend fighting these beasts with a group of players unless you're looking for a tremendous solo challenge.
Monster Hunter Rise is out now on Nintendo Switch, with a PC version coming in 2022. We've got a number of other guides to help you out if you're just setting off on your adventure, which you can find in the list below.
Monster Hunter Rise Guides And News
- How To Kill Every Monster
- Essential Beginner And Advanced Tips
- How To Set Up Multiplayer
- + Show More Monster Hunter Rise Guides And News Links (7)
- Weapons Explainer - Which Weapon Is Right For You?
- Best Weapons For Beginners
- Buddy Explainer: How Palamutes And Palicoes Work
- Rampage Quest Tips And Explainer
- Amiibo Guide
- All The Best Armor We've Crafted (So Far)
- Monster Hunter Rise Review
Got a news tip or want to contact us directly? Email news@gamespot.com
Join the conversation