BIM practitioners are always on the lookout for ways to consolidate workflows and put out accurate project deliverables faster.
We’ve tried to make it easier for you to accomplish that with our Smart Documentation plugin for Revit®.
In this blog post, you’ll see 10 common structural engineering tasks that can be automated with Smart Documentation. Keep in mind that the plugin can just as easily be wielded by architects or MEP engineers.
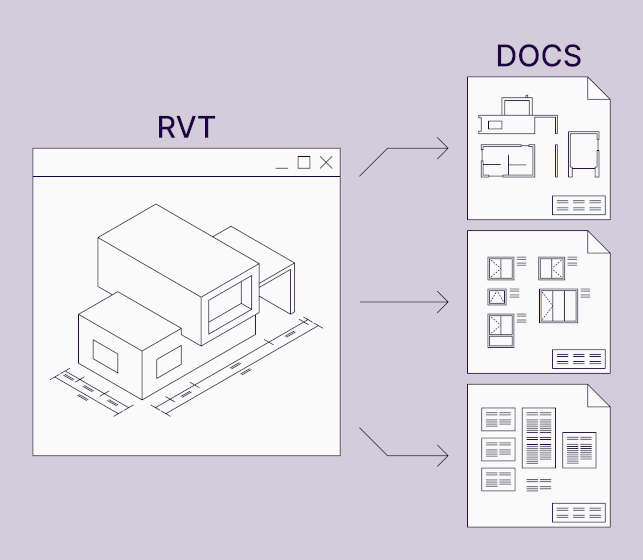
What is Smart Documentation?
1. Element views & dimensions
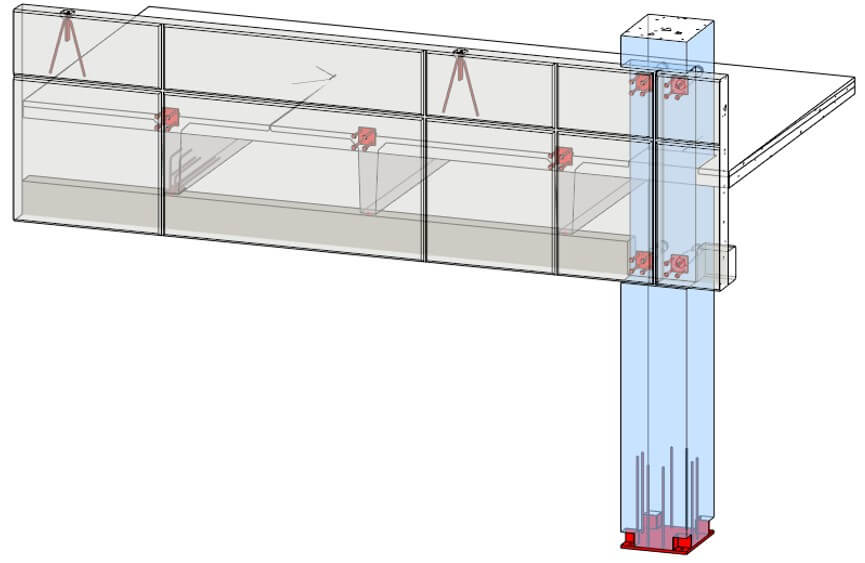
Detailing elements and building designs for structural projects requires precision and long hours of work, especially in native Revit because there’s no efficient way to create views for assembled families. All the more so if you need to add dimensions or annotations to views.
With Smart Documentation, you can quickly generate element views with dimensions from an assembly. Via the ‘Views’ menu, you can set predefined configurations so that it’s taken care of automatically.
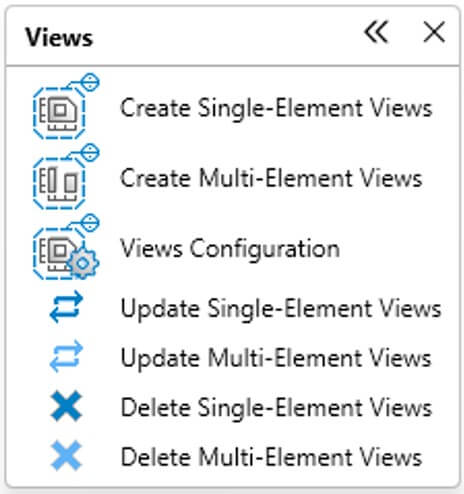

Looking at the ‘Views’ menu, the ‘Create Multi-Element Views’ function lets you select which elements have a 3D section view and which have 2D views.
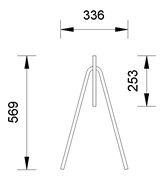
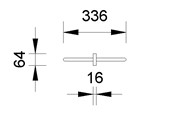
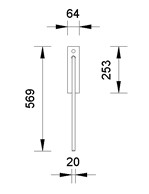
Apply your selected annotation design to elevation views. When placing dimensions, you can define the style, whether strings should snap or not, and apply tagging rules.
The ‘Create Single-Element Views’ function generates automatically dimensioned views for selected families based on your predefined configurations.

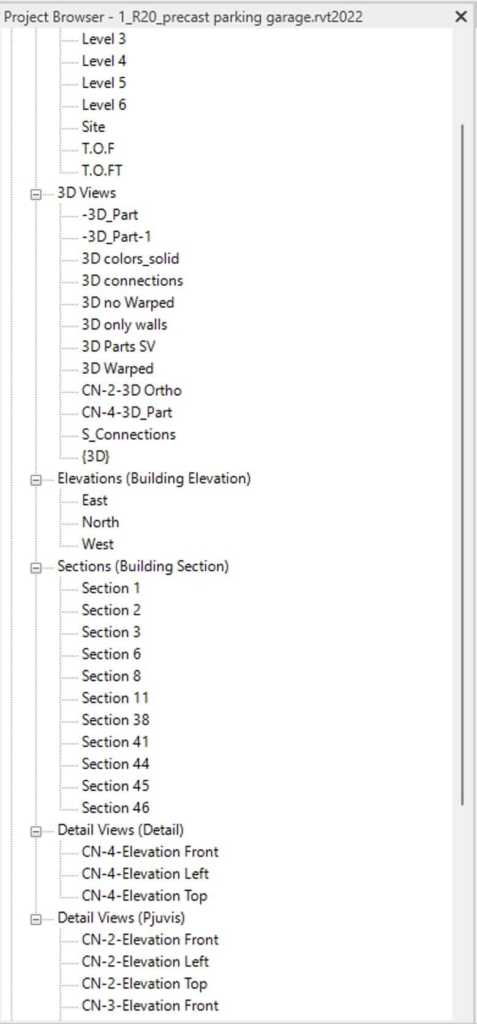
When you have multiple element views in the project browser that must be placed on sheets, the native Revit workflow is to drag-n-drop selected views. And keep doing that until you’ve dragged-n-dropped them all.
Take a look at the ‘Sheets’ menu of Smart Documentation.
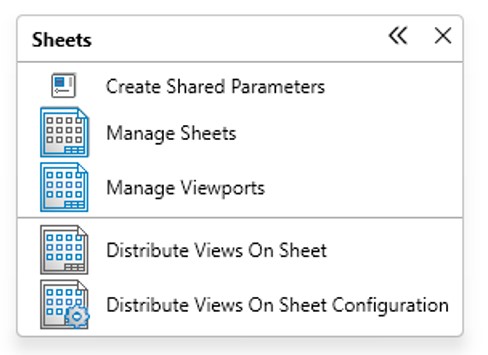
The ‘Manage Sheets’ function lets you define where views should be placed on sheets. Shazam! That repetitive dragging-n-dropping workflow is eliminated and replaced with just a few mouse clicks, placing all those element views right where you want them automatically.

2. Assembly shop drawings
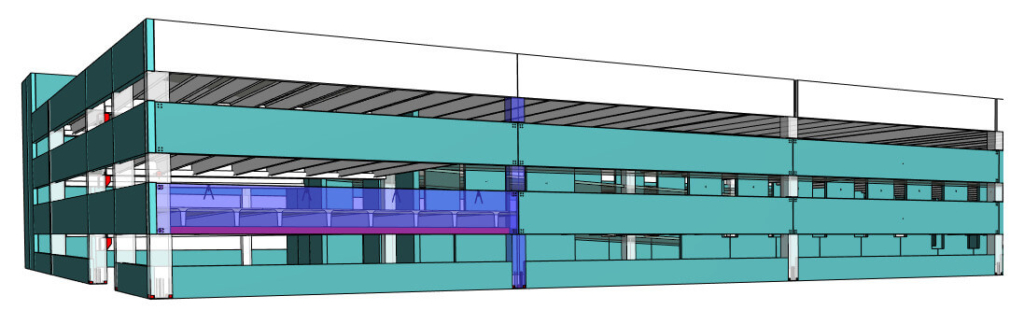
Smart Documentation lets you combine multiple hosted or nested concrete and steel elements into a single entity. Then, with dynamic update, modify numerous assemblies without having to select every assembly separately and add or subtract individual families.
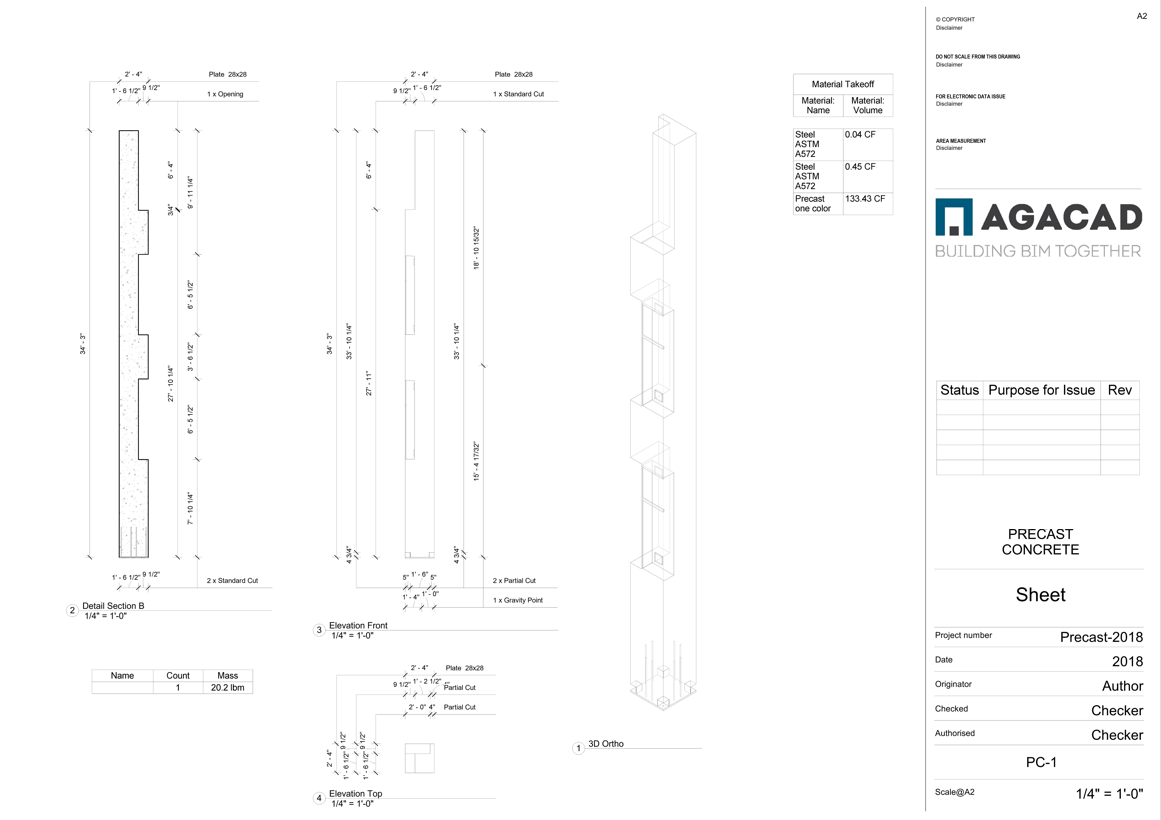
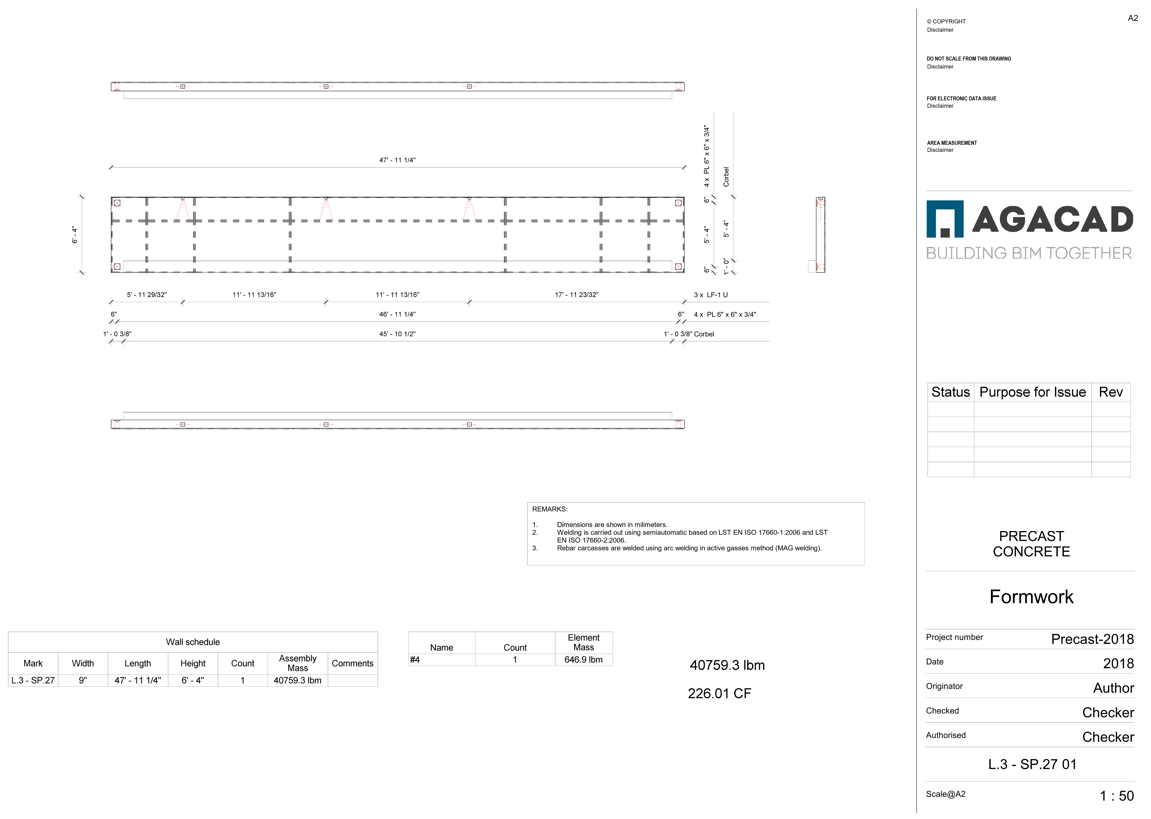
Then, automatically generate shop drawings with all the needed views, sections, 3D views, schedules, and legends. Views and sections are generated with annotations that are flexible enough to meet different continents’ standards.
3. Dimensions for structural framing
The Smart Documentation plugin will automatically place dimension strings and chains according to your predefined configurations. Note that auto-dimensioning can be applied to architectural, structural, and mechanical category elements.
You can dimension multiple structural framing plans, elevations, and sections in Revit, and create multiple dimension chains or join several into a single measurement string.
The process of measuring multiple structural floor plans is dramatically shortened when you use Smart Documentation. And you don’t need to press Tab lots of times to select the center of structural framing, as you do in plain Revit.
4. Multicategory family tagging
Tagging is an essential task in structural projects. Doing it in Revit-out-of-the-box, though, is tedious and time-consuming. Primarily because it doesn’t let you define which elements should get tags, which tag families must be applied, and how to position tags.
Smart Documentation brings efficiency and flexibility to the situation, greatly simplifying and speeding it up. For instance, its filtering capabilities allow you to tag multiple elements differently.
5. Sort & mark multiple elements
Sort and number Revit elements the way you want, including detecting and renumbering grids in order, determining door swing/orientation, and calculating coordinates.
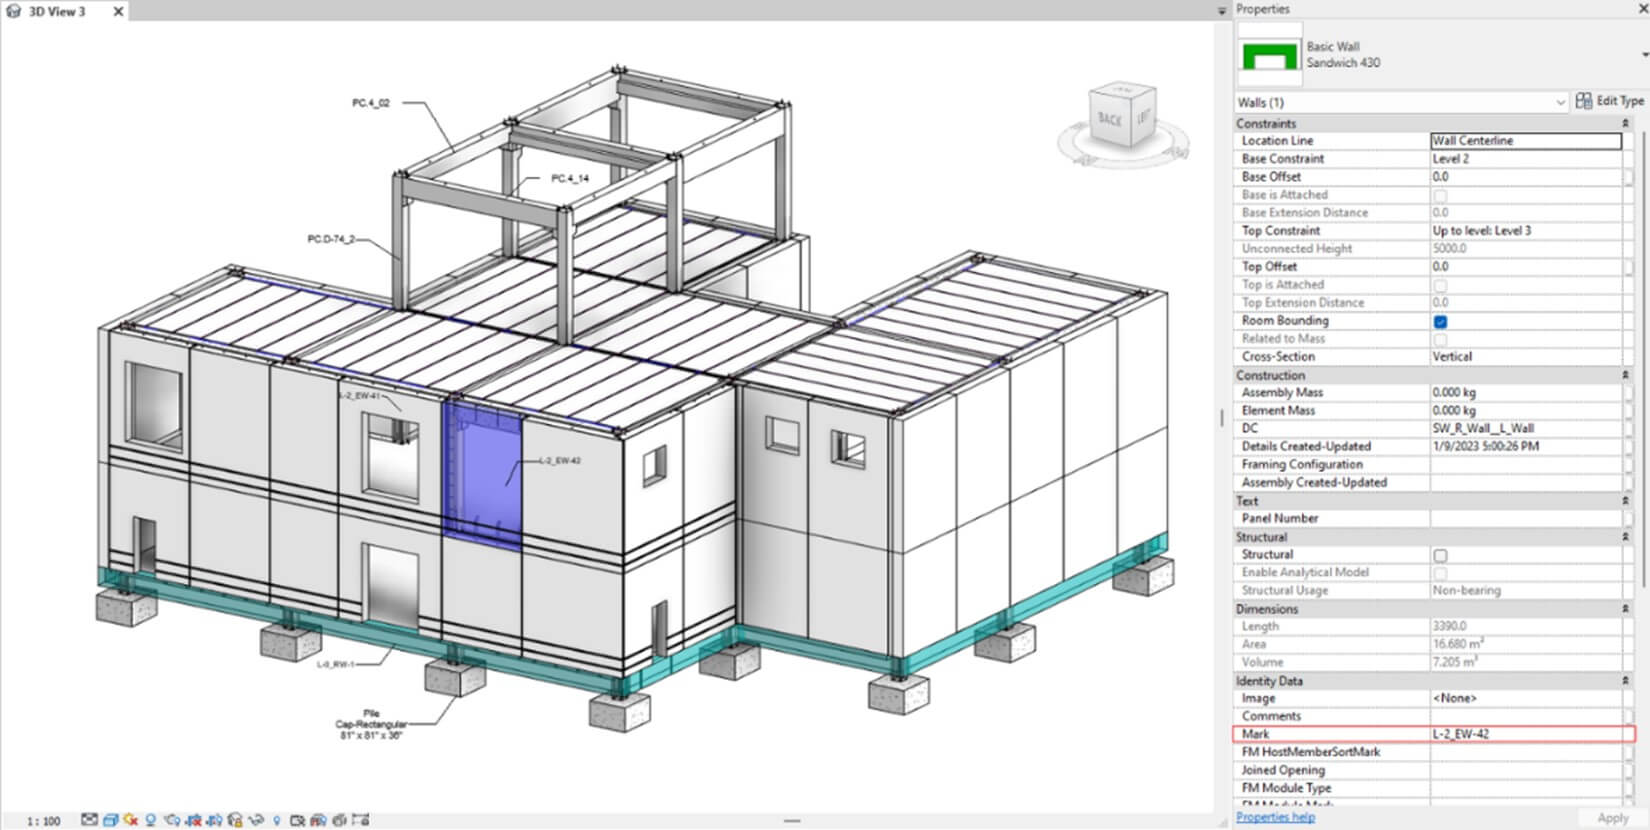
You can select from a list the information that should be reflected in your selected or added parameter. For example, wall panel level, number, function, interior/exterior. For structural framing, number grid location, level, material, etc.
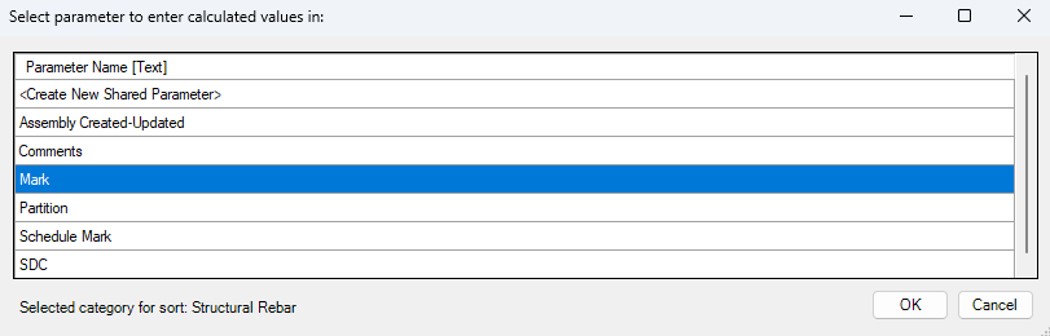
Marking elements is also fast and easy with Smart Documentation. For example, you can:
- Mark elements by type, number them sequentially, and add coordinates.
- Sort and number beams by length, structural function, or apply a unique number.
- Mark assembly parts and generate a schedule with structural elements sorted by type and size.
6. Rebar images
Schedules are useful for displaying essential model information when documenting projects.
Displaying graphical information in schedules as images in Revit can be done with letter values. Take rebar shapes, for example. After you add or create rebar images, you have to include additional fields to display the rebar dimensions.
Smart Documentation’s ‘Create Rebar Images’ function automatically generates all images with number values. There are also options to display metric or imperial units and to adjust the images.

7. QR codes, barcodes
The QR/barcode feature of Smart Documentation auto-generates a code as an image based on your selected parameters for selected categories. There are also options to add suffixes, prefixes, etc. Practically any information can be placed in them.
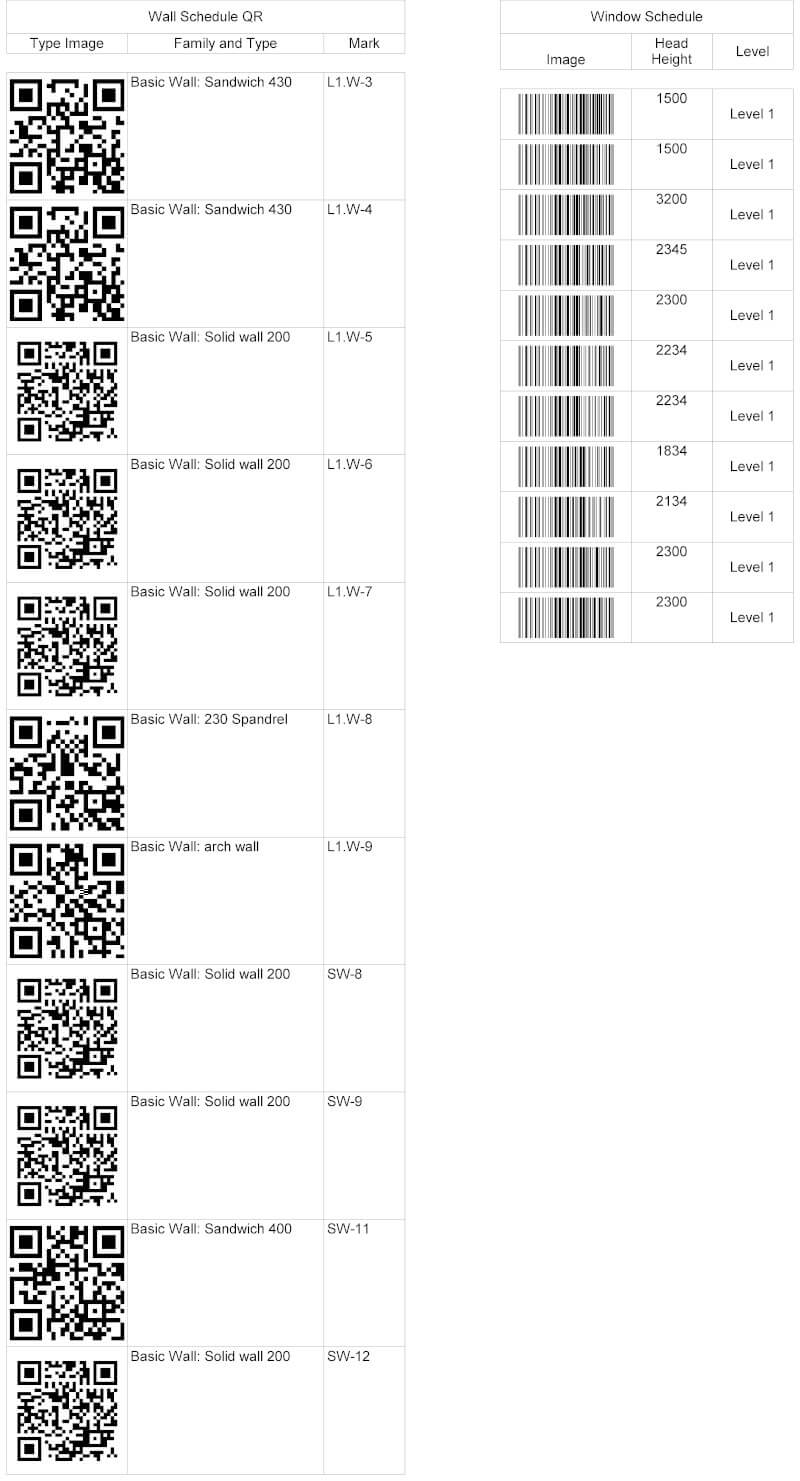
Using scannable codes in drawings opens new avenues for increasing quality assurance and accelerating manufacturing processes by improving communication between teams.
8. Legends
With Smart Documentation at your fingertips, you can forget about having to manually create and update legends. It generates your selected data and element views automatically and maintains consistency by meeting company standards. Worry no more about missing data in your legends!
You can generate vertical or horizontal legend tables with it, split them into different sizes, and work with linked, imported models.
9. Import Excel into Revit
Excel tables can easily be imported – multiple at a time! – and synced with the ‘Import Data from Excel’ function. This simplified data management process ensures efficiency, speeding up the project documentation workflow.
Smart Documentation’s created draft view allows you to browse data faster, improving communication between project actors. And because the data link between Excel and your Revit project is maintained, you get notified if any updates have been made.
10. Manage multiple views on sheets
Functions in the ‘Sheets’ menu let you control and distribute views on sheets. Your generated views are selected from the list and placed automatically according to your predefined configurations.
Easily add or replace large numbers of sheet sets containing different views (sections, elevations, plans, detail views, schedules, legends) at once. And you can further simplify sheet management by using a custom template.
Trusted tools for Revit project documentation
Smart Documentation drastically reduces the time needed to turn 3D models into deliverables by automating Revit’s manual, labor-intensive annotation processes. No more placing dimensions, tagging elements, creating views and legends, and placing them onto sheets by hand. At least, not if you have Smart Documentation in your toolbox.
For more on how Smart Documentation can save time for structural engineers, check out this webinar recording: