

In this beginner tutorial, you’ll learn what the HubSpot plugin is and how it can help you improve your WordPress website. I’ll also show you how to install the plugin, and once we’re done, you’ll learn how to connect HubSpot to WordPress.
Ready? Let’s get started!
What is HubSpot?
HubSpot is an online marketing and managing assistant for your business. It is one of the most popular business growth platforms with five useful online tools for website owners. It helps you attract more users (contacts), boost sales, build better customer relationships, and more. Here are HubSpot’s five essential tools:
- Marketing Hub
- CMS Hub
- Sales Hub
- Operations Hub
- Service Hub
Now, to take the advantage of HubSpot tools for your WordPress website, and in order to grow your WordPress-based business with this amazing platform, you need to download and install the official HubSpot WordPress plugin on your site.


Benefits of HubSpot for WordPress Websites
How can the HubSpot plugin improve your WordPress website? Why should you install the HubSpot plugin on your site?
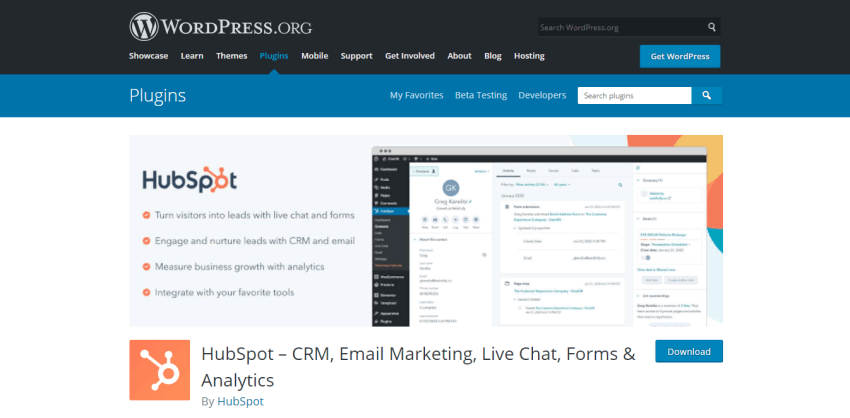
The HubSpot plugin eliminates the need to install many other plugins on a WordPress website. It provides you with many tools and features like a form and popup builder, email newsletter builder, live chat manager, analytics dashboards, cookies and GDPR compliance tools, and more. It is also a marketing and user management plugin at the same time and helps you manage anything that is related to the users.
As the developers of the HubSpot plugin say:
"It helps turn visitors into leads, nurture them into customers, and measure your business growth."
If you need to learn more about the HubSpot platform and the WordPress CMS, please read the articles below:


How to Connect HubSpot to WordPress Websites
Follow the step-by-step process and instructions below to connect your website to a HubSpot account.
1. Download and Install HubSpot on WordPress
To install the HubSpot plugin, navigate to Plugins > Add New in your WordPress admin area and search for the “HubSpot” keyword. When it appears, click Install Now and activate it:


After this, you’ll see the HubSpot item on the admin left-hand menu. This is not the end of the installation process however. Now you need to sign up for a free HubSpot account.
2. Sign up for a HubSpot Account
After activation, the plugin takes you to the sign-up screen. From there, you can sign-up with your email and personal information. You can also use the Sign up with Google button.
Fill in the required fields and click Next.


For the next step, you need to confirm that you’ve used your real email address. So check your inbox, find the HubSpot confirmation email, and click on the Confirm email address button.


3. Update Your HubSpot Account Information
When you confirm your email address, the browser will redirect you to the HubSpot website, where you can continue the registration process.
Choose a strong password and click Next.


Then, write down your company name and domain in the provided fields and click Next again.


Now you need to answer some questions about your business; how many people work in your company, what field you work in, your role, and how familiar you are with the HubSpot platform. Pick the appropriate answers and click Finish sign up.


4. Connect Your HubSpot Account to Your WordPress Website
Finally, click Connect website to confirm the connection between HubSpot (your free Marketing Hub account) and your WordPress website.


Then, you’ll probably be redirected to your WordPress admin panel. There you’ll see a popup message that says “HubSpot is now connected to your website.”


Well done! You have successfully installed the HubSpot plugin and connected your website to your new-created HubSpot account.
Now let’s go one step further and review different parts of this plugin and see how to use it.
How to Use HubSpot with WordPress
As you can see in the previous screenshot, there are 9 submenus under the HubSpot plugin menu. Let’s take a quick look at each one and see how they can be helpful.
What is “User Guide” in the HubSpot WordPress Plugin?
The first submenu under the HubSpot plugin is User Guide. This is like the homepage or dashboard of the plugin. Here you can see some tips and tasks on how to get started with the plugin and some links that guide you to your account on the HubSpot website, the official HubSpot academy, and its marketplace.
How HubSpot Reporting Helps you Manage Your WordPress Website
Reporting is the second submenu for the HubSpot plugin. One feature that sets this platform apart from others is its valuable analytics and marketing benefits.
You can access detailed analytical information about your website’s performance in the Reporting screen, such as email analytics, traffic analytics, contacts analytics, and more. The Reporting screen helps you find out which form, email, or marketing action is doing well and which one needs to be changed.


HubSpot’s tracking system tracks all the activities of your users on different pages and parts of the website. It stores this analytical data in the HubSpot database, so by using the Reporting section you can access it whenever you want, directly from your WordPress admin area.
Contacts in the HubSpot WordPress Plugin
Any website user which completes an action of some kind becomes a “contact” in HubSpot. Whether they’ve registered to receive a newsletter, enquired via the chatbot, or made a purchase through WooCommerce (for example) they can be identified accurately and nurtured as a lead.
On the Contacts screen, you can access a list of all users of your website. Here you can see your contacts in different categories and find them using filters and the search box.


If you click on a row, it will take you to the contact page, where you can see the advanced details and reports about the contact. With These detailed reports, you can find the best way to communicate with the user and cater to their needs!
How to Create Contact Lists with the HubSpot WordPress Plugin
The HubSpot plugin allows you to create segmented lists of your contacts and use them for different marketing actions like sending emails to a limited number of your contacts. To create a new list of your users, go to HubSpot > Lists from the admin side menu, then in the top-right corner, click the Create list button.


Next, you need to choose a name for your list and define what kind of list you plan to create. You can choose to create a contact-based or company-based list and make it static or active.
If you manually change the properties for a contact, it will also affect the contact in an active list. But nothing can delete, add, or change the contacts without your permission in a static list.
When you select the list type, click Next.


On the next page, use the left-hand filters to find and select the contacts you want to include in your list. after selecting the contacts, click Save list to finish the creation process.


That’s it! Now you have a segmented list for sending a marketing email or enrolling contacts in your workflows.
How to Create Forms with the HubSpot WordPress Plugin
Yes! the HubSpot plugin supports forms and comes with a live visual editor for WordPress that allows you to build forms (and emails as well) easily. It also provides helpful reports about how the visitors interact with your form and help you improve it.
To build your first form with HubSpot, navigate to Forms from the side menu and click Create form in the top-right corner.


Then you should choose your form type. You can create different types of HubSpot forms like an embedded form, popup box, standalone page, and more.


Please choose the type you want and click Next.
In the next step, you can select a ready-to-use template for your form or stick with the blank template. After you choose the template, click Start. This will take you to a live and drag-and-drop form builder.


When you finish designing your form, click Submit in the top-right corner. It will create a shortcode so you can copy and embed it on any page of your website.
How to Set Up the HubSpot Live Chat for a WordPress Website
Having a Live Chat service on your website is an excellent way for visitors to communicate with you or support agents. They can ask their questions directly, and It will satisfy customers, making them feel that your company cares about them.
To set up a live chat for your WordPress website, select Live Chat from the admin menu, and choose a color for your chatbox. Then click Next.


Then choose a user as the support agent and write a welcome message for your chatbox. When you finish, click Next again.


With that done, you need to select when your team should appear available, based on your team member status or business hours. You can also set a reply time for your chatbox that tells users how long they should typically wait for an answer. The reply time will display on top of your chatbox when you’re offline, Just like the chatbox in the following screenshot.


Finally, review the chatbox you have created, see how it looks on different devices like phones, desktops, and tablets, and ensure it is what you want. Then, click Publish.


Congratulation! You have successfully created a live chat system for your WordPress website using the HubSpot plugin. Every chat is added to your HubSpot account as a discussion thread and is associated with the customer in question.


To see the messages and answer them, or in order to access your inbox, navigate to the Live Chat again.
If you want to see your inbox on the HubSpot website, navigate to the User Guide section and click the Manage Inbox button under the Live Chat tab. It will take you to your account, where you can access your inbox.


Now let’s see how to work with emails in the HubSpot plugin.
How to Create and Send Marketing Emails with the HubSpot Plugin
Sending email newsletters is one of the best marketing strategies to make your contacts aware of your new products, discounts, news, etc. It allows you to communicate with users in a personalized way and if you use it with smart business strategies, you can bring more customers, sales, or normal users to your website.
In order to send an email to your contacts, you first need to create one. Go to HubSpot > Email and click Create email.


Then, just as we did in the forms section, choose a template and click Next.


Then you’ll see a live and easy-to-use editor that lets you create your email newsletter with drag and drop actions. Working with this editor is as easy as working with famous page builders like Elementor, so you will not have any trouble designing and customizing your email template.
Before sending it, don’t forget to check the Send or schedule and Settings tabs on top of the page. From there, you can customize some options for your email newsletter and change email recipients to a certain list (group) of your contacts.


Finally, click Review and send.
How to Change Settings and Reset the HubSpot WordPress Plugin
Sometimes you may want to reset the plugin, or sign up for a new account, and set it up again.
For any reason, if you have troubles with the HubSpot plugin and are looking for a way to get everything back to normal, navigate to the Settings submenu and click Reset plugin.


If you just want to sign out from your account, don’t use this button. Instead, click on your name in the top-right corner and select Sign out from the drop-down.
HubSpot Free Plugin vs. Premium Version for WordPress
The last submenu under the HubSpot plugin is Upgrade. The HubSpot plugin’s free version almost has everything you need for a small business and a normal WordPress Website. But the premium version can be beneficial if you want to remove the watermarks from the front-end side of the plugin (like the chatbox and emails) and it can be a good choice if you own a growing online business.
According to the official HubSpot website:
“HubSpot’s WordPress plugin is part of Operations Hub, and you can get started with it for free. If you’re looking for more advanced features to help automate and scale your business operations, HubSpot also offers premium features with Starter, Professional, and Enterprise editions of Operations Hub.”
So it’s up to you and your business goals to choose between the free and premium versions. If you decide to buy the premium version, click the Upgrade submenu, select your desired plan, and pay for it!
Grow Your WordPress Website with HubSpot Today
In this tutorial, you have learned what HubSpot is, and how to connect HubSpot to WordPress. Start to improve your website with this amazing free plugin today. Good luck!

 Updated Course: A Beginner’s Guide to Using WordPress


 15+ Best HubSpot Landing Page Templates


 15+ Best HubSpot CMS Hub Themes


 How to Add Google Analytics to WordPress


 10 Best Live Chat Plugins for WordPress in 2024


 Best WordPress Form Builder Plugins for 2024

 Best WordPress Newsletter Plugins of 2019


 Best Free WordPress Templates (for a Quick and Easy Website)


