7 Ways to Enhance Eyes in Photoshop
Here’s an in-depth 28-minute tutorial from the Photoshop Training Channel that will show you how to enhance and create amazing eyes in portrait photos using Photoshop.
Each technique forms a different step to a thorough eye enhancement, but all adjustments should be made on separate layers so that your edits are not destructive.
1. Remove the Red Lines
The first step to better eyes is to remove those unwanted red lines in the whites of the eye. At this point, you can also remove unwanted eyelashes that look unattractive and obtrusive.
2. Selecting the Eyes
To make it easy to apply different adjustments to the eyes, separating them onto their own layer is ideal. With some clever selection work, you can take just the iris of the eye and bring it over to a separate layer.
3. Dodging and Burning the Eyes
Using the dodging and burning tools will allow you to bring more contrast into the iris. Darkening the tops of the iris, underneath the eyelashes, gives much more punch to the shot.
4. Adding Highlights to the Eye
The introduction of a highlight to the lower part of the iris will add that glint typical of magazine covers. After having created a moon shaped selection at the bottom of the iris, a white fill color with blur applied will lay the foundations of the highlight. Using the “Overlay” blend mode, it will suddenly appear much more natural and appealing.
5. Adding Contrast
Temporarily disabling your dodging/burning and highlights adjustment, a Curves adjustment layer applied to the iris layer you created before will allow you to directly apply contrast to the target area.
Normally you would see the color emphasized strongly by an adjustment of the curves, but if you only want to adjust the luminosity of the iris with your Curves tweak then that is possible too. Just select the Luminance blend mode, and you’re good to go.
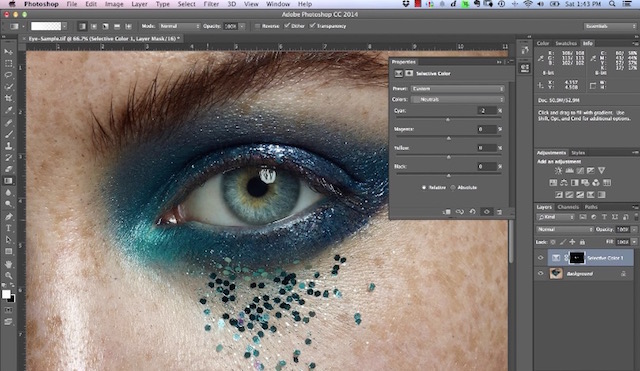
6. Changing the Eye Color
Not happy with your model’s eye color? No problem. You can change this with a simple Hue/Saturation adjustment layer. If you tick the Colorize checkbox in the dialog window, your adjustment will apply to the entire iris layer.
7. Remove Chromatic Aberration
If you’re getting a purple outline around the catchlight in the eye, this can be removed by using the raw adjustments filter. You can then apply lens corrections to just the iris, and remove that purple fringing with the dedicated sliders.