


 This season of brown paper packages tied up in strings—delivered by our postal carrier and the express trucks— generates a lot of one of my favorite materials, cardboard. Cardboard just happens to be pretty close to the color of some of the lower molasses-content gingerbread recipes, and as a material cardboard is deliciously sturdy, cheap, and versatile!
In this project, I show you how to make blank cardboard gingerbread houses for kids to decorate with paper, stickers, holiday candy, perhaps even some of the leftover Halloween candy (that the Switch Witch stole from your kids and hid on top of the refrigerator so you could use it later for just this inedible purpose!)
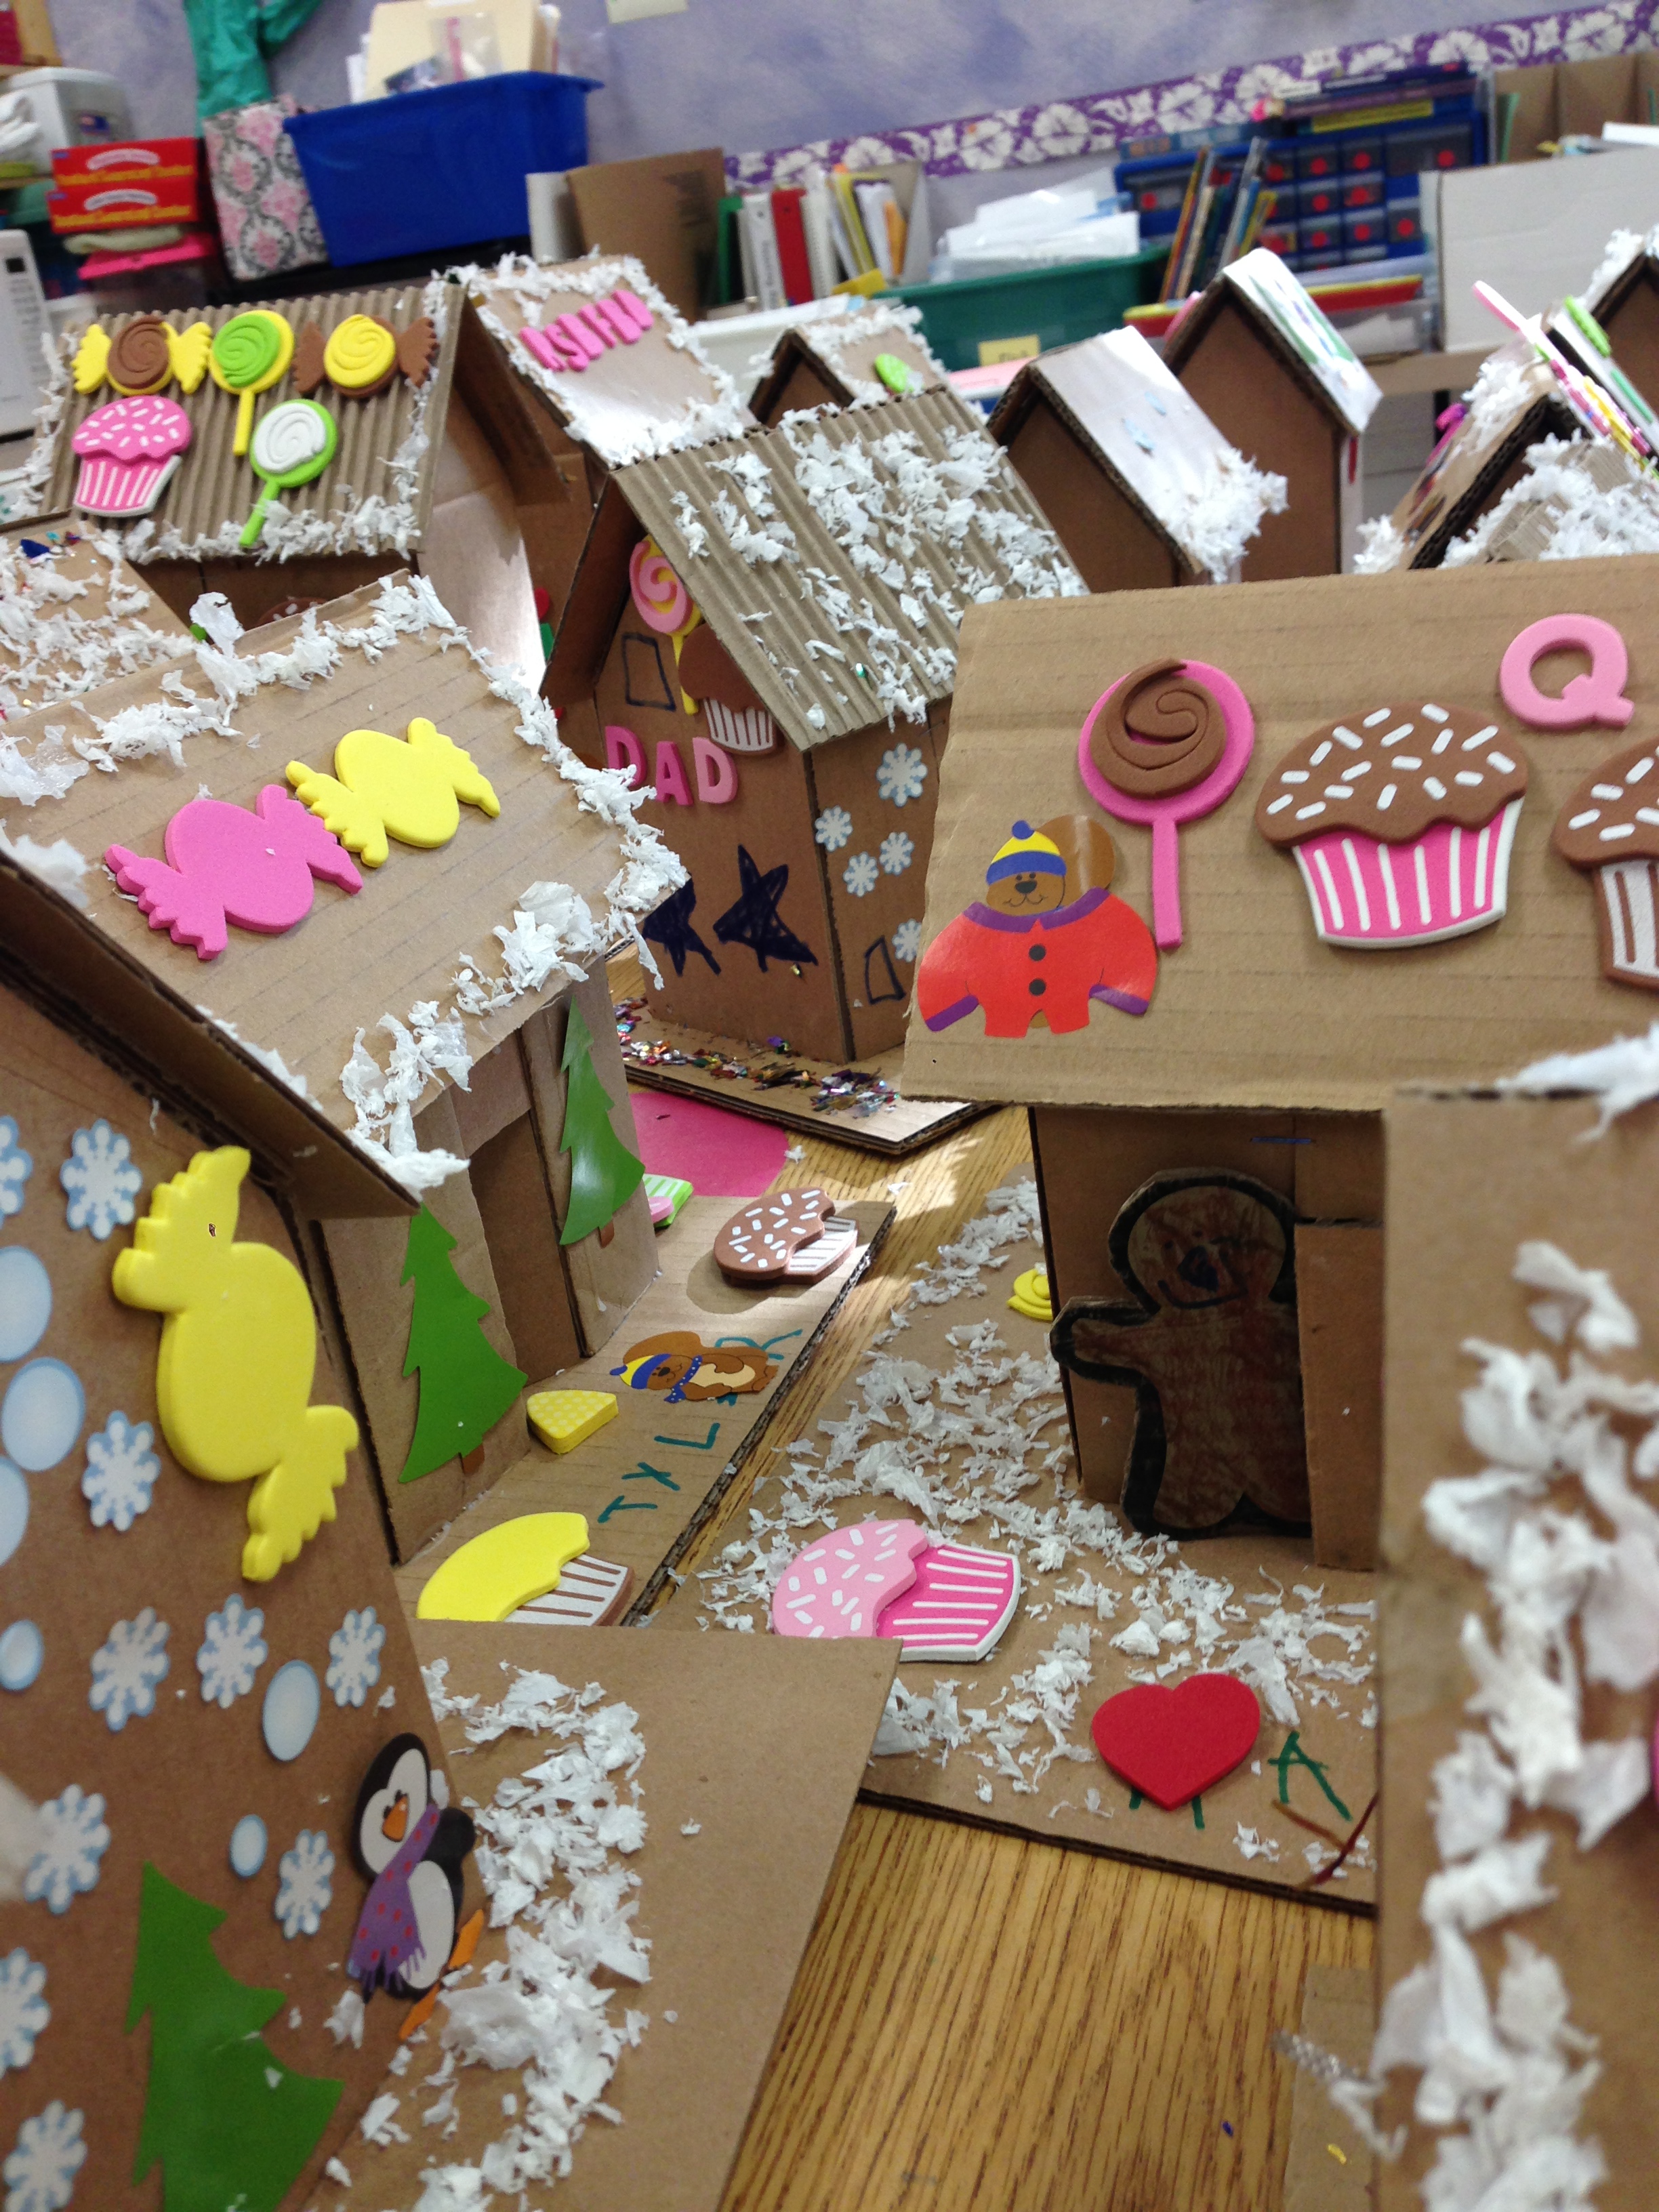
Last winter, I produced two dozen little cardboard “gingerboard” houses for my eldest’s kindergarten class to decorate in the final days before the holiday break. Because I was bringing these to a swarm of 5- and 6-year olds, it was important for us to use boxes that were all about the same size, and small enough that the kids could get the surfaces well covered before losing interest. So I came up with a template I could use to make them all similar but slightly different.
 Making a whole village of blank gingerboard houses was a bit more ambitious an undertaking than I expected, yet not quite as exhausting as baking 24 houses would have been. Later, I felt I’d slighted my younger child’s preschool class by not making dozens of cardboard houses for them, so I made one big one using a large plain cardboard parcel that came to our doorstep. (See left.) The preschoolers decorated this one collaboratively with pompoms and such. I describe the simple way to make a nice sturdy roof for a house-ready box in the final two steps of this project.
 This method is useful beyond just holiday crafting. I used the same construction trick for the roof to build a playhouse for my kids out of my neighbors’ appliance carton. That recycled cardboard structure lasted an astonishing three years under the harsh treatment of two very rambunctious little guys! In that time it lost 3 of 4 windows and its door came off its hinges, but I’d guess it lasted longer than the cardboard playhouse I’ve seen sold commercially. (Our hearty house is pictured right. The round features were traced around the lid of our largest skillet. Having been outgrown by my guys, this 3’x3’x4′ house traveled to a local daycare for one final hurrah.)
If you’d like to make much nicer boxes to wrap gifts, check out this fancier design by Billie and Tootie in Make:Projects. Also, check out the adorable cardboard gingerbread man project.
For the project described below, making small houses from flat cardboard, get the cutting and scoring template here.


