


In this tutorial we'll explore the ins and outs of building a Computer Vision-based game bot in Python, which will be able to to play the popular Flash game Sushi Go Round. You can use the techniques taught in this tutorial to create bots for automatically testing your own web games.
Final Result Preview
Let's take a look at the final result we will be working towards:

Prerequisites
This tutorial, and all the code within it, requires that a few additional Python libraries be installed. They provide a nice Python wrapping to a bunch of low-level C code which greatly eases the process and speed of bot scripting.
Some of the code and libraries are Windows-specific. There may be Mac or Linux equivalents, but we won't be covering them in this tutorial.
You'll need to download and install the following libraries:
- The Python Imaging Library
- Numpy
- PyWin
All of the above have self installers; Running them will automatically install the modules into your \lib\site-packages directory and, in theory, adjust your pythonPath accordingly. However in practice this doesn't always happen. Should you begin receiving any Import Error messages after installation, you'll probably need to manually adjust your Environment Variables. More information on adjusting Path Variables may be found here.
The final tool we'll need is a decent paint program. I suggest Paint.NET as an excellent free option, but any program with rulers that display their measurements in pixels can be used.
We'll use a few games as examples along the way.
By the way, if you want to take a shortcut, you can find plenty of browser-based game templates to work from on Envato Market.


Introduction
This tutorial is written to gave a basic introduction to the process of building bots that play browser-based games. The approach we're going to take is likely slightly different than what most would expect when they think of a bot. Rather than making a program that sits between the client and server injecting code (like a Quake or C/S bot), our bot will sit purely on the 'outside'. We'll rely on Computer Vision-esque techniques and Windows API calls to gather needed information and generate movement.
With this approach we lose a bit of refined detail and control, but make up for it in shortened dev time and ease of use. Automating a specific game function can be done in a few short lines of code, and a full-fledged, start-to-finish bot (for a simple game) can be cranked out in a few hours.
The joys of this fast approach are such that once you get familiar with what the computer can easily 'see', you'll begin to view games slightly differently. A good example is found in puzzle games. A common construct involves exploiting human speed limitations to force you into a less than optimal solution. It's fun (and pretty easy) to 'break' these games by scripting in movements that could never be accomplished by a human.
These bots are also very useful for testing simple games - unlike a human, a bot won't get bored playing the same scenario over and over again.
Source code for all of the tutorial examples, as well as for one of the completed example bots, may be found here.
Have fun!
Step 1: Create a New Python Project
In a new folder, right-click and select New > Text Document.


Once made, rename the file from 'New Text Document' to 'quickGrab.py' (without the quotes) and confirm that you want to change the file name extension.


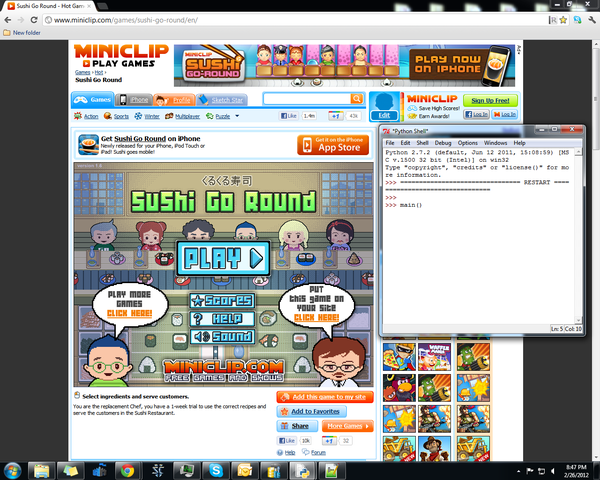
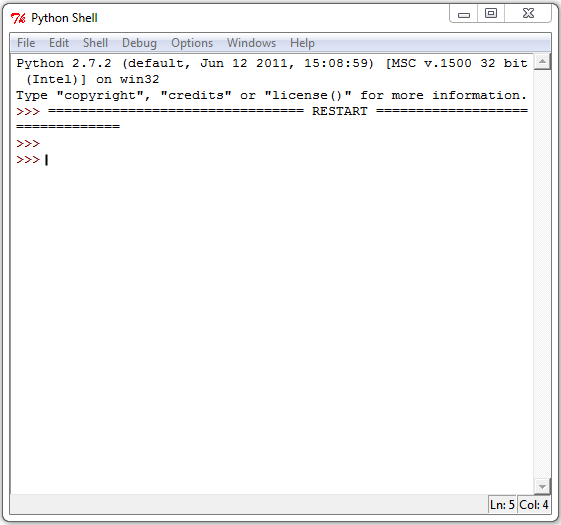
Finally, right-click on our newly created file and select "Edit with IDLE" from the context menu to launch the editor


Step 2: Setting Up Your First Screen Grab
We'll begin work on our bot by exploring the basic screen grab function. Once up and running, we'll step through it line by line, as this function (and its many iterations) will serve as the backbone of our code.
In quickgrab.py enter the following code:
1 |
import ImageGrab |
2 |
import os |
3 |
import time |
4 |
|
5 |
def screenGrab(): |
6 |
box = () |
7 |
im = ImageGrab.grab() |
8 |
im.save(os.getcwd() + '\\full_snap__' + str(int(time.time())) + |
9 |
'.png', 'PNG') |
10 |
|
11 |
def main(): |
12 |
screenGrab() |
13 |
|
14 |
if __name__ == '__main__': |
15 |
main() |
Running this program should give you a full snapshot of the screen area:


The current code grabs the full width and height of your screen area and stores it as a PNG in your current working directory.
Now let's step through the code to see exactly how it works.
The first three lines:
1 |
import ImageGrab |
2 |
import os |
3 |
import time |
...are the aptly named 'import statements'. These tell Python to load in the listed modules at runtime. This gives us access to their methods via the module.attribute syntax.
The first module is part of the Python Image Library we installed earlier. As its name suggests, it gives us the basic screen gabbing functionality our bot will rely on.
The second line imports the OS (Operating System) Module. This gives us the ability to easily navigate around our operating system's directories. It'll come in handy once we begin organizing assets into different folders.
This final import is the built-in Time module. Well use this mostly for stamping the current time onto snapshots, but it can be very useful as a timer for bots that need events triggered over a given number of seconds.
The next four lines make up the heart of our screenGrab() function.
1 |
def screenGrab(): |
2 |
box = () |
3 |
im = ImageGrab.grab() |
4 |
im.save(os.getcwd() + '\\full_snap__' + str(int(time.time())) + |
5 |
'.png', 'PNG') |
The first line def screenGrab() defines the name of our function. The empty parentheses mean it expects no arguments.
Line 2, box=() assigns an empty tuple to a variable named "box". We'll fill this with arguments in the next step.
Line 3, im = ImageGrab.grab() creates a full snapshot of your screen and returns an RGB image to the instance im
Line 4 can be a little tricky if you're unfamiliar with how the Time module works. The first part im.save( calls the "save" method from the Image class. It expects two arguments. The first is the location in which to save the file, and the second is the file format.
Here we set the location by first calling os.getcwd(). This gets the current directory the code is being run from and returns it as a string. We next add a +. This will be used in between each new argument to concatenate all of the strings together.
The next piece '\\full_snap__ give our file a simple descriptive name. (Because the backslash is an escape character in Python, we have to add two of them to avoid cancelling out one of our letters).
Next is the hairy bit: str(int(time.time())) . This takes advantage of Python's built-in Type methods. We'll explain this piece by working from the inside out:
time.time() returns the number of seconds since Epoch, which is given as a type Float. Since we're creating a file name we can't have the decimal in there, so we first convert it to an integer by wrapping it in int(). This gets us close, but Python can't concatenate type Int with type String, so the last step is to wrap everything in the str() function to give us a nice usable timestamp for the file name. From here, all that remains is adding the extension as part of the string: + '.png' and passing the second argument which is again the extension's type: "PNG".
The last part of our code defines the function main(), and tells it to call the screenGrab() function whenever it's run.
And here, at the end, is a Python convention that checks whether the script is top level, and if so allows it to run. Translated, it simply means that that it only executes main() if it is run by itself. Otherwise - if, for instance, it is loaded as a module by a different Python script - it only supplies its methods instead of executing its code.
1 |
def main(): |
2 |
screenGrab() |
3 |
|
4 |
if __name__ == '__main__': |
5 |
main() |
Step 3: The Bounding Box
The ImageGrab.grab() function accepts one argument which defines a bounding box. This is a tuple of coordinates following the pattern of (x,y,x,y) where,
- The first pair of values (
x,y..defines the top left corner of the box - The second pair
..x,y) defines the bottom right.
Combining these allows us to only copy the part of the screen we need.
Let's put this into practice.
For this example, we're going to use a game called Sushi Go Round. (Quite addicting. You've been warned.) Open the game in a new tab and take a snapshot using our existing screenGrab() code:

A snapshot of the full screen area.
Step 4: Getting Coordinates
Now it's time to start mining some coordinates for our bounding box.
Open up your most recent snapshot in an image editor.


The (0,0) position is always located at the top left corner of the image. We want to pad the x and y coordinates so that our new snapshot function sets (0,0) to the leftmost corner of the game's play area.
The reasons for this are two-fold. First, it makes finding in-game coordinates much easier when we only need to adjust values in relation to the play area versus the entire area of your screen resolution. Second, grabbing a smaller portion of the screen reduces the processing overhead required. Full screen grabs produce quite a bit of data, which can make it tough to traverse it multiple times per second.


If not done already, enable the ruler display in your editor and zoom in on the top corner of the play area until you can see the pixels in detail:


Hover your cursor over the first pixel of the play area and check the coordinates displayed on the ruler. These will be the first two values of our Box tuple. On my specific machine these values are 157, 162.
Navigate to the lower edge of the play area to get the bottom pair of coordinates.


This shows coordinates of 796 and 641. Combining these with our previous pair gives a box with the coordinates of (157,162,796,641).
Let's add this to our code.
1 |
import ImageGrab |
2 |
import os |
3 |
import time |
4 |
|
5 |
def screenGrab(): |
6 |
box = (157,346,796,825) |
7 |
im = ImageGrab.grab(box) |
8 |
im.save(os.getcwd() + '\\full_snap__' + str(int(time.time())) + |
9 |
'.png', 'PNG') |
10 |
|
11 |
def main(): |
12 |
screenGrab() |
13 |
|
14 |
if __name__ == '__main__': |
15 |
main() |
In line 6 we've updated the tuple to hold the coordinates of the play area.
Save and run the code. Open up the newly saved image and you should see:


Success! A perfect grab of the play area. We won't always need to do this kind of intensive hunt for coordinates. Once we get into the win32api we'll go over some faster methods for setting coordinates when we don't need pixel perfect accuracy.
Step 5: Planning Ahead for Flexibility
As it stands now, we've hard-coded the coordinates in relation to our current setup, assuming our browser, and our resolution. It's generally a bad idea to hard-code coordinates in this way. If, for instance, we want to run the code on a different computer - or say, a new ad on the website shifts the position of the play area slightly - we would have to manually and painstakingly fix all of our coordinate calls.
So we're going to create two new variables: x_pad and y_pad. These will be used to store the relationship between the game area and the rest of the screen. This will make it very easy to port the code from place to place since every new coordinate will be relative to the two global variables we're going to create, and to adjust for changes in screen area, all that's required is to reset these two variables.
Since we've already done the measurements, setting the pads for our current system is very straightforward. We're going to set the pads to store the location of the first pixel outside of the play area. From the first pair of x,y coordinates in our box tuple, subtract a 1 from each value. So 157 becomes 156, and 346 becomes 345.
Let's add this to our code.
1 |
# Globals
|
2 |
# ------------------
|
3 |
|
4 |
x_pad = 156 |
5 |
y_pad = 345 |
Now that these are set, we'll begin to adjust the box tuple to be in relation to these values.
1 |
def screenGrab(): |
2 |
box = (x_pad+1, y_pad+1, 796, 825) |
3 |
im = ImageGrab.grab() |
4 |
im.save(os.getcwd() + '\\full_snap__' + str(int(time.time())) + |
5 |
'.png', 'PNG') |
For the second pair, we're going to first subtract the values of the pads (156 and 345) from the coordinates (796, 825), and then use those values in the same Pad + Value format.
1 |
def screenGrab(): |
2 |
box = (x_pad+1, y_pad+1, x_pad+640, y_pad+479) |
3 |
im = ImageGrab.grab() |
4 |
im.save(os.getcwd() + '\\full_snap__' + str(int(time.time())) + |
5 |
'.png', 'PNG') |
Here the x coordinate becomes 640 (769-156), and the y becomes 480 (825-345)
It may seem a little redundant at first, but doing this extra step ensures easy maintenance in the future.
Step 6: Creating a Docstring
Before we go any further, we're going to create a docstring at the top of our project. Since most of our code will be based around specific screen coordinates and relationships to coordinates, it's important to know the circumstances under which everything will line up correctly. For instance, things such as current resolution, browser, toolbars enabled (since they change the browser area), and any adjustments needed to center the play area on screen, all affect the relative position of the coordinates. Having all of this documented greatly helps the troubleshooting process when running your code across multiple browsers and computers.
One last thing to be aware of is the ever-changing ad space on popular gaming sites. If all of your grab calls suddenly stop behaving as expected, a new add slightly shifting things on screen is a good bet.
As an example, I usually have the following comments at the top of my Python code:
1 |
"""
|
2 |
|
3 |
All coordinates assume a screen resolution of 1280x1024, and Chrome
|
4 |
maximized with the Bookmarks Toolbar enabled.
|
5 |
Down key has been hit 4 times to center play area in browser.
|
6 |
x_pad = 156
|
7 |
y_pad = 345
|
8 |
Play area = x_pad+1, y_pad+1, 796, 825
|
9 |
"""
|
Dropping all of this information at the beginning of your Python file makes it quick and easy to double check all of your settings and screen alignment without having to pore over your code trying to remember where you stored that one specific x-coordinate.
Step 7: Turning quickGrab.py Into a Useful Tool
We're going to fork our project at this point, creating two files: one to hold all of our bot's code, and the other to act as a general screen shot utility. We're going to be taking a lot of screen shots as we hunt for coordinates, so having a separate module ready to go will make things a lot speedier.
Save and close our current project.
In your folder, right-click on quickGrab.py and select 'copy' from the menu.


Now right-click and select 'paste' from the menu


Select the copied file and rename it to 'code.py'


From now on all new code additions and changes will be made in code.py. quickGrab.py will now function purely as a snapshot tool. We just need to make one final modification:
Change the file extension from .py, to .pyw and confirm the changes.


This extension tells Python to run the script without launching the console. So now, quickGrab.pyw lives up to its name. Double click on the file and it will quietly execute its code in the background and save a snapshot to your working directory.
Keep the game open in the background (be sure to mute it before the looped music drives you to madness); we'll return to it shortly. We have a few more concepts/tools to introduce before we get into controlling things on-screen.
Step 8: Win32api - A Brief Overview
Working with the win32api can be a little daunting initially. It wraps the low-level Windows C code - which is thankfully very well documented here, but a little like a labyrinth to navigate through your first couple of go-arounds.
Before we start scripting any useful actions, we're going to take a close look at some of the API functions upon which we'll be relying. Once we have a clear understanding of each parameter it will be easy to adjust them to serve whatever purposes we need in-game.
The win32api.mouse_event():
1 |
win32api.mouse_event( |
2 |
dwFlags, |
3 |
dx, |
4 |
dy, |
5 |
dwData
|
6 |
)
|
The first parameter dwFlags defines the "action" of the mouse. It controls things such as movement, clicking, scrolling, etc..
The following list shows the most common parameters used while scripting movement.
dwFlags:
win32con.MOUSEEVENTF_LEFTDOWNwin32con.MOUSEEVENTF_LEFTUPwin32con.MOUSEEVENTF_MIDDLEDOWNwin32con.MOUSEEVENTF_MIDDLEUPwin32con.MOUSEEVENTF_RIGHTDOWNwin32con.MOUSEEVENTF_RIGHTUPwin32con.MOUSEEVENTF_WHEEL
Each name is self explanatory. If you wanted to send a virtual right-click, you would pass win32con.MOUSEEVENTF_RIGHTDOWN to the dwFlags parameter.
The next two parameters, dx and dy, describe the mouse's absolute position along the x and y axis. While we could use these parameters for scripting mouse movement, they use a coordinate system different than the one we've been using. So, we'll leave them set to zero and rely on a different part of the API for our mouse moving needs.
The fourth parameter is dwData . This function is used if (and only if) dwFlags contains MOUSEEVENTF_WHEEL. Otherwise is can be omitted or set to zero. dwData specifies the amount of movement on your mouse's scroll wheel.
A quick example to solidify these techniques:
If we imagine a game with a weapon selection system similar to Half-Life 2 - where weapons can be selected by rotating the mouse wheel - we would come up with the following function to sift through the weapons list:
1 |
def browseWeapons(): |
2 |
weaponList = ['crowbar','gravity gun','pistol'...] |
3 |
for i in weaponList: |
4 |
win32api.mouse_event(win32con.MOUSEEVENTF_MOUSEEVENTF_WHEEL,0,0,120) |
Here we want to simulate scrolling the mouse wheel to navigate our theoretical weapon listing, so we passed the ...MOUSEEVENTF_WHEEL 'action' to the dwFlag. We don't need dx or dy, positional data, so we left those set to zero, and we wanted to scroll one click in the forward direction for each 'weapon' in the list, so we passed the integer 120 to dwData (each wheel click equals 120).
As you can see, working with mouse_event is simply a matter of plugging the right arguments into the right spot. Let's now move onto some more usable functions
Step 5: Basic Mouse Clicking
We're going to make three new functions. One general left-click function, and two that handle the specific down and up states.
Open code.py with IDLE and add the following to our list of import statements:
1 |
import win32api, win32con |
As before, this gives us access to module's contents via the module.attribute syntax.
Next we'll make our first mouse click function.
1 |
def leftClick(): |
2 |
win32api.mouse_event(win32con.MOUSEEVENTF_LEFTDOWN,0,0) |
3 |
time.sleep(.1) |
4 |
win32api.mouse_event(win32con.MOUSEEVENTF_LEFTUP,0,0) |
5 |
print "Click." #completely optional. But nice for debugging purposes. |
Recall that all we're doing here is assigning an 'action' to the first argument of mouse_event. We don't need to pass any positional information, so we're leaving the coordinate parameters at (0,0), and we don't need to send any additional info, so dwData is being omitted. The time.sleep(.1) function tells Python to halt execution for the time specified in parentheses. We'll add these through out our code, usually for very short amount of times. Without these, the 'clicking' can get ahead of itself and fire before menus have a chance to update.
So what we've made here is a general left-click. One press, one release. We'll spend most of our time with this one, but we're going to make two more variations.
The next two are the exact same thing, but now each step is split into its own function. These will be used when we need to hold down the mouse for a length of time (for dragging, shooting, etc..).
1 |
def leftDown(): |
2 |
win32api.mouse_event(win32con.MOUSEEVENTF_LEFTDOWN,0,0) |
3 |
time.sleep(.1) |
4 |
print 'left Down' |
5 |
|
6 |
def leftUp(): |
7 |
win32api.mouse_event(win32con.MOUSEEVENTF_LEFTUP,0,0) |
8 |
time.sleep(.1) |
9 |
print 'left release' |
Step 9: Basic Mouse Movement
With clicking out of the way all that's left is moving the mouse around on screen.
Add the following functions to code.py:
1 |
def mousePos(cord): |
2 |
win32api.SetCursorPos((x_pad + cord[0], y_pad + cord[1]) |
3 |
|
4 |
def get_cords(): |
5 |
x,y = win32api.GetCursorPos() |
6 |
x = x - x_pad |
7 |
y = y - y_pad |
8 |
print x,y |
These two functions serve distinctly different purposes. The first will be used for scripting movement in the program. Thanks to excellent naming conventions, the body of the function does exactly as SetCursorPos() implies. Calling this function sets the mouse to the coordinates passed to it as an x,y tuple. Notice that we've added in our x and y pads; it's important to do this anywhere a coordinate is called.
The second is a simple tool that we'll use while running Python interactively. It prints to the console the current position of the mouse as an x,y tuple. This greatly speeds up the process of navigating through menus without having to take a snapshot and break out a ruler. We won't always be able to use it, as some mouse activities will need to be pixel-specific, but when we can, it's a fantastic time saver.
In the next step we'll put some of these new techniques to use and start navigating in-game menus. But before we do, delete the current contents of main() in code.py and replace it with pass. We're going to be working with the interactive prompt for the next step, so we won't be needing the screenGrab() function.
Step 10: Navigating Game Menus
In this, and the next few steps, we're going to attempt to gather as many event coordinates as we can using our get_cords() method. Using it we'll be able to quickly build up the code for things like navigating menus, clearing tables, and making food. Once we have these set, it will just be a matter of hooking them into the bot's logic.
Let's get started. Save and run your code to bring up the Python shell. Since we replaced the body of main() with pass in the last step, you should see a blank shell upon running.

Now, before we even get to the playable part of the game there are four initial menus we need to get through. They are as follows:
- Initial "play" button

- iPhone "continue" button


- Tutorial "Skip" button

- Today's goal "Continue" button


We'll need to get the coordinates for each of these and the add them to a new function called startGame(). Position the IDLE shell so you can see both it and the play area. Type in the get_cords() function but don't press return yet; move your mouse over the button for which you need coordinates. Be sure not to click yet, as we want focus to remain in the shell. Hover your mouse over the menu item and now press the return key. This will grab the current location of the mouse and print to the console a tuple containing the x,y values. Repeat this for the remaining three menus.

Leave the shell open and arrange it so you can see it as well as the IDLE editor. We're now going to now add our startGame() function and fill it with our newly acquired coordinates.
1 |
def startGame(): |
2 |
#location of first menu
|
3 |
mousePos((182, 225)) |
4 |
leftClick() |
5 |
time.sleep(.1) |
6 |
|
7 |
#location of second menu
|
8 |
mousePos((193, 410)) |
9 |
leftClick() |
10 |
time.sleep(.1) |
11 |
|
12 |
#location of third menu
|
13 |
mousePos((435, 470)) |
14 |
leftClick() |
15 |
time.sleep(.1) |
16 |
|
17 |
#location of fourth menu
|
18 |
mousePos((167, 403)) |
19 |
leftClick() |
20 |
time.sleep(.1) |
We now have a nice compact function to call at the start of each game. It sets the cursor position to each of the menu locations we previously defined, and then tells the mouse to click. time.sleep(.1) tells Python to halt execution for 1/10 of a second between each click, which gives the menus enough time to update in between.
Save and run your code and you should see a result similar to this:

As a feeble human it takes me slightly longer than a second to navigate all of the menus by hand, but our bot can now do it in about .4 seconds. Not bad at all!
Step 11: Getting Food Coordinates
Now we're going to repeat the same process for each of these buttons:

Once again, in the Python shell, type in get_cords(), hover you mouse over the food box you need, and press the Enter key to execute the command.
As an option to further speed things along, if you have a second monitor, or are able to arrange the python shell in a way that you can see it as well as the game area, rather than typing in and running get_cords() each time we need it, we can set up a simple for loop. Use a time.sleep() method to halt execution just long enough for you to move the mouse to the next location needing coordinates.
Here's the for loop in action:

We're going to create a new class called Cord and use it to store all of the coordinate values we gather. Being able to call Cord.f_rice offers a huge readability advantage over passing the coordinates directly to mousePos(). As an option, you could also store everything in a dictionary, but I find the class syntax more enjoyable.
1 |
class Cord: |
2 |
|
3 |
f_shrimp = (54,700) |
4 |
f_rice = (119 701) |
5 |
f_nori = (63 745) |
6 |
f_roe = (111 749) |
7 |
f_salmon = (54 815) |
8 |
f_unagi = (111 812) |
We're going to store a lot of our coordinates in this class, and there will be some overlap, so adding the 'f_' prefix lets us know that we referring to the food locations, rather than, say, a location in the phone menu.
We'll return to these in a bit. There is a bit more coordinate hunting to do!
Step 12: Getting Empty Plate Coordinates
Each time a customer finishes eating, they leave behind a plate that needs to be clicked on to be removed. So we need to get the location of the empty plates as well.


I've noted their position with a giant red 'X'. Repeat the same pattern as in the last two steps to get their coordinates. Store them in the comment string for now.
1 |
"""
|
2 |
|
3 |
Plate cords:
|
4 |
|
5 |
108, 573
|
6 |
212, 574
|
7 |
311, 573
|
8 |
412, 574
|
9 |
516, 575
|
10 |
618, 573
|
11 |
"""
|
We're getting close. Only a few more steps of preliminary setup before we get into the really fun stuff.
Step 13: Getting Phone Coordinates
Ok, this will be the final set of coordinates we have to mine in this specific manner.
This one has a lot more to keep track of so you may want to do it by manually calling the get_cords() function rather than the previously used for loop method. Either way, we're going to go through all of the phone menus to get the coordinates for each item.
This one is a bit more involved as to reach one of the purchase screens we need, you need to have enough money to actually purchase something. So you'll need to make a few pieces of sushi before you go about the business of coordinate hunting. At the most, you'll have to make two sushi rolls, I believe. That will get you enough to buy some rice, which will get us to the screen we need.
There are six menus we have to get through:
- The Phone

- Initial Menu

- Toppings

- Rice

- Shipping

We need to get coordinates for everything but Sake (although you can if you want. I found the bot worked fine without it. I was willing to sacrifice the occasional bad in-game review for not having to code in the logic.)
Getting the coordinates:

We're going to add all of these to our Cord class. We'll use the prefix 't_' to denote that food types are phone>toppings menu items.
1 |
class Cord: |
2 |
|
3 |
f_shrimp = (54,700) |
4 |
f_rice = (119 701) |
5 |
f_nori = (63 745) |
6 |
f_roe = (111 749) |
7 |
f_salmon = (54 815) |
8 |
f_unagi = (111 812) |
9 |
|
10 |
#-----------------------------------
|
11 |
|
12 |
phone = (601, 730) |
13 |
|
14 |
menu_toppings = (567, 638) |
15 |
|
16 |
t_shrimp = (509, 581) |
17 |
t_nori = (507, 645) |
18 |
t_roe = (592, 644) |
19 |
t_salmon = (510, 699) |
20 |
t_unagi = (597, 585) |
21 |
t_exit = (614, 702) |
22 |
|
23 |
menu_rice = (551, 662) |
24 |
buy_rice = 564, 647 |
25 |
|
26 |
delivery_norm = (510, 664) |
Alright! We've finally mined all the coordinate values we need. So let's start making something useful!
Step 14: Clearing Tables
We're going to take our previously recorded coordinates and use them to fill a function called clear_tables().
1 |
def clear_tables(): |
2 |
mousePos((108, 573)) |
3 |
leftClick() |
4 |
|
5 |
mousePos((212, 574)) |
6 |
leftClick() |
7 |
|
8 |
mousePos((311, 573)) |
9 |
leftClick() |
10 |
|
11 |
mousePos((412, 574)) |
12 |
leftClick() |
13 |
|
14 |
mousePos((516, 575)) |
15 |
leftClick() |
16 |
|
17 |
mousePos((618, 573)) |
18 |
leftClick() |
19 |
time.sleep(1) |
As you can see, this looks more or less exactly like our earlier startGame() function. A few small differences:
We have no time.sleep() functions in between the different click events. We don't have to wait for any menus to update, so we don't have to throttle our click speeds.
We do, however, have one long time.sleep() at the very end. While not strictly required, it is nice to add these occasional pauses in execution to our code, something just long enough to give us time to manually break out of the bot's main loop if necessary (which we'll get to). Otherwise, the thing will continue to steal your mouse position over and over, and you won't be able to shift focus to the shell long enough to stop the script - which can funny the first two or three times as you struggle against a mouse, but it quickly loses its charm.
So be sure to add in some reliable pauses in your own bots!

Step 15: Making Sushi
The first thing we need to do is learn how to make the sushi. Click the recipe book to open the instruction manual. All sushi types encountered throughout the game will be found within its pages. I'll note the first three below, but I leave it to you to catalog the rest.


1 |
'''
|
2 |
Recipes:
|
3 |
|
4 |
onigiri
|
5 |
2 rice, 1 nori
|
6 |
|
7 |
caliroll:
|
8 |
1 rice, 1 nori, 1 roe
|
9 |
|
10 |
gunkan:
|
11 |
1 rice, 1 nori, 2 roe
|
12 |
'''
|
Now we're going to set up a function that will accept an argument for "sushi type" and then assemble the proper ingredients based on the passed value.
1 |
def makeFood(food): |
2 |
if food == 'caliroll': |
3 |
print 'Making a caliroll' |
4 |
mousePos(Cord.f_rice) |
5 |
leftClick() |
6 |
time.sleep(.05) |
7 |
mousePos(Cord.f_nori) |
8 |
leftClick() |
9 |
time.sleep(.05) |
10 |
mousePos(Cord.f_roe) |
11 |
leftClick() |
12 |
time.sleep(.1) |
13 |
foldMat() |
14 |
time.sleep(1.5) |
15 |
|
16 |
elif food == 'onigiri': |
17 |
print 'Making a onigiri' |
18 |
mousePos(Cord.f_rice) |
19 |
leftClick() |
20 |
time.sleep(.05) |
21 |
mousePos(Cord.f_rice) |
22 |
leftClick() |
23 |
time.sleep(.05) |
24 |
mousePos(Cord.f_nori) |
25 |
leftClick() |
26 |
time.sleep(.1) |
27 |
foldMat() |
28 |
time.sleep(.05) |
29 |
|
30 |
time.sleep(1.5) |
31 |
|
32 |
elif food == 'gunkan': |
33 |
mousePos(Cord.f_rice) |
34 |
leftClick() |
35 |
time.sleep(.05) |
36 |
mousePos(Cord.f_nori) |
37 |
leftClick() |
38 |
time.sleep(.05) |
39 |
mousePos(Cord.f_roe) |
40 |
leftClick() |
41 |
time.sleep(.05) |
42 |
mousePos(Cord.f_roe) |
43 |
leftClick() |
44 |
time.sleep(.1) |
45 |
foldMat() |
46 |
time.sleep(1.5) |
This functions just as all the others but with one small change: rather than passing the coordinates directly, we're calling them as attributes from our Cord class.
The function foldMat() is called at the end of each sushi making process. This clicks the mat to roll the sushi we just assembled. Let's define that function now:
1 |
def foldMat(): |
2 |
mousePos((Cord.f_rice[0]+40,Cord.f_rice[1])) |
3 |
leftClick() |
4 |
time.sleep(.1) |
Let's briefly walk though this mousePos() call as it's a bit cobbled together. We access the first value of the f_rice tuple by adding [0] on the end of the attribute. Recall that this is our x value. To click on the mat we only need to adjust our x values by a handful of pixels, so we add 40 to the current x coordinate, and the then pass f_rice[1] to the y. This shifts our x position just enough to the right to allow us to trigger the mat.
Notice that after the foldMat() call we have a long time.sleep(). The Mat takes quite a while to roll, and food items can't be clicked while their animations are running, so you just have to wait.

Step 16: Navigating the Phone Menu
In this step we'll set all of the mousePos() to point to the appropriate menu items, but we'll leave it there for now. This is part of the program that will be wrapped in and controlled by the bot's logic. We'll revisit this function after getting a few new techniques under our belt.
1 |
def buyFood(food): |
2 |
|
3 |
mousePos(Cord.phone) |
4 |
|
5 |
mousePos(Cord.menu_toppings) |
6 |
|
7 |
|
8 |
mousePos(Cord.t_shrimp) |
9 |
mousePos(Cord.t_nori) |
10 |
mousePos(Cord.t_roe) |
11 |
mousePos(Cord.t_salmon) |
12 |
mousePos(Cord.t_unagi) |
13 |
mousePos(Cord.t_exit) |
14 |
|
15 |
mousePos(Cord.menu_rice) |
16 |
mousePos(Cord.buy_rice) |
17 |
|
18 |
mousePos(Cord.delivery_norm) |
That's it for this step. We'll do more with this later.
Brief Intro: Making the Computer See
We're now getting to the very interesting bits. We're going to start looking at how to make the computer 'see' on-screen events. This is a very exciting part of the process, and one that's easy to get wrapped up thinking about.
Another neat part of bot building is that eventually the bot can provide us, the programmers, with enough information that further vision work is not required. For instance, in the case of the Sushi bot, once we get the first level running, the bot is spitting out accurate enough data about what's happening on screen that all we have to do from that point on is take that data it's "seeing" and simply tell it how to react to it.
Another large part of bot building is learning the game, knowing what values you need to keep track of versus which you can ignore. For instance, we'll make no effort to track cash on hand. It's just something that ended up being irrelevant to the bot. All it needs to know is if it has enough food to continue working. So rather than keeping tabs on the total money, it simply checks to see if it can afford something, regardless of price, because as it works out in the game, it's only a matter of a few seconds before you can afford to replenish something. So if it can't afford it now, it just tries again in a few seconds.
Which brings me to my final point. That of the brute force method versus the elegant one. Vision algorithms take valuable processing time. Checking multiple points in many different regions of the play area can quickly eat away your bot performance, so it comes down to a question of "does the bot need to know whether _______ has happened or not?".
As an example, a customer in the Sushi game could be thought of as having four states: not present, waiting, eating, and finished eating. When finished, they leave a flashing empty plate behind. I could expend the processing power on checking all plate locations by snapping all six plate locations and then checking against an expected value (which is prone to failure since the plates flash on and off, making a false negative a big possibility), or... I could just brute force my way through by clicking each plate location every few seconds. In practice this is every bit as effective as the 'elegant' solution of letting the bot determine the state of the customer. Clicking six locations takes a fraction of a second where as grabbing and processing six different images is comparatively slow. We can use the time we saved on other more important image processing tasks.
Step 17: Importing Numpy and ImageOps
Add the following to your list of import statements.
1 |
import ImageOps |
2 |
from numpy import * |
ImageOps is another PIL module. It is used to perform operations (such as grayscaling) on an Image.
I'll briefly explain the second for those who aren't familiar with Python. Our standard import statements loads the module's namespace (a collection of variable names and functions). So, to access items in a module's scope, we have to employ the module.attribute sytax. However, by using a from ___ import statement we inherit the names into our local scope. Meaning, the module.attribute syntax is no longer needed. They are not top level, so we use them as we would any other Python built-in function, like str() or list(). By importing Numpy in this manner, it allows us to simply call array(), instead of numpy.array().
The wildcard * means import everything from the module.
Step 18: Making the Computer See
The first method we'll explore is that of checking a specific RGB value of a pixel against an expected value. This method is good for static things such as menus. Since it deals with specific pixels, it's usually a little too fragile for moving objects. however, its varies from case to case. Sometimes it's the perfect technique, other time you'll have to sort out a different method.
Open Sushi Go Round in your browser and start a new game. Ignore your customers and open the phone menu. You start off with no money in the bank, so everything should be greyed out as below. These will be the RGB values we'll check.


In code.py, scroll to your screenGrab() function. We're going to make the following changes:
1 |
def screenGrab(): |
2 |
b1 = (x_pad + 1,y_pad+1,x_pad+640,y_pad+480) |
3 |
im = ImageGrab.grab() |
4 |
|
5 |
##im.save(os.getcwd() + '\\Snap__' + str(int(time.time())) +'.png', 'PNG')
|
6 |
return im |
We've made two small changes. In line 5 we commented out our save statement. In line 6 we now return the Image object for use outside of the function.
Save and run the code. We're going to do some more interactive work.
With the Toppings menu open and all items greyed out, run the following code:
1 |
>>>im = screenGrab() |
2 |
>>>
|
This assigns the snap shot we take in screenGrab() to the instance im. For here, we can call the getpixel(xy) method to grab specific pixel data.
Now we need to get RGB values for each of the greyed out items. These will make up our 'expected value' that the bot will test against when it makes its own getpixel() calls.
We already have the coordinates we need from the previous steps, so all we have to do is pass them as arguments to getpixel() and note the output.

Output from our interactive session:
1 |
>>> im = screenGrab() |
2 |
>>> im.getpixel(Cord.t_nori) |
3 |
(33, 30, 11) |
4 |
>>> im.getpixel(Cord.t_roe) |
5 |
(127, 61, 0) |
6 |
>>> im.getpixel(Cord.t_salmon) |
7 |
(127, 71, 47) |
8 |
>>> im.getpixel(Cord.t_shrimp) |
9 |
(127, 102, 90) |
10 |
>>> im.getpixel(Cord.t_unagi) |
11 |
(94, 49, 8) |
12 |
>>> im.getpixel(Cord.buy_rice) |
13 |
(127, 127, 127) |
14 |
>>>
|
We need to add these values to our buyFood() function in way that allows it to know whether or not something is available.
1 |
def buyFood(food): |
2 |
|
3 |
if food == 'rice': |
4 |
mousePos(Cord.phone) |
5 |
time.sleep(.1) |
6 |
leftClick() |
7 |
mousePos(Cord.menu_rice) |
8 |
time.sleep(.05) |
9 |
leftClick() |
10 |
s = screenGrab() |
11 |
if s.getpixel(Cord.buy_rice) != (127, 127, 127): |
12 |
print 'rice is available' |
13 |
mousePos(Cord.buy_rice) |
14 |
time.sleep(.1) |
15 |
leftClick() |
16 |
mousePos(Cord.delivery_norm) |
17 |
time.sleep(.1) |
18 |
leftClick() |
19 |
time.sleep(2.5) |
20 |
else: |
21 |
print 'rice is NOT available' |
22 |
mousePos(Cord.t_exit) |
23 |
leftClick() |
24 |
time.sleep(1) |
25 |
buyFood(food) |
26 |
|
27 |
|
28 |
|
29 |
if food == 'nori': |
30 |
mousePos(Cord.phone) |
31 |
time.sleep(.1) |
32 |
leftClick() |
33 |
mousePos(Cord.menu_toppings) |
34 |
time.sleep(.05) |
35 |
leftClick() |
36 |
s = screenGrab() |
37 |
print 'test' |
38 |
time.sleep(.1) |
39 |
if s.getpixel(Cord.t_nori) != (33, 30, 11): |
40 |
print 'nori is available' |
41 |
mousePos(Cord.t_nori) |
42 |
time.sleep(.1) |
43 |
leftClick() |
44 |
mousePos(Cord.delivery_norm) |
45 |
time.sleep(.1) |
46 |
leftClick() |
47 |
time.sleep(2.5) |
48 |
else: |
49 |
print 'nori is NOT available' |
50 |
mousePos(Cord.t_exit) |
51 |
leftClick() |
52 |
time.sleep(1) |
53 |
buyFood(food) |
54 |
|
55 |
if food == 'roe': |
56 |
mousePos(Cord.phone) |
57 |
time.sleep(.1) |
58 |
leftClick() |
59 |
mousePos(Cord.menu_toppings) |
60 |
time.sleep(.05) |
61 |
leftClick() |
62 |
s = screenGrab() |
63 |
|
64 |
time.sleep(.1) |
65 |
if s.getpixel(Cord.t_roe) != (127, 61, 0): |
66 |
print 'roe is available' |
67 |
mousePos(Cord.t_roe) |
68 |
time.sleep(.1) |
69 |
leftClick() |
70 |
mousePos(Cord.delivery_norm) |
71 |
time.sleep(.1) |
72 |
leftClick() |
73 |
time.sleep(2.5) |
74 |
else: |
75 |
print 'roe is NOT available' |
76 |
mousePos(Cord.t_exit) |
77 |
leftClick() |
78 |
time.sleep(1) |
79 |
buyFood(food) |
Here we pass a ingredient name to the buyFood() function. A series of if/elif statements is used to catch the passed parameter and respond accordingly. Each fork follows the exact same logic, so we'll just explore the first one.
1 |
|
2 |
if food == 'rice': |
3 |
mousePos(Cord.phone) |
4 |
time.sleep(.1) |
5 |
leftClick() |
6 |
mousePos(Cord.menu_rice) |
7 |
time.sleep(.05) |
8 |
leftClick() |
9 |
s = screenGrab() |
10 |
time.sleep(.1) |
The first thing we do after the if fork is click on the phone and open up the proper menu item - in this case the Rice menu.
1 |
|
2 |
s = screenGrab() |
3 |
if s.getpixel(Cord.buy_rice) != (127, 127, 127): |
Next we take a quick snapshot of the screen area and call getpixel() to get an RGB value for the pixel at the coordinates of Cord.buy_rice. We then test this against our previously established RGB value for when the item is greyed out. If it evaluates to True, we know that the item is not longer greyed out, and we have enough money to buy it. Consequently, if it evaluated to False, we can't afford it.
1 |
|
2 |
print 'rice is available' |
3 |
mousePos(Cord.buy_rice) |
4 |
time.sleep(.1) |
5 |
leftClick() |
6 |
mousePos(Cord.delivery_norm) |
7 |
time.sleep(.1) |
8 |
leftClick() |
9 |
time.sleep(2.5) |
Providing we can afford the ingredient, we simply navigate through the remaining boxes required to purchase the food.
1 |
|
2 |
else: |
3 |
print 'rice is NOT available' |
4 |
mousePos(Cord.t_exit) |
5 |
leftClick() |
6 |
time.sleep(1) |
7 |
buyFood(food) |
Finally, if we cannot afford the food, we tell Python to close the menu, wait one second, and then try the process again. It is usually only a matter of seconds between being able to afford something versus not being able to afford something. We won't do it in this tutorial, but it is fairly straightforward to add additional logic to this function to let the bot decide whether it needs to continue waiting until it can afford something, or if it's free to do other tasks and return at a later time.
Step 19: Keeping Track of Ingredients
All right, now we're going to slowly, little by little, start replacing areas where we, the external entity, provide input and decision making with logic that can run by itself.
We need to device a way of keeping track of how many ingredients we currently have on hand. We could do this by pinging the screen in certain areas, or by averaging each ingredient box (we'll get to this technique later), but by far, the simplest and fastest method is to just store all of the on hand items in a dictionary.
The amount of each ingredient stays constant throughout each level. You will always begin with 10 of the 'common' items (rice, nori, roe), and 5 of the 'premium' items (shrimp, salmon, unagi).
Let's add this information to a dictionary.
1 |
foodOnHand = {'shrimp':5, |
2 |
'rice':10, |
3 |
'nori':10, |
4 |
'roe':10, |
5 |
'salmon':5, |
6 |
'unagi':5} |
Our dictionary keys hold the name of the ingredient, and we'll be able to get current amount by exploring the values.
Step 20: Adding Tracking to Code
Now that we have our dictionary of values. Let's work it into the code. Every time we make something, we'll subtract the ingredients used. Every time we shop, we'll add them back in.
Let's begin by expanding the makeFood() function
1 |
def makeFood(food): |
2 |
if food == 'caliroll': |
3 |
print 'Making a caliroll' |
4 |
foodOnHand['rice'] -= 1 |
5 |
foodOnHand['nori'] -= 1 |
6 |
foodOnHand['roe'] -= 1 |
7 |
mousePos(Cord.f_rice) |
8 |
leftClick() |
9 |
time.sleep(.05) |
10 |
mousePos(Cord.f_nori) |
11 |
leftClick() |
12 |
time.sleep(.05) |
13 |
mousePos(Cord.f_roe) |
14 |
leftClick() |
15 |
time.sleep(.1) |
16 |
foldMat() |
17 |
time.sleep(1.5) |
18 |
|
19 |
elif food == 'onigiri': |
20 |
print 'Making a onigiri' |
21 |
foodOnHand['rice'] -= 2 |
22 |
foodOnHand['nori'] -= 1 |
23 |
mousePos(Cord.f_rice) |
24 |
leftClick() |
25 |
time.sleep(.05) |
26 |
mousePos(Cord.f_rice) |
27 |
leftClick() |
28 |
time.sleep(.05) |
29 |
mousePos(Cord.f_nori) |
30 |
leftClick() |
31 |
time.sleep(.1) |
32 |
foldMat() |
33 |
time.sleep(.05) |
34 |
|
35 |
time.sleep(1.5) |
36 |
|
37 |
elif food == 'gunkan': |
38 |
print 'Making a gunkan' |
39 |
foodOnHand['rice'] -= 1 |
40 |
foodOnHand['nori'] -= 1 |
41 |
foodOnHand['roe'] -= 2 |
42 |
mousePos(Cord.f_rice) |
43 |
leftClick() |
44 |
time.sleep(.05) |
45 |
mousePos(Cord.f_nori) |
46 |
leftClick() |
47 |
time.sleep(.05) |
48 |
mousePos(Cord.f_roe) |
49 |
leftClick() |
50 |
time.sleep(.05) |
51 |
mousePos(Cord.f_roe) |
52 |
leftClick() |
53 |
time.sleep(.1) |
54 |
foldMat() |
55 |
time.sleep(1.5) |
Now each time we make a piece of Sushi, we reduce the values in our foodOnHand dictionary by the appropriate amount. Next we'll adjust buyFood() to add values.
1 |
def buyFood(food): |
2 |
|
3 |
if food == 'rice': |
4 |
mousePos(Cord.phone) |
5 |
time.sleep(.1) |
6 |
leftClick() |
7 |
mousePos(Cord.menu_rice) |
8 |
time.sleep(.05) |
9 |
leftClick() |
10 |
s = screenGrab() |
11 |
print 'test' |
12 |
time.sleep(.1) |
13 |
if s.getpixel(Cord.buy_rice) != (127, 127, 127): |
14 |
print 'rice is available' |
15 |
mousePos(Cord.buy_rice) |
16 |
time.sleep(.1) |
17 |
leftClick() |
18 |
mousePos(Cord.delivery_norm) |
19 |
foodOnHand['rice'] += 10 |
20 |
time.sleep(.1) |
21 |
leftClick() |
22 |
time.sleep(2.5) |
23 |
else: |
24 |
print 'rice is NOT available' |
25 |
mousePos(Cord.t_exit) |
26 |
leftClick() |
27 |
time.sleep(1) |
28 |
buyFood(food) |
29 |
|
30 |
if food == 'nori': |
31 |
mousePos(Cord.phone) |
32 |
time.sleep(.1) |
33 |
leftClick() |
34 |
mousePos(Cord.menu_toppings) |
35 |
time.sleep(.05) |
36 |
leftClick() |
37 |
s = screenGrab() |
38 |
print 'test' |
39 |
time.sleep(.1) |
40 |
if s.getpixel(Cord.t_nori) != (33, 30, 11): |
41 |
print 'nori is available' |
42 |
mousePos(Cord.t_nori) |
43 |
time.sleep(.1) |
44 |
leftClick() |
45 |
mousePos(Cord.delivery_norm) |
46 |
foodOnHand['nori'] += 10 |
47 |
time.sleep(.1) |
48 |
leftClick() |
49 |
time.sleep(2.5) |
50 |
else: |
51 |
print 'nori is NOT available' |
52 |
mousePos(Cord.t_exit) |
53 |
leftClick() |
54 |
time.sleep(1) |
55 |
buyFood(food) |
56 |
|
57 |
if food == 'roe': |
58 |
mousePos(Cord.phone) |
59 |
time.sleep(.1) |
60 |
leftClick() |
61 |
mousePos(Cord.menu_toppings) |
62 |
time.sleep(.05) |
63 |
leftClick() |
64 |
s = screenGrab() |
65 |
|
66 |
time.sleep(.1) |
67 |
if s.getpixel(Cord.t_roe) != (127, 61, 0): |
68 |
print 'roe is available' |
69 |
mousePos(Cord.t_roe) |
70 |
time.sleep(.1) |
71 |
leftClick() |
72 |
mousePos(Cord.delivery_norm) |
73 |
foodOnHand['roe'] += 10 |
74 |
time.sleep(.1) |
75 |
leftClick() |
76 |
time.sleep(2.5) |
77 |
else: |
78 |
print 'roe is NOT available' |
79 |
mousePos(Cord.t_exit) |
80 |
leftClick() |
81 |
time.sleep(1) |
82 |
buyFood(food) |
Now each time an ingredient is purchased, we add the quantity to the appropriate dictionary value.
Step 21: Checking Food on Hand
Now that we have our makeFood() and buyFood() functions set up to modify the foodOnHand dictionary, we need to create a new function to monitor all the changes and check whether an ingredient has fallen below a certain threshold.
1 |
def checkFood(): |
2 |
for i, j in foodOnHand.items(): |
3 |
if i == 'nori' or i == 'rice' or i == 'roe': |
4 |
if j <= 4: |
5 |
print '%s is low and needs to be replenished' % i |
6 |
buyFood(i) |
Here we set up a for loop to iterate through the key and value pairs of our foodOnHand dictionary. For each value, it checks whether the name equals one of the ingredients we need; if so, it then checks to see if its value is less than or equal to 3; and finally, providing it is less than 3, it calls buyFood() with the ingredient type as the parameter.
Let's test this out a bit.

Everything seems to be working fairly well, so let's move on to some more image recognition tasks.
Step 22: Traversing RGB Values - Setup
To go any further with our bot, we need to gather information about which sushi type is in which customer's bubble. Doing this with the getpixel() method would be very painstaking as you would need to find an area in each thought bubble that has a unique RGB value not shared by any other sushi type/thought bubble. Given the pixel style art, which by its very nature has a limited color palette, you would have to fight tons of color overlap in the sushi types. Furthermore, for each new sushi type introduced through out the game, you would have to manually inspect it to see if it has a unique RGB not found in any of the other sushi types. Once found, it would certainly be at a different coordinate than the others so that means storing ever more coordinate values - 8 sushi types per bubble times 6 seat locations means 48 unique needed coordinates!
So, in summary, we need a better method.
Enter method two: Image summing/averaging. This version works off of a list of RGB values instead of one specific pixel. For each snapshot we take, the image is grayscaled, loaded into an array, and then summed. This sum is treated the same as the RGB value in the getpixel() method. We will use it to test and compare multiple images.
The flexibility of this method is such that once it is set up, in the case of our sushi bot, not more work is required on our part. As new sushi types are introduced their unique RGB values are summed and printed to the screen for our use. There's no need to chase down any more specific coordinates like with getpixel().
That said, there is still a bit of setup required for this technique. We'll need to create a few new bounding boxes so we process just the area of the screen we need rather than the entire play area.
Let get started. Navigate to your screenGrab() function and make a second copy of it. Rename the copy to grab() and make the following changes:
1 |
def screenGrab(): |
2 |
box = (x_pad + 1,y_pad+1,x_pad+640,y_pad+480) |
3 |
im = ImageGrab.grab(box) |
4 |
|
5 |
##im.save(os.getcwd() + '\\Snap__' + str(int(time.time())) + '.png', 'PNG')
|
6 |
return im |
7 |
|
8 |
|
9 |
def grab(): |
10 |
box = (x_pad + 1,y_pad+1,x_pad+640,y_pad+480) |
11 |
im = ImageOps.grayscale(ImageGrab.grab(box)) |
12 |
a = array(im.getcolors()) |
13 |
a = a.sum() |
14 |
print a |
15 |
return a |
Line 2: We're taking a screengrab just as we have before, but now we're converting it to grayscale before we assign it to the instance im. Converting to grayscale makes traversing all of the color values much faster; instead of each pixel having a Red, Green, and Blue value, it only has one value ranging from 0-255.
Line 3: We create an array of the image's color values using the PIL method getcolors() and assign them to the variable a
Line 4: We sum all the values of the array and print them to the screen. These are the numbers we'll use when we compare two images.
Step 23: Setting New Bounding Boxes
Start a new game and wait for all of the customers to fill up. Double click on quickGrab.py to take a snapshot of the play area.


We'll need to set bounding boxes inside of each of those bubbles.
Zoom in till you can see the fine detail of the pixels


For each bubble, we need to make sure the top left of our bounding box starts in the same location. To do so, count up two 'edges' from the inner left of the bubble. We want the white pixel at the second 'edge' to mark our first x,y location.


To get the bottom pair, add 63 to the x position, and 16 to the y. This will give you a box similar to the one below:


Don't worry that we're not getting the entire picture of the Sushi type. Since we're summing all of the values, even a small change in one pixel will change the total and let us know something new is on screen.
We're going to create six new functions, each a specialized version of our general grab() one, and fill their bounding arguments with the coordinates of all the bubbles. Once those are made, we'll make a simple function to call everything at once, just for testing purposes.
1 |
def get_seat_one(): |
2 |
box = (45,427,45+63,427+16) |
3 |
im = ImageOps.grayscale(ImageGrab.grab(box)) |
4 |
a = array(im.getcolors()) |
5 |
a = a.sum() |
6 |
print a |
7 |
im.save(os.getcwd() + '\\seat_one__' + str(int(time.time())) + '.png', 'PNG') |
8 |
return a |
9 |
|
10 |
def get_seat_two(): |
11 |
box = (146,427,146+63,427+16) |
12 |
im = ImageOps.grayscale(ImageGrab.grab(box)) |
13 |
a = array(im.getcolors()) |
14 |
a = a.sum() |
15 |
print a |
16 |
im.save(os.getcwd() + '\\seat_two__' + str(int(time.time())) + '.png', 'PNG') |
17 |
return a |
18 |
|
19 |
def get_seat_three(): |
20 |
box = (247,427,247+63,427+16) |
21 |
im = ImageOps.grayscale(ImageGrab.grab(box)) |
22 |
a = array(im.getcolors()) |
23 |
a = a.sum() |
24 |
print a |
25 |
im.save(os.getcwd() + '\\seat_three__' + str(int(time.time())) + '.png', 'PNG') |
26 |
return a |
27 |
|
28 |
def get_seat_four(): |
29 |
box = (348,427,348+63,427+16) |
30 |
im = ImageOps.grayscale(ImageGrab.grab(box)) |
31 |
a = array(im.getcolors()) |
32 |
a = a.sum() |
33 |
print a |
34 |
im.save(os.getcwd() + '\\seat_four__' + str(int(time.time())) + '.png', 'PNG') |
35 |
return a |
36 |
|
37 |
def get_seat_five(): |
38 |
box = (449,427,449+63,427+16) |
39 |
im = ImageOps.grayscale(ImageGrab.grab(box)) |
40 |
a = array(im.getcolors()) |
41 |
a = a.sum() |
42 |
print a |
43 |
im.save(os.getcwd() + '\\seat_five__' + str(int(time.time())) + '.png', 'PNG') |
44 |
return a |
45 |
|
46 |
def get_seat_six(): |
47 |
box = (550,427,550+63,427+16) |
48 |
im = ImageOps.grayscale(ImageGrab.grab(box)) |
49 |
a = array(im.getcolors()) |
50 |
a = a.sum() |
51 |
print a |
52 |
im.save(os.getcwd() + '\\seat_six__' + str(int(time.time())) + '.png', 'PNG') |
53 |
return a |
54 |
|
55 |
def get_all_seats(): |
56 |
get_seat_one() |
57 |
get_seat_two() |
58 |
get_seat_three() |
59 |
get_seat_four() |
60 |
get_seat_five() |
61 |
get_seat_six() |
Okay! Lots of code, but it's all just specialised versions of previously defined functions. Each defines a bounding box, and passes it to ImageGrab.Grab. From there, we convert to an array of RGB values and print the sum to the screen.
Go ahead and run this a few times while playing the game. Be sure to verify that every sushi type, regardless of which bubble it's in, displays the same sum each time.
Step 24: Create a Sushi Types Dictionary
Once you've verified that each of the sushi types is always displaying the same value, record their sums into a dictionary as follows:
1 |
sushiTypes = {2670:'onigiri', |
2 |
3143:'caliroll', |
3 |
2677:'gunkan',} |
Having the numbers as the key and the strings as the values will make it easy to shuffle things from function to function without loosing track of everything.
Step 25: Create a No Bubble Class
The final step in our bubble gathering is getting the sums for when there are no bubbles present. We'll use these to check when customers have come and gone.
Start a new game and quickly run get_all_seats() before anyone has a chance to show up. The numbers it prints out we'll place into a class called Blank. As before, you could use a dictionary if you prefer.
1 |
class Blank: |
2 |
seat_1 = 8119 |
3 |
seat_2 = 5986 |
4 |
seat_3 = 11598 |
5 |
seat_4 = 10532 |
6 |
seat_5 = 6782 |
7 |
seat_6 = 9041 |
We're almost there now! One final step and we'll have a simple, working bot!
Step 26: Putting It All Together
Time to finally hand off control to our bot. We'll script in the basic logic that will let it respond to customers, make their orders, and replenish its ingredients when the begin to run low.
The basic flow will follow this: Check seats > if customer, make order > check food > if low, buy food > clear tables > repeat.
This is a long one; let's get started.
1 |
def check_bubs(): |
2 |
|
3 |
checkFood() |
4 |
s1 = get_seat_one() |
5 |
if s1 != Blank.seat_1: |
6 |
if sushiTypes.has_key(s1): |
7 |
print 'table 1 is occupied and needs %s' % sushiTypes[s1] |
8 |
makeFood(sushiTypes[s1]) |
9 |
else: |
10 |
print 'sushi not found!\n sushiType = %i' % s1 |
11 |
|
12 |
else: |
13 |
print 'Table 1 unoccupied' |
14 |
|
15 |
clear_tables() |
16 |
checkFood() |
17 |
s2 = get_seat_two() |
18 |
if s2 != Blank.seat_2: |
19 |
if sushiTypes.has_key(s2): |
20 |
print 'table 2 is occupied and needs %s' % sushiTypes[s2] |
21 |
makeFood(sushiTypes[s2]) |
22 |
else: |
23 |
print 'sushi not found!\n sushiType = %i' % s2 |
24 |
|
25 |
else: |
26 |
print 'Table 2 unoccupied' |
27 |
|
28 |
checkFood() |
29 |
s3 = get_seat_three() |
30 |
if s3 != Blank.seat_3: |
31 |
if sushiTypes.has_key(s3): |
32 |
print 'table 3 is occupied and needs %s' % sushiTypes[s3] |
33 |
makeFood(sushiTypes[s3]) |
34 |
else: |
35 |
print 'sushi not found!\n sushiType = %i' % s3 |
36 |
|
37 |
else: |
38 |
print 'Table 3 unoccupied' |
39 |
|
40 |
checkFood() |
41 |
s4 = get_seat_four() |
42 |
if s4 != Blank.seat_4: |
43 |
if sushiTypes.has_key(s4): |
44 |
print 'table 4 is occupied and needs %s' % sushiTypes[s4] |
45 |
makeFood(sushiTypes[s4]) |
46 |
else: |
47 |
print 'sushi not found!\n sushiType = %i' % s4 |
48 |
|
49 |
else: |
50 |
print 'Table 4 unoccupied' |
51 |
|
52 |
clear_tables() |
53 |
checkFood() |
54 |
s5 = get_seat_five() |
55 |
if s5 != Blank.seat_5: |
56 |
if sushiTypes.has_key(s5): |
57 |
print 'table 5 is occupied and needs %s' % sushiTypes[s5] |
58 |
makeFood(sushiTypes[s5]) |
59 |
else: |
60 |
print 'sushi not found!\n sushiType = %i' % s5 |
61 |
|
62 |
else: |
63 |
print 'Table 5 unoccupied' |
64 |
|
65 |
checkFood() |
66 |
s6 = get_seat_six() |
67 |
if s6 != Blank.seat_6: |
68 |
if sushiTypes.has_key(s6): |
69 |
print 'table 1 is occupied and needs %s' % sushiTypes[s6] |
70 |
makeFood(sushiTypes[s6]) |
71 |
else: |
72 |
print 'sushi not found!\n sushiType = %i' % s6 |
73 |
|
74 |
else: |
75 |
print 'Table 6 unoccupied' |
76 |
|
77 |
clear_tables() |
The very first thing we do is check food on hand. from there, we take a snapshot of position one and assign the sum to s1. After that we check to see that s1 does NOT equal Blank.seat_1. If it doesn't, we have a customer. We check our sushiTypes dictionary to see it has a sum the same as our s1. If it does, we then call makeFood() and pass the sushiType as an argument.
Clear_tables() is called every two seats.
Only one final piece remaining: setting up the loop.
Step 27: Main Loop
We're going to set up a very simple while loop to play the game. We didn't make any sort of break mechanism, so to stop execution, click in the shell and hit Ctrl+C to send a keyboard interrupt.
1 |
def main(): |
2 |
startGame() |
3 |
while True: |
4 |
check_bubs() |
And that's it! Refresh the page, load the game, and set your bot loose!

So, it's a bit clunky and in need of refinement, but it stands as a decent skeleton for you to iterate upon.
A more complete version of the bot can be found here. It has several fixes such as keeping track of what's being made, not getting stuck in the phone menus, and other general optimizations.
Conclusion
You now have all of the tools you need to go about building your own simple bots. The techniques we used in this tutorial are quite primitive in the world of Computer Vision, but still, with enough persistence, you can create many cool things with them - even outside the realm of game bots. We, for instance, run several scripts based on these techniques to automate repetitive software tasks around the office. It's pretty satisfying to remove a human task with just a few lines of code.
Thanks for reading, and if you have any issues or comments, be sure to leave a note below. Good luck, have fun.
Learn Python
Learn Python with our complete python tutorial guide, whether you're just getting started or you're a seasoned coder looking to learn new skills.


